Difference between revisions of "Tutorial: Sputnik 1"
(added outdated template) |
|||
| (9 intermediate revisions by 7 users not shown) | |||
| Line 1: | Line 1: | ||
| − | |||
| − | |||
{{Quote | {{Quote | ||
| Line 13: | Line 11: | ||
== Ship design == | == Ship design == | ||
For this mission we will recreate the [[w:Sputnik (rocket)|Soviet R7 rocket]]. The first stage is made up of four engines which surround a second stage engine with the payload on top. | For this mission we will recreate the [[w:Sputnik (rocket)|Soviet R7 rocket]]. The first stage is made up of four engines which surround a second stage engine with the payload on top. | ||
| − | [[File:Sputnik | + | [[File:Sputnik pad.png|200px|thumb|right|Our vessel]] |
* Payload stage | * Payload stage | ||
| − | ** 1x [[Stayputnik | + | ** 1x [[Probodobodyne Stayputnik]] |
| − | ** 1x [[ | + | *** 4x [[Communotron 16]] (Radially mounted) |
| + | ** 1x [[TD-06 Decoupler]] | ||
| + | ** 1x [[Modular Girder Adapter]] | ||
| + | ** 1x [[AE-FF1 Airstream Protective Shell (1.25m)]] | ||
* Second stage | * Second stage | ||
| − | |||
| − | |||
| − | |||
** 1x [[FL-T800 Fuel Tank]] | ** 1x [[FL-T800 Fuel Tank]] | ||
| − | ** 1x [[LV-T30 Liquid Fuel Engine]] | + | *** (Optional) 1x [[Cubic Octagonal Strut]] (Clipped into the fuel tank) |
| + | **** 1x [[CH-J3 Fly-By-Wire Avionics Hub]] | ||
| + | *** 4x [[Vernor Engine]]s (Radially mounted to the bottom of the fuel tank) | ||
| + | ** 1x [[LV-T30 "Reliant" Liquid Fuel Engine]] | ||
* First stage | * First stage | ||
** 4x [[TT-38K Radial Decoupler]] | ** 4x [[TT-38K Radial Decoupler]] | ||
** 4x [[FL-T400 Fuel Tank]] | ** 4x [[FL-T400 Fuel Tank]] | ||
| − | ** 4x [[ | + | ** 4x [[Advanced Nose Cone - Type_B]] |
| − | ** 4x [[LV- | + | ** 4x [[LV-T45 "Swivel" Liquid Fuel Engine]] |
| − | |||
| − | |||
| − | |||
| − | |||
| − | |||
| − | |||
== Mission phases == | == Mission phases == | ||
=== Lift-Off === | === Lift-Off === | ||
| − | [[File:Sputnik | + | [[File:Sputnik launch.png|200px|thumb|The vessel just after ignition]] |
| − | Before you start your flight, switch on RCS and SAS so you have better control over your rocket. | + | Before you start your flight, switch on RCS and SAS so you have better control over your rocket. The CH-J3 Fly-By-Wire Avionics Hub is to enable SAS, since the Stayputnik has no SAS modules built-in. |
This phase is about getting out of the atmosphere as quickly as possible. The thick atmosphere around the ground creates drag which costs you fuel, so we will head straight up to get out of it. | This phase is about getting out of the atmosphere as quickly as possible. The thick atmosphere around the ground creates drag which costs you fuel, so we will head straight up to get out of it. | ||
| − | When you are ready, | + | When you are ready, press Z to set your throttle to maximum, and ignite your first stage by pressing space. Watch the nav-ball and keep your rocket pointed at the center for a perfectly vertical ascent. When the first stage has burnt all its fuel, drop it and ignite the second stage using space. Don't press space too often, or you will drop your payload. |
| + | [[File:Sputnik sep.png|200px|thumb|side booster separation]] | ||
=== Gravity-Turn === | === Gravity-Turn === | ||
| − | When you've reached an altitude of | + | When you've reached an altitude of 12 km (should be soon after igniting the 2nd stage), air resistance becomes much less. Now we start to build up horizontal speed so we get fast enough to get into a stable orbit. Do this by tipping your rocket to the east, and keeping it at the 45% mark. |
=== Getting into a circular orbit === | === Getting into a circular orbit === | ||
[[File:Sputnik-orbit.png|200px|right|A circular orbit]] | [[File:Sputnik-orbit.png|200px|right|A circular orbit]] | ||
| − | [[File:Sputnik | + | [[File:Sputnik insertion.png|200px|Accelerating horizontal to get on orbital speed]] |
| − | + | Once your craft is at 90% east and stable, switch to the map view(orbital view) by pressing the button on your bottom left or by pressing the "m" key. Here you can see your flight path and your apoapsis. Switch on the nav-ball in map view by clicking on the gray arrow at the bottom of the screen. Now you can control your rocket and view it's trajectory path. Monitor your apoapsis, your goal now is to get it to 75-100 km. | |
| − | When you reach your apoapsis, | + | Once your projected apoapsis reaches the range(75-100 km), cut the engine and let your craft drift towards your apoapsis. While you're waiting turn your craft all the way horizontal pointing east. When you reach your apoapsis, burn your remaining fuel to get into a circular orbit. Stay in the map view and your craft's path will make a complete circle around Kerbin. When that happens, make sure the orbit is what you want then cut the engine(if you still have fuel left), the longer you continue to give you engine fuel, the wider the orbit will be. |
| − | |||
=== Dropping the payload === | === Dropping the payload === | ||
| − | [[File:Sputnik | + | [[File:Sputnik orbit.png|200px|thumb|Decoupling Sputnik from the rocket]] |
| + | |||
| + | After you are in orbit, drop your payload using space. Thanks to the powerful separator it will be blasted forward while the engine stage drifts behind. Congratulations, you just made space history. Go into time-warp and watch your satellite orbit Kerbin gracefully. You can then turn on hibernation to prevent the electric charge from draining | ||
| − | + | [[File:Sputnik.png|200px|thumb|Mission complete!]] | |
== What next? == | == What next? == | ||
| Line 69: | Line 66: | ||
When unmanned satellites become boring, it's time to get to the next stage of space exploration: [[Tutorial: Vostok 1|your first manned mission]]. | When unmanned satellites become boring, it's time to get to the next stage of space exploration: [[Tutorial: Vostok 1|your first manned mission]]. | ||
| − | [[Category:Tutorials| | + | [[Category:Tutorials|Sputnik 1]] |
| − | [[Category:Historical Spaceflights]] | + | [[Category:Historical Spaceflights|Sputnik 1]] |
Latest revision as of 22:09, 24 May 2023
| “ | SPACE AGE IS HERE - Man-made moon is circling world — Daily Express |
” |
Welcome to the first entry of learning Kerbal Space Program through a re-enactment of historical key-missions of the spaceflight history of Earth. This tutorial assumes that you have completed the ingame tutorials so you know the basic controls.
Our first complete mission will be a recreation of the launch of Sputnik, the first man-made object to enter Earth's orbit. The successful launch of Sputnik in 1957 by the Soviet Union was a shock to the whole world. While the space programs by different branches of the US military were mostly impressing with explosions on launchpads unplanned vehicular disassemblies, nobody expected the Soviet Union to already be so far ahead in rocket science. The beeping sound of Sputniks transmitter - strong enough to be picked up by amateur radios all around the world - was a wake-up call for the West to finally start taking space exploration seriously. Now we are going to recreate this historic mission.
We will launch a satellite into space and bring it to a stable orbit. Space - for our purpose - starts at an altitude of 100 km where the atmosphere doesn't affect objects anymore and thus allows them to enter an orbit which is stable for an indefinite amount of time.
Contents
Ship design
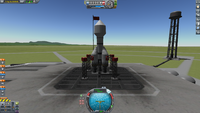
For this mission we will recreate the Soviet R7 rocket. The first stage is made up of four engines which surround a second stage engine with the payload on top.
- Payload stage
- 1x Probodobodyne Stayputnik
- 4x Communotron 16 (Radially mounted)
- 1x TD-06 Decoupler
- 1x Modular Girder Adapter
- 1x AE-FF1 Airstream Protective Shell (1.25m)
- 1x Probodobodyne Stayputnik
- Second stage
- 1x FL-T800 Fuel Tank
- (Optional) 1x Cubic Octagonal Strut (Clipped into the fuel tank)
- 4x Vernor Engines (Radially mounted to the bottom of the fuel tank)
- 1x LV-T30 "Reliant" Liquid Fuel Engine
- 1x FL-T800 Fuel Tank
- First stage
Mission phases
Lift-Off
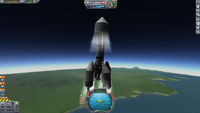
Before you start your flight, switch on RCS and SAS so you have better control over your rocket. The CH-J3 Fly-By-Wire Avionics Hub is to enable SAS, since the Stayputnik has no SAS modules built-in.
This phase is about getting out of the atmosphere as quickly as possible. The thick atmosphere around the ground creates drag which costs you fuel, so we will head straight up to get out of it. When you are ready, press Z to set your throttle to maximum, and ignite your first stage by pressing space. Watch the nav-ball and keep your rocket pointed at the center for a perfectly vertical ascent. When the first stage has burnt all its fuel, drop it and ignite the second stage using space. Don't press space too often, or you will drop your payload.
Gravity-Turn
When you've reached an altitude of 12 km (should be soon after igniting the 2nd stage), air resistance becomes much less. Now we start to build up horizontal speed so we get fast enough to get into a stable orbit. Do this by tipping your rocket to the east, and keeping it at the 45% mark.
Getting into a circular orbit
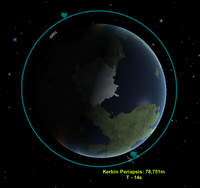
Once your craft is at 90% east and stable, switch to the map view(orbital view) by pressing the button on your bottom left or by pressing the "m" key. Here you can see your flight path and your apoapsis. Switch on the nav-ball in map view by clicking on the gray arrow at the bottom of the screen. Now you can control your rocket and view it's trajectory path. Monitor your apoapsis, your goal now is to get it to 75-100 km.
Once your projected apoapsis reaches the range(75-100 km), cut the engine and let your craft drift towards your apoapsis. While you're waiting turn your craft all the way horizontal pointing east. When you reach your apoapsis, burn your remaining fuel to get into a circular orbit. Stay in the map view and your craft's path will make a complete circle around Kerbin. When that happens, make sure the orbit is what you want then cut the engine(if you still have fuel left), the longer you continue to give you engine fuel, the wider the orbit will be.
Dropping the payload
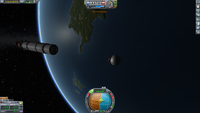
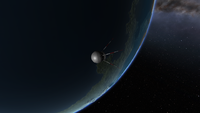
After you are in orbit, drop your payload using space. Thanks to the powerful separator it will be blasted forward while the engine stage drifts behind. Congratulations, you just made space history. Go into time-warp and watch your satellite orbit Kerbin gracefully. You can then turn on hibernation to prevent the electric charge from draining
What next?
Unfortunately the satellite still has a limited lifetime due to energy use. To extend its life further it needs some kind of energy source in the form of photovoltaic panels or a Radioisotope generator. When you have a sustainable energy supply, you can also add some scientific payloads like accelerometer, barometer, thermometer or gravimeter. Note that all of this will increase weight and atmospheric drag, so you will need to add some more tanks to your rocket.
When unmanned satellites become boring, it's time to get to the next stage of space exploration: your first manned mission.
