Difference between revisions of "Tutorial: Sputnik 1/ko"
Ysjbserver (talk | contribs) (→Mission phases) |
Ysjbserver (talk | contribs) (→What next?) |
||
| Line 60: | Line 60: | ||
After you are in orbit, drop your payload using space. Thanks to the powerful separator it will be blasted forward while the engine stage drifts behind. Congratulations, you just made space history. Go into time-warp and watch your satellite orbit Kerbin gracefully. | After you are in orbit, drop your payload using space. Thanks to the powerful separator it will be blasted forward while the engine stage drifts behind. Congratulations, you just made space history. Go into time-warp and watch your satellite orbit Kerbin gracefully. | ||
| − | == | + | == 다음은? == |
[[File:Science-satellite.png|200px|thumb|right|A scientific satellite in orbit]] | [[File:Science-satellite.png|200px|thumb|right|A scientific satellite in orbit]] | ||
Unfortunately the satellite still has a limited lifetime due to energy use. To extend its life further it needs some kind of energy source in the form of photovoltaic panels or a [[PB-NUK Radioisotope Thermoelectric Generator|Radioisotope generator]]. When you have a sustainable energy supply, you can also add some scientific payloads like [[Double-C Seismic Accelerometer|accelerometer]], [[PresMat Barometer|barometer]], [[2HOT Thermometer|thermometer]] or [[GRAVMAX Negative Gravioli Detector|gravimeter]]. Note that all of this will increase weight and atmospheric drag, so you will need to add some more tanks to your rocket. | Unfortunately the satellite still has a limited lifetime due to energy use. To extend its life further it needs some kind of energy source in the form of photovoltaic panels or a [[PB-NUK Radioisotope Thermoelectric Generator|Radioisotope generator]]. When you have a sustainable energy supply, you can also add some scientific payloads like [[Double-C Seismic Accelerometer|accelerometer]], [[PresMat Barometer|barometer]], [[2HOT Thermometer|thermometer]] or [[GRAVMAX Negative Gravioli Detector|gravimeter]]. Note that all of this will increase weight and atmospheric drag, so you will need to add some more tanks to your rocket. | ||
Revision as of 08:29, 23 March 2014
| “ | 우주 시대는 여기에 - 인간이 만든 물체가 지구 궤도에 진입 — 데일리 익스프레스 |
” |
Kerbal Space Program을 학습하는 것과 지구의 우주 개발 역사에 대해서 배우는 곳에 오신 것을 환영합니다. 이 튜토리얼은 조작키 등을 알아야 하기 때문에, 게임 내의 튜토리얼을 완료한 상태를 전제로 하겠습니다.
우리의 첫 번째 할 일은 바로 스푸트니크의 발사에 대해서 알아보는 것입니다. 소련이 1957년에 스푸트니크를 지구 궤도에 올리자, 전 세계는 놀랐습니다. While the space programs by different branches of the US military were mostly impressing with explosions on launchpads unplanned vehicular disassemblies, nobody expected the Soviet Union to already be so far ahead in rocket science. The beeping sound of Sputniks transmitter - strong enough to be picked up by amateur radios all around the world - was a wake-up call for the West to finally start taking space exploration seriously. Now we are going to recreate this historic mission.
We will launch a satellite into space and bring it to a stable orbit. Space - for our purpose - starts at an altitude of 100km where the atmosphere doesn't affect objects anymore and thus allows them to enter an orbit which is stable for an indefinite amount of time.
Ship design
For this mission we will recreate the Soviet R7 rocket. The first stage is made up of four engines which surround a second stage engine with the payload on top.
- Payload stage
- Second stage
- 1x TR-18A Stack Decoupler
- 1x FL-R25 RCS Fuel Tank
- 4x RV-105 RCS Thruster Block (symmetric radial-mounted)
- 1x FL-T800 Fuel Tank
- 1x LV-T30 Liquid Fuel Engine
- First stage
We need to add a battery bank to the payload, because the Stayputnik command module requires energy to stay operational. During the ascent the engines will generate energy, but after orbit insertion it will have to work on its own energy reserves. By itself it can store 5 units of energy which keeps it operational for just over 2 minutes. Afterwards it just becomes debris. The Z-500 adds another 500 units of energy which is enough to keep it operational for several orbits. Using the Z-100 battery packs would be more mass-effective, but unfortunately they aren't as elegant to integrate into a rocket design.
When you want your satellite to look more like the real Sputnik, you could also add four radially-mounted Communotron 16 antennas to the round part of the Stayputnik so that they face backwards in a 45° angle. But keep in mind that they don't do anything but making the mission more difficult by adding additional mass and drag to your rocket.
Note that the aerodynamic nose cones are technically just for show, because the current[outdated] version of KSP doesn't model atmospheric drag correctly. Any part you add to your rocket will make the drag worse, there is no way to reduce drag by adding more parts. Feel free to omit them when you don't care about aesthetics.
항해 계획
이륙
Before you start your flight, switch on RCS and SAS so you have better control over your rocket. Also, switch your nav-ball from surface-mode to orbit-mode by clicking on the dial above it (it should read "Orbit 174.5m/s").
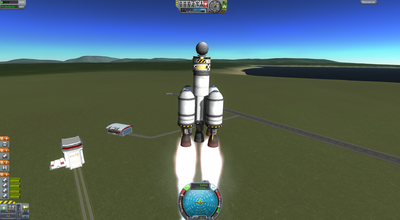
This phase is about getting out of the atmosphere as quickly as possible. The thick atmosphere around the ground creates drag which costs you fuel, so we will head straight up to get out of it. When you are ready, hold shift to set your throttle to maximum, and ignite your first stage by pressing space. Watch the nav-ball and keep your rocket pointed at the center for a perfectly vertical ascent. When the first stage has burnt all its fuel, drop it and ignite the second stage using space. Don't press space too often, or you will drop your payload.
중력-턴
When you've reached an altitude of 10km (should be shortly after igniting the 2nd stage), air resistance becomes much less. Now we start to build up horizontal speed so we get fast enough to get into a stable orbit. Do this by tipping your rocket into the direction of the yellow direction marker on the nav-ball (90° eastwards). While your rocket faces the direction marker, the marker will slowly fall towards the horizon. This is good. Keep your rocket pointed at the direction marker, so it slowly tips towards the horizontal plane.
원궤도에 진입
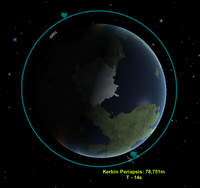
While you perform your gravity turn, switch to the map view so you can see your flight path and your apoapsis. You can switch on the nav-ball in orbital view by pressing the comma-key on the numeric keypad. Do this so you don't get off-course. Your goal now is to get your apoapsis to about 100km. We need some additional height because we aren't out of the atmosphere yet, so we will keep losing some height due to atmospheric drag.
When you reach your apoapsis, perform a prograde boost - orient your rocket horizontally pointing east and burn your remaining fuel to get into a circular orbit. Should you run out of fuel, remember that you likely still have plenty of monopropellant left from the ascent. Press H to use it to accelerate forward. It doesn't do much, but it can be enough to give you the crucial last few m/s to get into a stable orbit.
위성체 분리
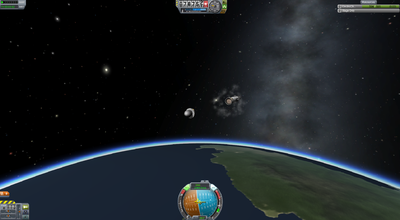
After you are in orbit, drop your payload using space. Thanks to the powerful separator it will be blasted forward while the engine stage drifts behind. Congratulations, you just made space history. Go into time-warp and watch your satellite orbit Kerbin gracefully.
다음은?
Unfortunately the satellite still has a limited lifetime due to energy use. To extend its life further it needs some kind of energy source in the form of photovoltaic panels or a Radioisotope generator. When you have a sustainable energy supply, you can also add some scientific payloads like accelerometer, barometer, thermometer or gravimeter. Note that all of this will increase weight and atmospheric drag, so you will need to add some more tanks to your rocket.
When unmanned satellites become boring, it's time to get to the next stage of space exploration: your first manned mission.


