Difference between revisions of "Tutorial:Mun Landing"
From Kerbal Space Program Wiki
CDR Xavier (talk | contribs) (→Constructing a Mun Rocket) |
CDR Xavier (talk | contribs) (→Constructing a Mun Rocket) |
||
| Line 25: | Line 25: | ||
Note: Depending on your preference, you may split this into two stages or more. More advanced players may want to incorporate detachable fuel tanks to save weight. | Note: Depending on your preference, you may split this into two stages or more. More advanced players may want to incorporate detachable fuel tanks to save weight. | ||
| − | '''Travel light'''. The more you incorporate in the top stage, the more thrusters you'll have to add to the stage below, and so on and so forth. For beginners, start with 1.25m parts, not the 2.5m parts in the first stage. | + | <!--'''Travel light'''. The more you incorporate in the top stage, the more thrusters you'll have to add to the stage below, and so on and so forth. For beginners, start with 1.25m parts, not the 2.5m parts in the first stage.--!> |
*Safety check: Go to delta V section (click on it). drag the altitude bar to say 30 KM. If your delta V here is BELOW 7.5K, you need to get more. 8.5K is recommended for beginners, and 8K is considered quite safe if you had went there for more than once. | *Safety check: Go to delta V section (click on it). drag the altitude bar to say 30 KM. If your delta V here is BELOW 7.5K, you need to get more. 8.5K is recommended for beginners, and 8K is considered quite safe if you had went there for more than once. | ||
Revision as of 02:46, 21 October 2020
This tutorial will show you how to land a Kerbal on The Mun.
Constructing a Mun Rocket
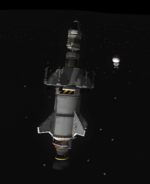
The kind of rocket that can get you to the Mun and back can be very, very heavy. The ideal sequence for a Mun rocket is 3-4 stages (though more or less are certainly possible).
Let's start from the top down:
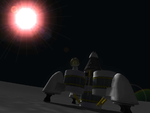
- The Upper Stage (Lander) should be deployed in Munar orbit, and should be capable of traveling to the surface of the Mun, back to orbit, back to Kerbin orbit, and down into Kerbin's atmosphere. Sounds like a lot, but since most of this occurs in a region with a small gravity well and no atmosphere, it doesn't require much. A couple fuel tanks, a parachute, and at least one light thruster should do it (note that landing legs, RCS, and SAS are recommended, but not necessary).
Note: It is possible to split this into two stages, 1 for the descent, and 1 for the return home. This is only recommended for heavier, more advanced landers.
- The Middle Stage (Transfer Burn) should be run from just before/during Kerbin orbit, and should end during/after Munar orbit. Depending on how effective your first stage is, this stage should not require much more fuel than the upper stage.
Note: It is also possible to incorporate this stage with the landing stage, though it is not recommended.
- The Lower Stage (Launch) Should be big enough to haul everything above it into (or at least close to) orbit above Kerbin. While not required, it is recommended that this stage incorporate some detachable Solid Rocket Boosters (SRBs). This is the stage where you want to pack as much stuff as you can to get to orbit, because you aren't taking it with you. If your Middle stage is powerful enough, you may be able to use this stage to get halfway into orbit, and use the Middle stage to complete the orbit, like the Saturn V.
Note: Depending on your preference, you may split this into two stages or more. More advanced players may want to incorporate detachable fuel tanks to save weight.


