Difference between revisions of "Vehicle Assembly Building/ja"
Kspjptrans (talk | contribs) (→変更点) |
Kspjptrans (talk | contribs) |
||
| Line 1: | Line 1: | ||
| + | {{DISPLAYTITLE:Vehicle Assembly Building|VAB|ろけっとくみたてとう【ロケット組立棟】}} | ||
{{:Vehicle Assembly Building/Box}} | {{:Vehicle Assembly Building/Box}} | ||
Revision as of 05:23, 14 April 2015
| Vehicle Assembly Building KSC building | ||||||
レベル 3
| ||||||
| 所在地 | | |||||
| | ||||||
| 高度 | 67 m | |||||
| バージョンから | 0.7.3 | |||||
- Vehicle Editorから転送された場合はSpaceplane Hangarも参照してください。
Vehicle Assembly Building(ロケット組立棟)は一般的に略称VAB(この略称からたまに"Vertical Assembly Building"垂直組立棟と誤解される)で呼ばれている、2つある建造施設のうちの1つで、Kerbal Space Center最大の施設である。Kerbal Space Programゲーム開発史において最古参の要素のひとつともいえる。
利用法
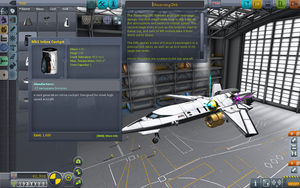
Spaceplane Hangar(SPH)と同様に、VABは宇宙船建造に用いる施設である。使用できるパーツはどちらも同じで施設ごとの制限は無い。この2ヵ所の本質的な違いはSPHでは前後を軸として左右へ鏡像対称にパーツを配置するのに対し、VABでは鉛直線を軸として回転対称にパーツを配置する点であり、ロケットのような対称形は作れるが航空機が持つ表裏がある対称形は作れない。VABでは2・3・4・6・8回対称にパーツを配置することが出来る。またVABで組み立てた機体はLaunch Padから発進する。
"Subassemblies"(サブアセンブリ)は組み立てたパーツ群をまとめて保存する機能で別の機体に同じ構造を流用することが出来る。Subassemblies機能で保存したパーツ群はVABとSPHで共用できるが、前述のパーツ配置の対称性には違いがあるのでパーツ群を修正する場合には注意が必要である。
操作画面
Since バージョン 0.90.0, the editor interface for the Vehicle Assembly Building and the Spaceplane Hangar is the same. The only functional exceptions are the orientation of the axis of symmetry (vertical or horizontal, respectively) and the default symmetry mode (radial or mirrored). The symmetry mode can be toggled by pressing the R button.
The graphical interface provides clickable icons for almost all actions. There are a few key combinations without icons. The ^ Control+Z key combination undoes the last action, and ^ Control+Y redoes it. Also, holding down the Mod, when left-clicking on a part, copies a segment of the craft consisting of the part and all its children, rather than grabbing it to be moved.
- in bottom left corner:
- center-points:
- information icons in bottom right corner:
Mode controls: Along the top of the screen are some of the workshop controls. The leftmost controls are dependent on the current mode the workshop is in.
The mode is controlled by the three blue icons just left-of-center along the top. These are: Parts (the default mode), Action Groups and Crew. These modes are described in detail on their respective pages.
Mode bars: the left 25%-30% of the screen will be occupied by the various controls related to the mode.
- Parts - the tableau of parts appears. There is a column of icon-labelled tabs for choosing the type of the parts. There is a row of buttons for changing the sorting of the visible parts by: Name, Mass, Cost and Size. There is an “Enable Advanced Mode” switch on the top, toggling extra buttons to sort by Module, Resource, Manufacturer, or Tech Level. Using Subassemblies and creating custom categories are also possible in this advanced mode.
- Action Groups - menu for rearranging the basic and custom action groups.
- Crew - menu for choosing kerbonauts for the mission.
Craft Name is in the top center. Clicking on the name allows the user to edit the name before saving the current craft. It also drops down a textarea to write things such as a description of the vehicle, operations guides, or anything else noteworthy. Clicking anywhere else on the screen closes it.
Mission Flag is just to the right of top center. It presents the flag used on decals and, if this is a manned vehicle, on any flag planted by crew on EVAs.
File controls and construction orders are located along the top right of the screen.
- New - Clears currently active vehicle from the VAB.
- Load - Opens a pop up window to load any previously saved vehicle assemblies.
- Save - Saves the currently active vehicle to disk.
- Launch is second in from the top right corner. If not recently saved, overwrites Auto Saved Ship on disk, then switches from the VAB to the Launch pad.
- Exit is the rightmost button. It exits the VAB back to the Space Center.
Few more things are visible and switchable in the bottom left corner.
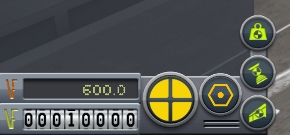
- The cost of the current vehicle is shown on right in the upper row, and the current fund in the lower one. There is financial system only in carrier mode - so the lower row doesn't appears in sandbox and science mode
- The Symmetry Mode is just right from the financial indicators. The number of symmetry level increasable and decreasable by clicking on the indicator (left or right), or using the X and ⇧ Shift+X keys. The switching between bilateral and radial symmetry is possible pressing R key.
- The Angle Snap's icon is the next. It is toggleable by clicking on it or pressing C.
- At the left side of this row there are the icons of the center-points in a column:
There are some popping up menu icons in the bottom right corner too, these from left:
- Craft Stats: The number of parts, the sizes and mass of the current craft shown clicking on the icon illustrated with an "i". If a value is beyond the capability of the building, the row turns to red in career game mode.
- Contracts: These list currently active contracts accepted in Mission Control. This icon appears only in career mode.
- Notifications: These report completed Contracts.
- Staging: On the right edge of the screen, rising from the bottom, is a dynamic and editable list of the current stages of the vehicle under construction. The game will attempt to build the stages as the user adds parts. However, the user may want to change the order that stages are activated, or edit what happens at each stage. The constantly visible RESET rearranges the staging system automatically.
Editor Gizmos: Icons for fine tune of the placing of the parts.
The editor gizmos appears on the top left as the first part is paced in the workshop (they are visible only if some part placed in the workshop) and makes fine tune of the parts situation and orientation possible. They Place, Offset, Rotate and Root. The modes can be activated by clicking on them, or pressing the equivalent (1234) key.
- Place is the default mode, for placing new and already placed parts.
- Offset makes the fine tune of the location of the placed parts possible. Pressing (left)-⇧ Shift makes this tuning work with even finer steps.
- Rotate for rotating - changing the orientation - of the already placed parts. The (left)-⇧ Shift works same way in this case too.
- Root for changing the root part with a single clicking on. The chosen part has to satisfy the conditions of being root part.
外観
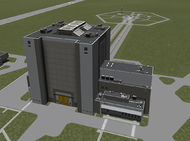
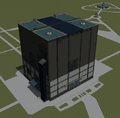
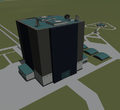
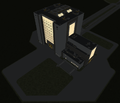
VABは高さ約100 m(ヘリポートを含むと108 m)でKSCの中央に位置している。南側には3段の張り出しがあり、そこだけでもKSC内上位の高さを誇っている。北側にも小さな張り出しがある。屋上にはヘリポートが天窓の間に2基設置されている。[outdated]現在標準パーツにヘリコプターはないが、VTOL機の着陸目標として利用できる。.
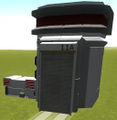
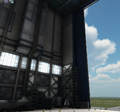
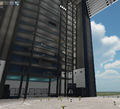
組立棟の東側面には高さ約93 mの8分割の引き上げ扉[1]がある。扉は普段閉まっており、棟内でロケット組立を行っている最中のみ扉が開いている姿(50 mほど上がっている)を見ることが出来る。しかしロケットをLaunch Padに移してしまうと扉は既に閉まっており、動いている様子を見ることは出来ない。残りの北・南・西側面には搬入口と思われる黄色い引き分け扉がある。また棟内から見る屋外はゲーム内時間とは連動しておらず常に昼である。
地上作業員には棟内を歩き回る科学者と工員、東側大扉の前に立つ誘導員それぞれの役割の緑がいる。VAB内外を作業車が走っており、棟内では南北の壁にある足場を貨物リフトで昇り降りしている。作業車はほかの作業車や緑が居るのも気にせずすり抜けて走行している。地上作業員はハンマーやドリル、レンチ等で作業、研究者は調査活動を行っているが実際の組立には何の影響も無い。
VAB区画の北西には初期バージョンで使われていた旧型Mk1 Podの記念碑が設置されている。
ギャラリー
変更点
- レベル別の施設モデルを追加。
- 燃料タンクを追加。
- Subassemblies(パーツ群の保存)機能を追加。
- 外装を変更。
- 輸送トラック、動くリフトの追加と地上作業員増量のため内外装を変更。
- 内装とLaunch Padにあわせて照明を調整。
- 地上作業員を追加。
- KSP初公開。
