|
|
| (6 intermediate revisions by 3 users not shown) |
| Line 1: |
Line 1: |
| − | {| style="float: right;"| [[File:Maneuver node.png|thumb|Maneuver node in orbital view]]| [[File:Maneuver.svg|thumb|107px|Maneuver marker on navball]]|}A maneuver node is a planned velocity change along an orbit. Multiple maneuver nodes can be added which will affect the following maneuver nodes. After adding a node, it shows the velocity change needed to reach the next new orbit. If multiple maneuver nodes have been planned, only the first one will be displayed on the navball - once it has been completed, it should be deleted so that the next one becomes visible.== Adding a Maneuver Node ==[[File:ManeuverNodes.PNG|thumb|Two maneuver nodes with one in edit mode]]Click on the vessel's orbital line and a popup will give the option to add a new maneuver node. Once created, selecting and right-clicking the node gives the option to delete it. If the maneuver node has been passed, selecting it immediately puts it in "delete" mode.Hovering over a node displays the time of arrival and the [[w:Delta-v|Delta-V]] needed to perform the maneuver.== Directions ==Because there are three dimensions of movement in space (or air), there are three basic axes on which to burn, with two directions per axis; thus, all maneuvers can be described as a combination of movement in three separate directions.=== Prograde and retrograde ==={| style="float: right;"| [[File:Prograde.svg|32px|Prograde]]| [[File:Retrograde.svg|32px|Retrograde]]|}These vectors directly change the speed of the craft. Burning prograde will increase velocity, raising the altitude of the orbit on the other side, while burning retrograde will decrease velocity and reduce the orbit altitude. Both of these vectors are directly visible on the [[navball]].This is the most efficient way to change the orbital shape, so whenever possible these vectors should be used.=== Normal and anti-normal ==={| style="float: right;"| [[File:Normal.svg|32px|Normal]]| [[File:Anti-normal.svg|32px|Anti-normal]]|}The normal vectors are orthogonal to the orbital plane. Burning normal or anti-normal will change the orbital inclination. On the navball, the normal and anti-normal vectors are located on the equator line directly between the prograde and retrograde markers.These vectors are generally used to match the orbital inclination of another celestial body or craft, and the optimal time to do this is when the current craft's orbit intersects the orbital plane of the target. To match the orbital inclination, either perform a normal burn at the ascending node or an anti-normal burn at the descending node - when the correct magnitude is reached, the relative inclination at the selected node will reach 0° and the nodes will start to move rapidly toward each other's positions.=== Radial in and radial out ==={| style="float: right;"| [[File:Radial-in.svg|32px|Radial in]]| [[File:Radial-out.svg|32px|Radial out]]|}The radial-in vector points directly toward the orbited body (center of the brown hemisphere on the navball), while the radial-out vector points directly away from it (center of the blue hemisphere). Performing a radial burn will rotate the orbit around the craft. Radial burns are the least efficient way of adjusting one's path - it is much more effective to use prograde and retrograde burns.During ascent from the launch pad, your craft is effectively burning radially outward.== Using ==Upon selecting a maneuver node, six symbols will appear, each corresponding to the vectors above. Each symbol can be clicked and dragged to adjust the amount of velocity change desired on each axis. Pulling a symbol away from the center of the node increases the speed change along the selected axis, and pushing a symbol toward the center of the node is equivalent to pulling the symbol on the opposite side. The further the symbol is pushed or pulled, the more rapidly the adjustment will be made.After adding a maneuver node, three new values will appear next to the [[navball]]:# Velocity change required, in meters per second# Estimated burn time# Time to maneuver node (or time since the node was passed)Because a maneuver node assumes an instantaneous velocity change, a perfect burn is impossible; to get the best results, it is recommended to burn half of the time before the node and the other half directly afterwards.Maneuver nodes can be used to reach a specific orbit without needing to continuously monitor the orbital map. When performing an [[aerobraking]] maneuver, the current maneuver node will automatically update the needed velocity change as the craft's velocity decreases; this can be used to perform manual corrections if the aerobraking turns out to be insufficient or excessive.=== Prograde ===This is the direction of your velocity (velocity=speed+direction) and is symbolized by a yellow circle with three little wings at 90 degree angles from each other, exactly the same as it appears on the navball.Burning in this direction will increase your apoapsis or periapsis, depending on where you are in your orbit. Think of it as increasing what your height above the ground will be on the opposite side of your orbit. This has other applications but this should help you get the gist of it.[[File:ManeuverNodePrograde.PNG|250px|thumbnail|none|Increasing the apoapsis.]]=== Retrograde ===This is the opposite direction of your velocity and is symbolized by a yellow circle with a cross in it as well as three wings at a 120 degree angle from each other, exactly the same as it appears on the navball.Burning in this direction will decrease your apoapsis or periapsis, depending on where you are in your orbit. Think of it as decreasing what your height above the ground will be on the opposite side of your orbit.[[File:ManeuverNodeRetrograde.PNG|250px|thumbnail|none|Decreasing the apoapsis.]]=== Normal ===This direction is both perpendicular (i.e. forming a 90 degree angle) to the orbital plane (the plane formed by one complete orbit along a particular orbital path or line) and perpendicular to the orbited body's radial direction or parallel to the surface (i.e. in the same direction as). It is symbolized by a pink triangle with a dot in the center.This direction has two major uses. Primarily, this maneuver is used to change the orbital plane by rotating it in the counter clock-wise direction (viewed from the side) around the point at which the burn takes place. The secondary use is to rendezvous with an orbiting object (ship, moon or planet); this is done by burning in this direction at the ascending node (i.e. the point at which your orbit intersects with the orbital plane of your target and begins passing beneath it)[[File:ManeuverNodeOrbitNormal.PNG|250px|thumbnail|none|Tilting the orbital plane counter-clockwise.]]=== Anti-normal ===This direction is both perpendicular to the orbital plane and perpendicular to the orbited body's radial direction or parallel to the surface. It is also 180 degrees from Orbit Normal or in the opposite direction. It is symbolized by a pink triangle with little wings on each side.This direction has two major uses. Primarily, this is used to make changes to the orbital plane by rotating in the clock-wise direction around the point at which the burn takes place. The secondary use is to rendezvous with an orbiting object (ship, moon, or planet); this is done by burring in this direction at the descending node (i.e. the point at which your orbit intersects with the orbital plane of your target and begins passing above it).[[File:ManeuverNodeOrbitAntiNormal.PNG|250px|thumbnail|none|Tilting the orbital plane clockwise.]]=== Radial in ===This direction points in the direction of the orbited body, i.e. it is perpendicular to the surface of the orbited body. It is also perpendicular to the direction of travel and Orbit Normal. It is symbolized by a blue circle with what looks like a four leaf clover in it (actually 4 inward wings).This direction is used to rotate the orbit about the point of burn without changing the orbital plane (think spinning a hula hoop with a stick). This direction will rotate the orbit counter-clockwise with a maximum change in angle of less than 90 degrees; beyond this point, the orbit would pass through the center of mass of the orbited body, and the ship would traverse a slow spiral in towards the center of mass of the orbited body.This is primarily used in rendezvous to line up two irregular orbits.[[File:ManeuverNodeRadialIn.PNG|250px|thumbnail|none|Rotating the orbital plane counter-clockwise.]]=== Radial out ===This direction points away from of the orbited body; also, it is perpendicular to the surface of the orbited body. It is also perpendicular to the direction of travel and Orbit Normal. It is symbolized by a blue circle with a dot in the center and four wings at 90 degrees from each other.This direction is used to rotate the orbit about the point of burn without changing the orbital plane. This direction will rotate the orbit clockwise with a maximum change in angle of less than 90 degrees; beyond this point, all horizontal momentum would be cancelled (this not possible in real life, but it is possible in Kerbal Space Program; normally, the ship would traverse a slow spiral away from the center of mass of the orbited body).This is primarily used in rendezvous to line up two irregular orbits.[[File:ManeuverNodeRadialOut.PNG|250px|thumbnail|none|Rotating the orbital plane clockwise.]]== Burning ==[[File:ManeuverNodesNavBall.PNG|200px|thumbnail|right|The nav ball at the bottom shows the blue marker the vessel has to be oriented to perform the desired maneuver during the burn.]]To perform the desired maneuver, you have to initiate a burn at the time indicated. For long burns, you will want to perform approximately one half of your burn done before you actually hit the node (and the remainder afterwards).If you are using SAS, you can line up your navball indicator with the blue burn direction indicator as soon as you are done setting up the maneuver node (see screenshot) - once the maneuver has been defined, the burn direction will not change, regardless of your craft's position.As you complete your burn, the marker may begin to move away from your current heading; this is merely because you were not perfectly lined up. This can generally be ignored, since it is usually a small error rather than a large one.Once the desired velocity change approaches zero, reduce your throttle so as to avoid overshooting; once it reaches zero (or reaches a sufficiently small value), stop burning (press "x"). Once the maneuver is completed, the blue marker becomes meaningless, so you should delete the node. This is especially important if you have set up multiple maneuver nodes, since the next node will not show up until you delete the current one.[[Category:Control]] | + | {| style="float: right;" |
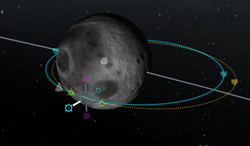
| | + | | [[File:Maneuver node.png|thumb|地图视角中的变轨节点]] |
| | + | | [[File:Maneuver.svg|thumb|107px|导航求上的变轨加速方向指示符]] |
| | + | |} |
| | + | 变轨节点表示轨道某个位置上的一次速度变化。你可以顺序添加多个变轨节点,且前面的变轨节点将会影响后面的。 添加节点后,它会显示你本次变轨所需的dV。如果有多个节点存在,只有第一个的所需dV会显示在导航球右上方,只有该变轨节点被删除后,下一个节点的dV信息才会显示在导航球右上方。 |
| | + | |
| | + | == 添加一个变轨节点 == |
| | + | [[File:ManeuverNodes.PNG|thumb|两个变轨节点,其中之一处于编辑状态]] |
| | + | 在地图视角中,单击飞船的轨道线,会弹出一个选项Add Maneuver让你添加变轨节点。节点创建后,选择节点并右键点击后会出现删除按钮。如果该变轨节点已经过时,选择该节点后会自动显示删除按钮。 |
| | + | |
| | + | 鼠标悬浮在一个节点上可以显示到达该节点的剩余时间以及这次变轨所需的[[w:Delta-v|Delta-V]]。 |
| | + | |
| | + | == 方向 == |
| | + | 因为运动在空间中(或空中)有三个维度,所以有三个轴可以加速,每个轴有两个方向。所有变轨操作都可以由这三个轴上的变化组合起来表示。 |
| | + | |
| | + | === 顺向及逆向 === |
| | + | {| style="float: right;" |
| | + | | [[File:Prograde.svg|32px|顺向]] |
| | + | | [[File:Retrograde.svg|32px|逆向]] |
| | + | |} |
| | + | 这两个向量直接改变飞船的速度。向顺向点火会提高速度,并提升轨道对面的高度。而向逆向点火则会降低速度,并使轨道对面的高度降低。这两个符号都直接可以在[[navball/zh-cn|导航球]]中看到。 |
| | + | |
| | + | 这是改变轨道形状的最有效方法,所以只要可能,就尽可能地沿这两个方向加速。 |
| | + | |
| | + | === 轨道平面法线/反面法线 === |
| | + | {| style="float: right;" |
| | + | | [[File:Normal.svg|32px|轨道平面法线]] |
| | + | | [[File:Anti-normal.svg|32px|轨道平面反面法线]] |
| | + | |} |
| | + | 轨道平面法线/反面法线与轨道平面正交。对准这两个方向设置加速将会改变轨道倾角。在导航球上,这两个向量位于赤道线上,并且恰好处于 顺向 与 逆向 向量的中间。 |
| | + | |
| | + | 这两个向量主要用于与另外一个星体/飞船进行轨道倾角对齐。而执行这个操作的最佳时机则是当飞船位于两者轨道平面的交线处(升交点/降交点)时。要与目标轨道倾角对齐,可以在升交点对准轨道平面反面法线设置加速,或在降交点对准轨道平面法线设置加速。在设置加速的过程中,相对于该节点的倾角会接近0度,在极为接近0度时升/降交点会快速在轨道上移动,此时即说明加速量已经足够。 |
| | + | |
| | + | === 径向朝内/朝外 === |
| | + | {| style="float: right;" |
| | + | | [[File:Radial-in.svg|32px|径向朝内]] |
| | + | | [[File:Radial-out.svg|32px|径向朝外]] |
| | + | |} |
| | + | 径向朝内/外向量直接改变轨道是朝向星球还是远离星球(对应导航球上棕色/蓝色半球的中心点)。执行这样的变轨将会令轨道绕飞船产生偏转。这种变轨是最低效的变轨方式,顺向/逆向变轨要有效率的多。(但有时候这种方法非常有效,比如定点圆化轨道时。) |
| | + | |
| | + | 在你从发射场垂直起飞时,你的飞船实际上就在执行远离星球的加速。 |
| | + | |
| | + | == 应用 == |
| | + | 选中一个节点后,会有六个符号出现。每个符号对应上述的六个向量之一。每个符号可以按住并拖动,拖动的方向会决定朝哪个方向改变dV,把一个符号朝变轨节点中心推和把与其对应的反向符号往外拉是等效的。另外,拖动的距离会影响调节的速率。 |
| | + | |
| | + | 添加变轨节点之后,三个新的数值会显示在[[navball/zh-cn|导航球]]上: |
| | + | # 所需的速度变化量,单位 m/s |
| | + | # 预测的加速所需耗时 |
| | + | # 到达该节点的剩余时间(或者已经晚了多少时间) |
| | + | |
| | + | 因为变轨表示的是一个瞬间的速度变化,所以实际上是无法完美地做到的。想要获得接近变轨节点规划速度增量的实际变轨效果,你需要提前大约一半加速所需耗时的时间点火,而在经过该节点后的剩下一半时间完成剩余的加速。例如,若加速过程需要一分钟,则你应该在到达机动节点前 30 秒就开始点火。 |
| | + | |
| | + | 变轨节点可以用来达到一个特定的轨道,而不需要一直关注地图视角。在执行一个[[aerobraking/zh-cn|大气刹车]]机动时,当前的变轨节点会随着飞船速度减速而不断更新。这可以用来在大气刹车不足/过度时进行手动修正。 |
| | + | |
| | + | === 顺向 === |
| | + | |
| | + | 这是你飞船在轨道上某一点处的速度矢量所指向的方向(相对于目标或中心天体的速度)。该方向是用黄色的带点圆圈外加三根互相垂直的线段来表示的。导航球上的符号与此相同。 |
| | + | |
| | + | 在该方向点火会抬升轨道的近拱点或远拱点,具体效果取决于飞船在轨道上的位置。一般可以把它的效果理解为提高轨道对侧的高度。沿该方向加速有其它的作用,但知道这一点是最要紧的。 |
| | + | |
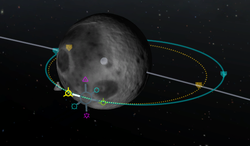
| | + | [[File:ManeuverNodePrograde.PNG|250px|thumbnail|none|顺向加速,抬升远拱点]] |
| | + | |
| | + | === 逆向 === |
| | + | |
| | + | 这与你飞船在轨道上某一点处的速度矢量所指向的方向(相对于目标或中心天体的速度)恰好相反。该方向是用黄色的带叉圆圈外加三根等距分布的线段来表示的。导航球上的符号与此相同。 |
| | + | |
| | + | 在该方向点火会降低轨道的近拱点或远拱点,具体效果取决于飞船在轨道上的位置。一般可以把它的效果理解为降低轨道对侧的高度。 |
| | + | |
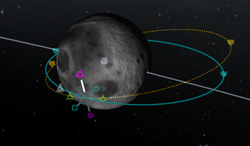
| | + | [[File:ManeuverNodeRetrograde.PNG|250px|thumbnail|none|逆向加速,降低远拱点]] |
| | + | |
| | + | |
| | + | === 法线方向 === |
| | + | |
| | + | 该方向既与轨道平面垂直,又与目标或中心天体到飞船的矢径垂直。从轨道侧面看,该方向指向上方。若是以中心天体为参照物,那么法线方向还和飞船正下方的天体表面相平行。该方向是用粉色的带点三角来表示的。 |
| | + | |
| | + | 沿该方向加速的主要作用有二。一是旋转轨道平面(从侧面看,绕加速点逆时针旋转),二是用于交会任务过程中,在降交点(DN)实施轨道平面修正。 |
| | + | |
| | + | [[File:ManeuverNodeOrbitNormal.PNG|250px|thumbnail|none|法线方向加速,逆时针旋转轨道平面]] |
| | + | |
| | + | |
| | + | === 反法线方向 === |
| | + | |
| | + | 该方向既与轨道平面垂直,又与目标或中心天体到飞船的矢径垂直。若是以中心天体为参照物,那么反法线方向还和飞船正下方的天体表面相平行。从轨道侧面看,该方向指向下方,与法线方向相反。该方向是用粉色的带点倒三角外加三根等距分布的线段来表示的。 |
| | + | |
| | + | 沿该方向加速的主要作用有二。一是旋转轨道平面(从侧面看,绕加速点顺时针旋转),二是用于交会任务过程中,在升交点(AN)实施轨道平面修正。 |
| | + | |
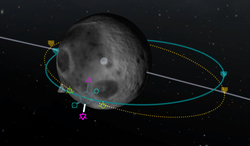
| | + | [[File:ManeuverNodeOrbitAntiNormal.PNG|250px|thumbnail|none|反法线方向加速,顺时针旋转轨道平面]] |
| | + | |
| | + | |
| | + | === 径向向内 === |
| | + | |
| | + | 该方向与目标或中心天体到飞船的矢径指向相反。更直观地讲,该方向是从飞船指向目标或中心天体的方向。它与飞船的速度矢量和轨道平面法向都垂直。该方向是用蓝色圆圈内加四根互相垂直的线段来表示的。 |
| | + | |
| | + | 沿该方向加速会让轨道在不改变平面的情况下旋转(类似于呼啦圈的转动方式)。从轨道平面上方看,会使轨道绕加速点逆时针转动,且转角小于 90 度。沿该方向加速的极限情况是,轨道最终会穿过中心天体的质心,使飞船正对中心天体飞去。 |
| | + | |
| | + | 沿该方向加速主要用于交会任务中对齐两条不规则的轨道,调整远拱点或近拱点的位置。 |
| | + | |
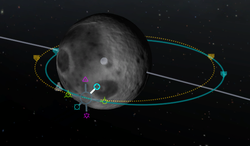
| | + | [[File:ManeuverNodeRadialIn.PNG|250px|thumbnail|none|径向向内加速,逆时针旋转轨道]] |
| | + | |
| | + | === 径向向外 === |
| | + | |
| | + | 该方向与目标或中心天体到飞船的矢径指向相同。更直观地讲,该方向是从目标或中心天体指向飞船的方向。它与飞船的速度矢量和轨道平面法向都垂直。该方向是用蓝色的带点圆圈外加四根互相垂直的线段来表示的。 |
| | + | |
| | + | 沿该方向加速会让轨道在不改变平面的情况下旋转。从轨道平面上方看,会使轨道绕加速点顺时针转动,且转角小于 90 度。沿该方向加速的极限情况是,轨道最终会背朝中心天体的质心,使飞船背对中心天体飞去。 |
| | + | |
| | + | 沿该方向加速主要用于交会任务中对齐两条不规则的轨道,调整远拱点或近拱点的位置。 |
| | + | |
| | + | [[File:ManeuverNodeRadialOut.PNG|250px|thumbnail|none|径向向外加速,顺时针旋转轨道]] |
| | + | |
| | + | == 点火加速 == |
| | + | [[File:ManeuverNodesNavBall.PNG|200px|thumbnail|right|底部的导航球显示了一个蓝色的符号,飞船需要对准它来执行该变轨。]] |
| | + | |
| | + | 想要达成预定的变轨,你需要在适当的时机开始点火。对于时间较长的变轨,你需要提前大约一半的时间开始加速,并在到达节点后再花一半时间完成加速。 |
| | + | |
| | + | 如果飞船装备了SAS,你可以在设置好变轨节点后就将飞船对准蓝色符号(见截图)。因为一旦变轨设计完,加速的方向就已经确定,与飞船具体处于什么位置无关。 |
| | + | |
| | + | 当你即将要完成加速时,蓝色符号会开始从顺向的位置飘移,并逐渐加速偏离,这主要是因为你的方向无法完全对准蓝色符号,导致实际的速度增量与规划的速度增量之间存在其它方向的差量。一般来说,因为误差足够小,这一点可以忽略,但你也可以用 RCS 平移来做最后的精确修正。 |
| | + | |
| | + | 当你完成变轨后(导航球右方的dV下降到0或极小的一个数字时),将油门收起(按 X 键)以避免加速过头。此时蓝色符号朝向哪里已经没有什么意义了,你可以到地图视角删除该节点。当你有多个变轨节点时这一点尤为重要,因为在你删除当前节点之前,下一个节点的信息不会显示出来。 |
| | + | |
| | + | [[Category:Control/zh-cn]] |
Latest revision as of 02:26, 18 October 2021
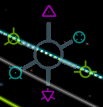
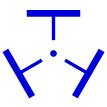
变轨节点表示轨道某个位置上的一次速度变化。你可以顺序添加多个变轨节点,且前面的变轨节点将会影响后面的。 添加节点后,它会显示你本次变轨所需的dV。如果有多个节点存在,只有第一个的所需dV会显示在导航球右上方,只有该变轨节点被删除后,下一个节点的dV信息才会显示在导航球右上方。
添加一个变轨节点
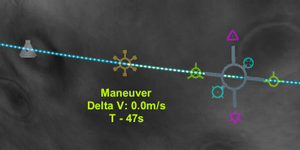
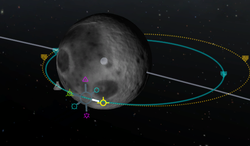
在地图视角中,单击飞船的轨道线,会弹出一个选项Add Maneuver让你添加变轨节点。节点创建后,选择节点并右键点击后会出现删除按钮。如果该变轨节点已经过时,选择该节点后会自动显示删除按钮。
鼠标悬浮在一个节点上可以显示到达该节点的剩余时间以及这次变轨所需的Delta-V。
方向
因为运动在空间中(或空中)有三个维度,所以有三个轴可以加速,每个轴有两个方向。所有变轨操作都可以由这三个轴上的变化组合起来表示。
顺向及逆向
这两个向量直接改变飞船的速度。向顺向点火会提高速度,并提升轨道对面的高度。而向逆向点火则会降低速度,并使轨道对面的高度降低。这两个符号都直接可以在导航球中看到。
这是改变轨道形状的最有效方法,所以只要可能,就尽可能地沿这两个方向加速。
轨道平面法线/反面法线
轨道平面法线/反面法线与轨道平面正交。对准这两个方向设置加速将会改变轨道倾角。在导航球上,这两个向量位于赤道线上,并且恰好处于 顺向 与 逆向 向量的中间。
这两个向量主要用于与另外一个星体/飞船进行轨道倾角对齐。而执行这个操作的最佳时机则是当飞船位于两者轨道平面的交线处(升交点/降交点)时。要与目标轨道倾角对齐,可以在升交点对准轨道平面反面法线设置加速,或在降交点对准轨道平面法线设置加速。在设置加速的过程中,相对于该节点的倾角会接近0度,在极为接近0度时升/降交点会快速在轨道上移动,此时即说明加速量已经足够。
径向朝内/朝外
径向朝内/外向量直接改变轨道是朝向星球还是远离星球(对应导航球上棕色/蓝色半球的中心点)。执行这样的变轨将会令轨道绕飞船产生偏转。这种变轨是最低效的变轨方式,顺向/逆向变轨要有效率的多。(但有时候这种方法非常有效,比如定点圆化轨道时。)
在你从发射场垂直起飞时,你的飞船实际上就在执行远离星球的加速。
应用
选中一个节点后,会有六个符号出现。每个符号对应上述的六个向量之一。每个符号可以按住并拖动,拖动的方向会决定朝哪个方向改变dV,把一个符号朝变轨节点中心推和把与其对应的反向符号往外拉是等效的。另外,拖动的距离会影响调节的速率。
添加变轨节点之后,三个新的数值会显示在导航球上:
- 所需的速度变化量,单位 m/s
- 预测的加速所需耗时
- 到达该节点的剩余时间(或者已经晚了多少时间)
因为变轨表示的是一个瞬间的速度变化,所以实际上是无法完美地做到的。想要获得接近变轨节点规划速度增量的实际变轨效果,你需要提前大约一半加速所需耗时的时间点火,而在经过该节点后的剩下一半时间完成剩余的加速。例如,若加速过程需要一分钟,则你应该在到达机动节点前 30 秒就开始点火。
变轨节点可以用来达到一个特定的轨道,而不需要一直关注地图视角。在执行一个大气刹车机动时,当前的变轨节点会随着飞船速度减速而不断更新。这可以用来在大气刹车不足/过度时进行手动修正。
顺向
这是你飞船在轨道上某一点处的速度矢量所指向的方向(相对于目标或中心天体的速度)。该方向是用黄色的带点圆圈外加三根互相垂直的线段来表示的。导航球上的符号与此相同。
在该方向点火会抬升轨道的近拱点或远拱点,具体效果取决于飞船在轨道上的位置。一般可以把它的效果理解为提高轨道对侧的高度。沿该方向加速有其它的作用,但知道这一点是最要紧的。
逆向
这与你飞船在轨道上某一点处的速度矢量所指向的方向(相对于目标或中心天体的速度)恰好相反。该方向是用黄色的带叉圆圈外加三根等距分布的线段来表示的。导航球上的符号与此相同。
在该方向点火会降低轨道的近拱点或远拱点,具体效果取决于飞船在轨道上的位置。一般可以把它的效果理解为降低轨道对侧的高度。
法线方向
该方向既与轨道平面垂直,又与目标或中心天体到飞船的矢径垂直。从轨道侧面看,该方向指向上方。若是以中心天体为参照物,那么法线方向还和飞船正下方的天体表面相平行。该方向是用粉色的带点三角来表示的。
沿该方向加速的主要作用有二。一是旋转轨道平面(从侧面看,绕加速点逆时针旋转),二是用于交会任务过程中,在降交点(DN)实施轨道平面修正。
反法线方向
该方向既与轨道平面垂直,又与目标或中心天体到飞船的矢径垂直。若是以中心天体为参照物,那么反法线方向还和飞船正下方的天体表面相平行。从轨道侧面看,该方向指向下方,与法线方向相反。该方向是用粉色的带点倒三角外加三根等距分布的线段来表示的。
沿该方向加速的主要作用有二。一是旋转轨道平面(从侧面看,绕加速点顺时针旋转),二是用于交会任务过程中,在升交点(AN)实施轨道平面修正。
径向向内
该方向与目标或中心天体到飞船的矢径指向相反。更直观地讲,该方向是从飞船指向目标或中心天体的方向。它与飞船的速度矢量和轨道平面法向都垂直。该方向是用蓝色圆圈内加四根互相垂直的线段来表示的。
沿该方向加速会让轨道在不改变平面的情况下旋转(类似于呼啦圈的转动方式)。从轨道平面上方看,会使轨道绕加速点逆时针转动,且转角小于 90 度。沿该方向加速的极限情况是,轨道最终会穿过中心天体的质心,使飞船正对中心天体飞去。
沿该方向加速主要用于交会任务中对齐两条不规则的轨道,调整远拱点或近拱点的位置。
径向向外
该方向与目标或中心天体到飞船的矢径指向相同。更直观地讲,该方向是从目标或中心天体指向飞船的方向。它与飞船的速度矢量和轨道平面法向都垂直。该方向是用蓝色的带点圆圈外加四根互相垂直的线段来表示的。
沿该方向加速会让轨道在不改变平面的情况下旋转。从轨道平面上方看,会使轨道绕加速点顺时针转动,且转角小于 90 度。沿该方向加速的极限情况是,轨道最终会背朝中心天体的质心,使飞船背对中心天体飞去。
沿该方向加速主要用于交会任务中对齐两条不规则的轨道,调整远拱点或近拱点的位置。
点火加速
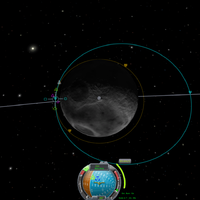
底部的导航球显示了一个蓝色的符号,飞船需要对准它来执行该变轨。
想要达成预定的变轨,你需要在适当的时机开始点火。对于时间较长的变轨,你需要提前大约一半的时间开始加速,并在到达节点后再花一半时间完成加速。
如果飞船装备了SAS,你可以在设置好变轨节点后就将飞船对准蓝色符号(见截图)。因为一旦变轨设计完,加速的方向就已经确定,与飞船具体处于什么位置无关。
当你即将要完成加速时,蓝色符号会开始从顺向的位置飘移,并逐渐加速偏离,这主要是因为你的方向无法完全对准蓝色符号,导致实际的速度增量与规划的速度增量之间存在其它方向的差量。一般来说,因为误差足够小,这一点可以忽略,但你也可以用 RCS 平移来做最后的精确修正。
当你完成变轨后(导航球右方的dV下降到0或极小的一个数字时),将油门收起(按 X 键)以避免加速过头。此时蓝色符号朝向哪里已经没有什么意义了,你可以到地图视角删除该节点。当你有多个变轨节点时这一点尤为重要,因为在你删除当前节点之前,下一个节点的信息不会显示出来。
