Difference between revisions of "Kerbal to Pro: Modelling in 3ds Max"
Bilsta1000 (talk | contribs) (→Chapter 6: Texturing) |
Mr. Kerbin (talk | contribs) (doesn't exist) |
||
| (68 intermediate revisions by 8 users not shown) | |||
| Line 1: | Line 1: | ||
| − | + | == Foreward == | |
| Line 42: | Line 42: | ||
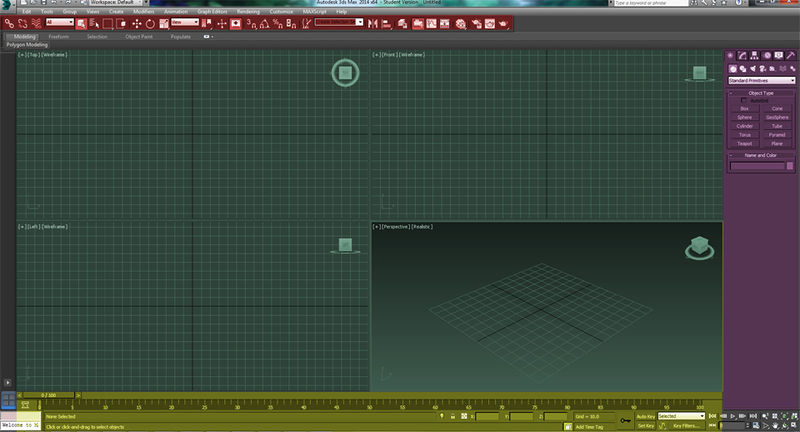
[[File:k2pfamiliarisation.jpg|800px|right|upright=2.0|alt=3ds Max 2014 Main screen.]] | [[File:k2pfamiliarisation.jpg|800px|right|upright=2.0|alt=3ds Max 2014 Main screen.]] | ||
| − | + | ==Chapter 2.1: Viewports== | |
First you have your viewports (green) where your model will sit whilst you edit it. Any of the views can be edited if for example you'd like a textured view in one and a flat wireframe in another. It's your Max, Have it your way. | First you have your viewports (green) where your model will sit whilst you edit it. Any of the views can be edited if for example you'd like a textured view in one and a flat wireframe in another. It's your Max, Have it your way. | ||
| Line 64: | Line 64: | ||
* ALT + Right mouse button - Quick access menu (pivot point options) | * ALT + Right mouse button - Quick access menu (pivot point options) | ||
| − | + | ==Chapter 2.2: Toolbars== | |
The toolbars (red) contain the controls you need to manipulate your models. | The toolbars (red) contain the controls you need to manipulate your models. | ||
from left to right (default) they go | from left to right (default) they go | ||
| Line 72: | Line 72: | ||
* Selection filter - when selecting an object, you can only select what's in this box. | * Selection filter - when selecting an object, you can only select what's in this box. | ||
* Select object - Select objects using your mouse | * Select object - Select objects using your mouse | ||
| − | * Select by name - Opens a window where you can select an object by name, | + | * Select by name - Opens a window where you can select an object by name, Useful if you have a lot of parts to your model. |
* Selection region (hold) - With this you can change how you click and drag to select objects. | * Selection region (hold) - With this you can change how you click and drag to select objects. | ||
* Window/Crossing - Which parts are included in your selection | * Window/Crossing - Which parts are included in your selection | ||
| Line 80: | Line 80: | ||
* Select and Rotate - Select an object and rotate it around (Shortcut: CTRL + E) | * Select and Rotate - Select an object and rotate it around (Shortcut: CTRL + E) | ||
* Select and Scale - Select an object and scale it up or down. (Shortcut: Ctrl + R) | * Select and Scale - Select an object and scale it up or down. (Shortcut: Ctrl + R) | ||
| − | * | + | * Reference coordinate system - This changes the orientation of your transform gizmo for when you manipulate your objects. |
| − | ** View - The default, The gizmo will be | + | ** View - The default, The gizmo will be parallel with the viewports grid. |
| − | ** Screen - The gizmo will be | + | ** Screen - The gizmo will be parallel with your computer monitor |
** World - Usually the same as the viewport unless you have changed the orientation of your grid. | ** World - Usually the same as the viewport unless you have changed the orientation of your grid. | ||
** Parent - (Never used it) | ** Parent - (Never used it) | ||
** Local - (Never used it) | ** Local - (Never used it) | ||
** Gimbal - (Never used it) | ** Gimbal - (Never used it) | ||
| − | ** Grid - The gizmo will be | + | ** Grid - The gizmo will be parallel with the grid. |
** Working - (Never used it) | ** Working - (Never used it) | ||
** Pick - (Never used it) | ** Pick - (Never used it) | ||
| − | * Change pivot point - This has quick options to move your pivot point around, Bear in mind you can move your pivot point anywhere you want by using the | + | * Change pivot point - This has quick options to move your pivot point around, Bear in mind you can move your pivot point anywhere you want by using the Hierarchy panel. |
| − | ** Use Pivot Point Center - This is the default location or where you have moved it using the | + | ** Use Pivot Point Center - This is the default location or where you have moved it using the Hierarchy Panel |
** Use Bounding Box Center - This moves your pivot point to the center of the bounding box. | ** Use Bounding Box Center - This moves your pivot point to the center of the bounding box. | ||
** Use Transform Coordinate Center - Moves your pivot point to (0,0,0) | ** Use Transform Coordinate Center - Moves your pivot point to (0,0,0) | ||
| Line 97: | Line 97: | ||
These are most of the tools you'll need, I find it easier to relax my left hand on the W + E + R keys which then makes "Move" my ring finger, "Rotate" my middle and "Scale" my index. | These are most of the tools you'll need, I find it easier to relax my left hand on the W + E + R keys which then makes "Move" my ring finger, "Rotate" my middle and "Scale" my index. | ||
| − | + | ==Chapter 2.3: The Panels== | |
Usually found on the right hand side of the screen, the panels window (Purple) is used for any creation or editing to your model. | Usually found on the right hand side of the screen, the panels window (Purple) is used for any creation or editing to your model. | ||
| Line 103: | Line 103: | ||
* Create - Add something to your scene | * Create - Add something to your scene | ||
* Modify - Modify something in your scene. | * Modify - Modify something in your scene. | ||
| − | * | + | * Hierarchy - Modify any parenting or scene options such as the Pivot Point |
* Motion - Used for Mocap and controlled animation. | * Motion - Used for Mocap and controlled animation. | ||
* Display - Used to show and hide parts of your scene. | * Display - Used to show and hide parts of your scene. | ||
| − | * Utilities - | + | * Utilities - Helpful little scripts. |
I will go into more detail into certain sections of this as and when we need them as there is way too much to cover. | I will go into more detail into certain sections of this as and when we need them as there is way too much to cover. | ||
| − | + | ==Chapter 2.4: The Timeline== | |
This will be covered in the animation section, for basic modelling you don't need this. | This will be covered in the animation section, for basic modelling you don't need this. | ||
| + | == Chapter 2.5: WHY CAN'T I SELECT ANYTHING!== | ||
| − | + | When I first started out using Max, I found it to be very confusing when I tried to do something and something other than what was expected happened instead. Because of that here are Bilsta’s helpful solutions to the problem of “I can’t select my object” | |
| − | |||
| − | |||
| − | |||
| − | When I first started out using Max, I found it to be very confusing | ||
| Line 127: | Line 124: | ||
# You’re trying to create something; you probably have a button in the '''[Create]''' menu clicked. Try right clicking a few times or pressing '''[Escape]''' | # You’re trying to create something; you probably have a button in the '''[Create]''' menu clicked. Try right clicking a few times or pressing '''[Escape]''' | ||
# Your object is frozen, Right click and click '''[Unfreeze All]''' | # Your object is frozen, Right click and click '''[Unfreeze All]''' | ||
| − | # You’re in subselection mode – When this is the case you can only select whichever subobject you have selected. | + | # You’re in subselection mode – When this is the case you can only select whichever subobject you have selected. E.g. Vertices or Edges, Turn it off in the '''[Modifiers]''' stack |
# You’re making a crossing selection when your '''[Window/Crossing]''' toggle is set to window. See the section above on toolbars. | # You’re making a crossing selection when your '''[Window/Crossing]''' toggle is set to window. See the section above on toolbars. | ||
=Chapter 3: Research= | =Chapter 3: Research= | ||
| − | When modelling a part, the most important step is to have some sort of | + | When modelling a part, the most important step is to have some sort of reference material. |
This can be anything you can get your hands on whether it be three-views, images, videos, whatever, just have a lot of it. | This can be anything you can get your hands on whether it be three-views, images, videos, whatever, just have a lot of it. | ||
| Line 145: | Line 142: | ||
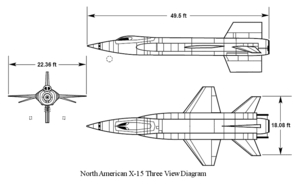
[[File:K2p3view.png|thumb |alt=An example of a 3 view|An example of a 3 view]] | [[File:K2p3view.png|thumb |alt=An example of a 3 view|An example of a 3 view]] | ||
| − | == | + | ==Chapter 3.1: Three Views== |
Correct-scale three view images are the holy grail of modelling research, if you have one of these, then you can at least model the geometry very closely to correctly | Correct-scale three view images are the holy grail of modelling research, if you have one of these, then you can at least model the geometry very closely to correctly | ||
| − | == | + | ==Chapter 3.2: Images== |
Images can give you overall ideas of how the texture and geometry all fits together. | Images can give you overall ideas of how the texture and geometry all fits together. | ||
| − | == | + | ==Chapter 3.3 Video== |
Videos are brilliant for animation | Videos are brilliant for animation | ||
| Line 180: | Line 177: | ||
| − | Once there's a nice | + | Once there's a nice reference in our viewport we can make sure it's scaled right. If you have access to technical details this can aid you quite a bit but bear in mind you need to scale relative so that the object is then useful in KSP. |
For example this Docking Module is 2.6M diameter x 4.7M length so these wouldn't be very useful if you tried to dock to it with the stock parts. | For example this Docking Module is 2.6M diameter x 4.7M length so these wouldn't be very useful if you tried to dock to it with the stock parts. | ||
| Line 192: | Line 189: | ||
[[File:K2pC56.png|thumb |alt=Piping: Part 1|Piping: Part 1]] | [[File:K2pC56.png|thumb |alt=Piping: Part 1|Piping: Part 1]] | ||
[[File:K2pC57.png|thumb |alt=Piping: Part 2|Piping: Part 2]] | [[File:K2pC57.png|thumb |alt=Piping: Part 2|Piping: Part 2]] | ||
| − | + | ==Chapter 5.1: The Basic Geometry using Poligonal Modelling== | |
Firstly I created a 2m cylinder since this is the sort of shape the end result kind of looks like. | Firstly I created a 2m cylinder since this is the sort of shape the end result kind of looks like. | ||
| Line 205: | Line 202: | ||
| − | Once my first piece is in the right place. I then Extrude the edges byfirst entering the '''[Edges]''' subobject mode, located in the Edit Poly modifier and then holding '''[SHIFT]''' whilst I '''[Move]''', '''[Rotate]''' or '''[Scale]''' the edges I want to extrude and work my way across using the image as a guide only scaling on the Y/Z axis as I go. I find it useful to model with my camera on an angle whilst keeping the center of the geometry central on the design. Then if I need to | + | Once my first piece is in the right place. I then Extrude the edges byfirst entering the '''[Edges]''' subobject mode, located in the Edit Poly modifier and then holding '''[SHIFT]''' whilst I '''[Move]''', '''[Rotate]''' or '''[Scale]''' the edges I want to extrude and work my way across using the image as a guide only scaling on the Y/Z axis as I go. I find it useful to model with my camera on an angle whilst keeping the center of the geometry central on the design. Then if I need to reference how curvy it needs to be I can see that |
| Line 212: | Line 209: | ||
Once I've reached the end, I pull the geometry all the way in and apply a '''[CAP ENDS]''' Modifier to seal it closed, There are other ways to do this but I find a cap ends modifier is the easiest and best way. | Once I've reached the end, I pull the geometry all the way in and apply a '''[CAP ENDS]''' Modifier to seal it closed, There are other ways to do this but I find a cap ends modifier is the easiest and best way. | ||
| − | + | ==Chapter 5.2: Solar Arrays and Spline Modelling== | |
| − | So now that our main shell is complete. I start to model the two solar arrays. Because there's no end view of these I'll have to just match the | + | So now that our main shell is complete. I start to model the two solar arrays. Because there's no end view of these I'll have to just match the reference images. |
Spline modelling is the name given to modelling from a single drawn line. | Spline modelling is the name given to modelling from a single drawn line. | ||
| Line 237: | Line 234: | ||
So now we have the basic geometry we need to be detailed. | So now we have the basic geometry we need to be detailed. | ||
| − | + | ==Chapter 5.3 Adding Detail== | |
Detailing is what makes an object look better. You have to base how much detail you can afford to do on your tricount. | Detailing is what makes an object look better. You have to base how much detail you can afford to do on your tricount. | ||
| Line 244: | Line 241: | ||
Currently I have 1,140 so I'm ok for now and will aim for a final tricount of about 2000 Tris. | Currently I have 1,140 so I'm ok for now and will aim for a final tricount of about 2000 Tris. | ||
| − | + | ==Piping== | |
Piping, Surprisingly is one of the easiest things to do in 3ds Max. | Piping, Surprisingly is one of the easiest things to do in 3ds Max. | ||
Start off by creating a spline that follows the direction you'd like your pipe | Start off by creating a spline that follows the direction you'd like your pipe | ||
| Line 256: | Line 253: | ||
Using these techniques, I add a lot of detail on this and my final TriCount comes in at 2,364 | Using these techniques, I add a lot of detail on this and my final TriCount comes in at 2,364 | ||
| − | + | ==Optimizing== | |
Optimising your model is good practice when modelling for game engines, it means that the Game Engine doesn't have to work too hard when it wants to load your model. | Optimising your model is good practice when modelling for game engines, it means that the Game Engine doesn't have to work too hard when it wants to load your model. | ||
=Chapter 6: Texturing= | =Chapter 6: Texturing= | ||
| + | [[File:K2pC61.png|thumb |alt=The texture file for pipes etc.|The texture file I used for pipes etc.]] | ||
| + | [[File:K2pC62.png|thumb |alt=UVW Unwrapping: Part 1|UVW Unwrapping: Part 1]] | ||
| + | [[File:K2pC63.png|thumb |alt=UVW Unwrapping: Part 2|UVW Unwrapping: Part 2]] | ||
You can only get so far with detailing before your Tricount goes sky high to stupid levels. | You can only get so far with detailing before your Tricount goes sky high to stupid levels. | ||
For this we have texturing, | For this we have texturing, | ||
| − | Texturing is adding the colours and | + | Texturing is adding the colours and 2d detail to the geometry. |
To start off open your favorite image editor, I'll be using Photoshop CS5.1 | To start off open your favorite image editor, I'll be using Photoshop CS5.1 | ||
| − | + | Be certain you're happy with your geometry before you start UVW Mapping | |
| + | |||
| + | '''ONCE YOU'VE ADDED THE UNWRAP MODIFIER, ANY ALTERATION TO GEOMETRY WILL MEAN YOU HAVE TO START AGAIN WITH UVW MAPPING.''' | ||
| + | |||
| + | |||
| + | |||
| + | ==Chapter 6.1: Creating the textures== | ||
| + | |||
| + | Firstly you have to decide which parts of your model will reuse specific textures. In my example I've split it up into two different texture files. | ||
| + | |||
| + | One will contain all of the textures for any piping and the other will be for the solar arrays and the module itself. | ||
| + | |||
| + | |||
| + | This section is difficult to explain as each model will be different and different programs will create different qualities of texture, If you're unsure on creating the texture yourself ask someone to help you as you do have to have a skill at digital art sometimes. | ||
| + | |||
| + | In the pipes texture it contains the texture used for the external docking target which is simply four rectangles with a bit of noise on them since metal isn't flawless. | ||
| + | |||
| + | |||
| + | |||
| + | |||
| + | |||
| + | ==Chapter 6.2: Assigning textures== | ||
| + | To then assign the texture I need to import my texture; I go to '''[Rendering]''' --> '''[Material Editor]''' --> '''[Compact Material Editor]'''. | ||
| + | Once the Material editor has opened I find the Diffuse colour which is a basic object texture. Next to diffuse there is a gray box (by default) this is the colour of that particular material. Next to that gray box is another darker gray box which is for your maps. For this we will use a '''[BITMAP]''' so I click on the gray box next to the lighter gray box and then select '''[BITMAP]'''. This then opens my file explorer, I find the image and it is applied to the material. | ||
| + | |||
| + | Now we need to assign that material to our geometry; I click and drag the material from the material editor onto the parts that will use that particular texture. | ||
| + | |||
| + | By default the image will not be displayed on the geometry, You have to click on your viewport render style which is next to the viewport name (Left, Top, Perspective), go down to '''[Materials]''' and click either '''[Shaded materials with maps]''' or '''[Realistic materials with maps]''' depending on whether you want it quickly rendered in your viewport (shaded) or realistically rendered in the viewport. If you experience lag, this is the first thing to change. | ||
| + | |||
| + | ==Chapter 6.3 UVW Unwrapping== | ||
| + | Select the object you wish to texture and apply a '''[Unwrap UVW]''' Modifier to it. | ||
| + | |||
| + | Then open the UV Editor by clicking '''[Open UV Editor]''' | ||
| + | |||
| + | The idea now is to select which part of the texture goes to which side of your models. | ||
| + | If you cannot see your texture in the UVW editor, you need to make sure it's assigned to the part you're working on. | ||
| + | |||
| + | Once it's assigned, to make sure you can see it in the UVW Editor there's a dropdown menu in the top right of the UV Editor where you can change the background of the UV Editor to your texture. | ||
| + | |||
| + | Once I'm setup, using the '''[Polygon]''' subselection, I select the front faces which will highlight them in the '''[UV Editor]''' | ||
| + | |||
| + | You can separate them from the rest of the model by clicking one of the flattening options under the '''[Explode]''' panel. | ||
| + | Just click each option until you find which one works best, for example one splits them up into each individual polygon, another separates them but keeps them attached. | ||
| + | |||
| + | Once it's separate, you then simply move, scale and rotate it until it's covering the correct part of your texture. | ||
| + | |||
| + | |||
| + | '''Yes it really is that easy to texture.''' | ||
| + | |||
| + | =Chapter 7: Animation= | ||
| + | ==Chapter 7.1: Preparation== | ||
| + | |||
| + | The model that I decided to create unfortunately doesn't require any animation so for this section of the tutorial I will give the very basics by doing an opening gear door. | ||
| + | |||
| + | Firstly for any animation you need to decide on the order of events for any animation and how long each part will take. | ||
| + | |||
| + | In my example it will go as follows. | ||
| + | |||
| + | |||
| + | Gear down | ||
| + | |||
| + | 1. gear door opens - 4 seconds | ||
| + | |||
| + | 2. Delay - 1 second | ||
| + | |||
| + | 3. gear drops down - 5 seconds | ||
| + | |||
| + | |||
| + | Gear up | ||
| + | |||
| + | 1. gear lifts up - 6 seconds | ||
| + | |||
| + | 2. delay - 1 second | ||
| + | |||
| + | 3. gear door closes 4 seconds | ||
| + | |||
| + | |||
| + | Now all animation is done with bones, This has the advantage of being able to use the same piece of software but stops any accidental damage to the model, which in some cases will have been worked on by another person. | ||
| + | |||
| + | |||
| + | In my example I have three objects: | ||
| + | |||
| + | 1. Gear Door | ||
| + | |||
| + | 2. Gear Housing | ||
| + | |||
| + | 3. The gear itself | ||
| + | |||
| + | ==Chapter 7.2: Bones and Parenting== | ||
| + | [[File:K2pC71.png|thumb |alt=A basic model of gear with a door|A basic model of gear with a door]] | ||
| + | [[File:K2pC72.png|thumb |alt=Door parented to bone|Door parented to bone]] | ||
| + | [[File:K2pC73.png|thumb |alt=Both gear and door have bones|Both gear and door have bones]] | ||
| + | [[File:K2pC74.png|thumb |alt=Door open, gear down|Door open, gear down]] | ||
| + | The easiest way to get your head around bones is to think of them as hinges. | ||
| + | |||
| + | For ease, I will be working on mine upside down. | ||
| + | |||
| + | I start off by entering the '''[Systems]''' tab of the '''[CREATE]''' tab in the '''[MODIFIERS]''' stack. | ||
| + | I select '''[BONES]''', To start the bone you click once, you don't click and drag for this. | ||
| + | I click where the hinge would be and then extend the bone over the geometry in question. | ||
| + | I then click once more and right click to finish. | ||
| + | |||
| + | You always want the extra little nub as this is useful for moving the bone. | ||
| + | '''Note that you have to be in an orthographic view (Top, left, bottom etc.) to create bones.''' | ||
| + | |||
| + | |||
| + | Notice that the bone doesn't have to be on top of the geometry. I usually offset the bones to make it a bit easier when I'm working on one axis. | ||
| + | |||
| + | Once you've positioned your bone correctly you can then parent the object in question to it. | ||
| + | |||
| + | In the toolbar at the furthest left, there's a button labelled '''[Select and Link]''' click this and then click and drag from your geometry to the control bone. | ||
| + | |||
| + | |||
| + | Now moving the bone controls the geometry. | ||
| + | |||
| + | I do this for the wheels too so they also have a control bone | ||
| + | |||
| + | ==Chapter 7.3: Keyframe animation== | ||
| + | |||
| + | Keyframe animation works by the animator setting how the geometry should look on specific frames and letting the computer work out the bits in between. | ||
| + | |||
| + | |||
| + | To start I set my initial state. This is the state that the scene starts at so in my case it's door closed, gear up. | ||
| + | |||
| + | |||
| + | I select my bones and click '''[Set Key]''' on the timeline at the bottom. A red border will appear on your screen. | ||
| + | |||
| + | |||
| + | If you're on the default, your timeline might not go up to the number of frames you need. | ||
| + | In this case click '''[Time Configuration]''' on the timeline and change the '''[End Time]''' to the total number of frames you'll need. | ||
| + | |||
| + | |||
| + | To set a key you can either press the '''[K]''' key, or click the key next to the '''[Set Key]''' button on the timeline. | ||
| + | |||
| + | Remember that setting a key will only effect the objects selected and any that are parented to it. | ||
| + | |||
| + | I setup my first keyframe, select the two bones and press '''[K]''' | ||
| + | |||
| + | I then go to my next event frame which in my case would be frame 96 | ||
| + | |||
| + | |||
| + | I work this out by timing how many seconds the animation should do and multiplying it by 24 since i'm working at 24fps | ||
| + | |||
| + | |||
| + | I then set up the new state, make sure the bones are selected and press '''[K]''' again. | ||
| + | |||
| + | I continue like this until my animation is how I like it. | ||
| + | |||
| + | You can fine tune your animation by using the '''[Curve Editor]''' which can be accessed on the right click menu | ||
| + | =Chapter 8: To Unity= | ||
| + | ==Chapter 8.1: Setting up Unity== | ||
| + | [[File:K2PC81.png|thumb |alt=Make sure that you include the package|Make sure you include the package]] | ||
| + | [[File:K2PC82.png|thumb |alt=Create a new folder|Create a new folder]] | ||
| + | [[File:K2PC83.png|thumb |alt=Break up your model to get a better mesh|Break up your model to get a better mesh]] | ||
| + | Firstly you'll need the following: | ||
| + | |||
| + | #Unity - Found at '''[http://unity3d.com/unity/download/ The Unity Website]''' | ||
| + | #The current version Part Tools - Found in '''[http://forum.kerbalspaceprogram.com/showthread.php/34013 This thread]''' | ||
| + | |||
| + | Once you've downloaded Unity and the Part tools you'll need to install them. | ||
| + | |||
| + | Unity has a GUI installer so that should be easy enough. | ||
| + | |||
| + | Then for the Part Tools, they need to be extracted into your Unity packages, which will probably be found at | ||
| + | |||
| + | |||
| + | '''C:\Program Files\Unity\Editor\Standard Packages\''' | ||
| + | |||
| + | |||
| + | In Unity start a new project by going to '''[File]''' and '''[New Project]''' | ||
| + | |||
| + | Set a good project location and make sure to import the '''[PartTools.unitypackage]''' | ||
| + | |||
| + | Create a new GameObject by clicking '''[Create Empty]''' under the '''[GameObject]''' menu | ||
| + | |||
| + | At the right then click '''[Add Component]''', go down to [KSP] and then [PartTools] | ||
| + | |||
| + | This is the program that actually generates the .Mu file | ||
| + | |||
| + | ==Chapter 8.2: Importing your model== | ||
| + | |||
| + | Out of Max you want to export as a .Dae | ||
| + | Make sure that the scale factor under the '''[Units]''' section is equal to 1.0 | ||
| + | Other tutorials talk about the '''[Unit Conversion]''' tab, Personally I've never had any issues with '''[Y-Up]''' | ||
| + | Export it and then you can then drag this file to your asset bin in unity. | ||
| + | |||
| + | Once in unity, then drag it into your game object. | ||
| + | |||
| + | Assign any materials by first importing them to unity and then dragging them to the correct objects. | ||
| + | |||
| + | Make sure everything looks ok before moving onto meshes. | ||
| + | |||
| + | ==Chapter 8.3: Colision meshes== | ||
| + | |||
| + | |||
| + | For your mesh coliders, this is where splitting up your model will come in exceptionally handy otherwise you may have to go back and do it again. | ||
| + | |||
| + | Select a part of your model in the left hand panel and then click '''[Add Component]''' go to '''[Physics]''' and '''[Mesh Collider]''' | ||
| + | |||
| + | Once it's been added it will appear on the right hand side of Unity. Make sure that Convex is selected and have a look at the green lines that have appeared on your mesh, these should line up with the geometry as best as possible. If they don't then you need to break up your model further. | ||
| + | |||
| + | Do this for all of your parts. | ||
| + | |||
| + | I opted to leave out the two rings so these will not have any kind of collision since it's designed for the stock 2M docking ports to fit nicely inside it. | ||
| + | |||
| + | ==Chapter 8.4: Unity Export== | ||
| + | |||
| + | Once you've done everything above, you're ready to hand over your part to the kerbals to have their fun with it. | ||
| + | |||
| + | Click the '''[GameObject]''' on the left hand side and you'll see a component called a Part Tools (Script) | ||
| + | |||
| + | In this component, select where you want to export the .mu file to in the '''[File URL]''' | ||
| + | Give your model a name (Remember linux can be fussy with case so keep it all lowercase) and finally: | ||
| + | |||
| + | |||
| + | Click '''[WRITE]''' | ||
| + | |||
| + | =Chapter 9: Kerbals and CGFs= | ||
| + | ==Chapter 9.1: CFGs== | ||
| + | Now you will have a folder with a model file named ''whatever_you_named_your_model.mu'', plus a couple of textures. | ||
| + | |||
| + | These are all ready to go into Kerbal Space Program so create a new folder in Kerbal Space Program\GameData\ with your name and inside that folder create another with the name <tt>Parts</tt> and a third with your part's name. You're all set bar one last thing. | ||
| + | |||
| + | |||
| + | You need a little file so that KSP knows what to do with your model, for this we have the CFG file | ||
| + | |||
| + | This will be an absolute BASIC .cfg File since I'm a modeller not a programmer. | ||
| + | |||
| + | There's details on how to create a CFG file: [[CFG File Documentation]] | ||
| + | |||
| + | CFG files are all different and they require their own tutorial so one will not be provided here..... mainly because I'm no good at creating them. | ||
| + | |||
| + | ==Chapter 9.2: Troubleshooting== | ||
| + | |||
| + | Be sure to test your part out before any kind of release, the '''[Alt] + [F12]''' menu is very helpful in this situation. | ||
| + | |||
| + | =Chapter 10: Finale= | ||
| + | [[File:K2pC01.png|thumb |alt=As basic as you can get|As basic as you can get]] | ||
| + | [[File:K2pc102.png|thumb |alt=Sat on top ready to dock|Sat on top ready to dock]] | ||
| + | [[File:K2pc103.png|thumb |alt=And Docked|And Docked]] | ||
| + | I hope you enjoyed this tutorial, any questions feel free to PM Bilsta1000 and I'll try and answer as best i can. | ||
| + | |||
| + | Once the model is finished we need to make sure it's working fine. | ||
| − | + | I built a quick rocket to get it to my thrown together space station and make sure all docking is fine. | |
| − | + | [[Category:Tutorials|Kerbal to Pro: Modelling in 3ds Max]] | |
| − | + | [[Category:Modding Tutorials|Kerbal to Pro: Modelling in 3ds Max]] | |
Latest revision as of 04:01, 5 January 2025
Contents
Foreward
By Bilsta1000. This tutorial will cover creating the geometry, texture and animation for a MIR Docking Port.
It will also include getting your model into KSP using unity and how to set up your collision meshes correctly.
Please bear in mind this is a work in progress so chapters will be completed as and when I have free time to continue. (I have a life outside of KSP)
Message from the Author:
A bit of background to me: I’m a final year university student who has been using Max, Maya and various other pieces of 3d modelling software on and off for several years.
Having been taught myself and also being taught by professionals and amateurs alike, I know how intimidating and confusing some pieces of software can be to work with.
Because of this I have made this tutorial to be friendly to all skill levels, Brand newbies can follow step by step from actually getting Max to getting their models into unity,
meanwhile advanced modellers can click straight through to helpful sections such as setting up Max for KSP.
if you decide to use this tutorial, I have one simple request:
Please don’t follow this tutorial to the dot; I’ve intentionally left out steps to make sure that following my every single mouse click is very difficult.
This way, rather than learning to model a MIR Docking Port, you’ll learn to create whatever it is you’d like to create.
Chapter 1: Acquisition
If you’re a student then you can download free versions and get free licences for Max, Maya and any of the Autodesk suite.
All you have to do is register at http://students.autodesk.com/ and scan or take a photo of your student card.
In this tutorial I'll be working with 3ds Max 2014
Chapter 2: Familiarisation
Max can be very intimidating on first launch, especially if you've never used it before. So first we will get used to where everything is.
Chapter 2.1: Viewports
First you have your viewports (green) where your model will sit whilst you edit it. Any of the views can be edited if for example you'd like a textured view in one and a flat wireframe in another. It's your Max, Have it your way.
It's also possible to maximize one of these views so that it takes up the whole screen by pressing ALT + W
By default navigating this view is done with the mouse, here are some very useful notes on navigation alone.
- Left mouse button - Select
- CTRL + Left mouse button - Add to selection (Also works with click and drag)
- ALT + Left mouse button - Remove from selection (Also works with click and drag)
- Middle Mouse button (Click the scroll wheel) - Pan around view
- CTRL + Middle mouse button - Pan around view faster
- ALT + Middle mouse button - Orbit around view
- CTRL + ALT + Middle mouse button - Zoom in and out
- Right mouse button - Context menu
- CTRL + Right mouse button - Quick access menu (New objects and transforms)
- SHIFT + Right mouse button - Quick access menu (options)
- ALT + Right mouse button - Quick access menu (pivot point options)
Chapter 2.2: Toolbars
The toolbars (red) contain the controls you need to manipulate your models. from left to right (default) they go
- Select and link - use for parenting
- Unlink Selection - use for unparenting
- Bind to spacewarp - (Never used it myself)*
- Selection filter - when selecting an object, you can only select what's in this box.
- Select object - Select objects using your mouse
- Select by name - Opens a window where you can select an object by name, Useful if you have a lot of parts to your model.
- Selection region (hold) - With this you can change how you click and drag to select objects.
- Window/Crossing - Which parts are included in your selection
- If set to Crossing, whilst clicking and dragging, if any part of the geometry is dragged over it will be included in the selection.
- If set to Window, whilst clicking and dragging, the entire part needs to be inside the bounding box for it to be included in the selection.
- Select and Move - Select an object and moves it around (Shortcut: CTRL + W)
- Select and Rotate - Select an object and rotate it around (Shortcut: CTRL + E)
- Select and Scale - Select an object and scale it up or down. (Shortcut: Ctrl + R)
- Reference coordinate system - This changes the orientation of your transform gizmo for when you manipulate your objects.
- View - The default, The gizmo will be parallel with the viewports grid.
- Screen - The gizmo will be parallel with your computer monitor
- World - Usually the same as the viewport unless you have changed the orientation of your grid.
- Parent - (Never used it)
- Local - (Never used it)
- Gimbal - (Never used it)
- Grid - The gizmo will be parallel with the grid.
- Working - (Never used it)
- Pick - (Never used it)
- Change pivot point - This has quick options to move your pivot point around, Bear in mind you can move your pivot point anywhere you want by using the Hierarchy panel.
- Use Pivot Point Center - This is the default location or where you have moved it using the Hierarchy Panel
- Use Bounding Box Center - This moves your pivot point to the center of the bounding box.
- Use Transform Coordinate Center - Moves your pivot point to (0,0,0)
These are most of the tools you'll need, I find it easier to relax my left hand on the W + E + R keys which then makes "Move" my ring finger, "Rotate" my middle and "Scale" my index.
Chapter 2.3: The Panels
Usually found on the right hand side of the screen, the panels window (Purple) is used for any creation or editing to your model.
It has six sections.
- Create - Add something to your scene
- Modify - Modify something in your scene.
- Hierarchy - Modify any parenting or scene options such as the Pivot Point
- Motion - Used for Mocap and controlled animation.
- Display - Used to show and hide parts of your scene.
- Utilities - Helpful little scripts.
I will go into more detail into certain sections of this as and when we need them as there is way too much to cover.
Chapter 2.4: The Timeline
This will be covered in the animation section, for basic modelling you don't need this.
Chapter 2.5: WHY CAN'T I SELECT ANYTHING!
When I first started out using Max, I found it to be very confusing when I tried to do something and something other than what was expected happened instead. Because of that here are Bilsta’s helpful solutions to the problem of “I can’t select my object”
- You have object select locked…. Press [Spacebar].
- In Wireframe view, You're attempting to select the object itself rather than the wireframe.
- You’re trying to create something; you probably have a button in the [Create] menu clicked. Try right clicking a few times or pressing [Escape]
- Your object is frozen, Right click and click [Unfreeze All]
- You’re in subselection mode – When this is the case you can only select whichever subobject you have selected. E.g. Vertices or Edges, Turn it off in the [Modifiers] stack
- You’re making a crossing selection when your [Window/Crossing] toggle is set to window. See the section above on toolbars.
Chapter 3: Research
When modelling a part, the most important step is to have some sort of reference material.
This can be anything you can get your hands on whether it be three-views, images, videos, whatever, just have a lot of it. I usually dedicate a folder to the object in question and put all of the photos in there, then I can just flick through when I need to know something. For this tutorial I will be modelling the MIR Docking port as it's a pretty basic model to start with.
I've found some photos and they're all ready to be flicked through when I need to know something.
I've found a blueprint kind of view which will come in very handy when it comes to modelling.
Chapter 3.1: Three Views
Correct-scale three view images are the holy grail of modelling research, if you have one of these, then you can at least model the geometry very closely to correctly
Chapter 3.2: Images
Images can give you overall ideas of how the texture and geometry all fits together.
Chapter 3.3 Video
Videos are brilliant for animation
Chapter 4: Setting up Max
Firstly we need to make sure that the Max units are equal to 1 Unit = 1 Meter.
This is done by going to [Customise] --> [Units Setup].
I'm setting my unit scale to Metric and in [System Unit Setup] I actually set how much one unit is equal to.
I will probably only need a side view for now to get the basic shape and then later when it comes to detailing I'll use the rest of the research.
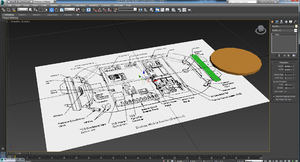
I create a plane by going to the [CREATE] Panel and selecting [Plane], I then click and drag on the grid to create it. This will have the side view image so I can model off it easier.
To then add the image I need to give this plane a material; I go to [Rendering] --> [Material Editor] --> [Compact Material Editor].
Once the Material editor has opened I find the Diffuse colour which is a basic object texture. Next to diffuse there is a gray box (by default) this is the colour of that particular material. Next to that gray box is another darker gray box which is for your maps. For this we will use a BITMAP so I click on the gray box next to the lighter gray box and then select [BITMAP]. This then opens my file explorer, I find the image and it is applied to the material.
Now we need to assign that material to our geometry; I click and drag the material from the material editor onto my plane.
By default the image will not be displayed on the geometry, You have to click on your viewport render style which is next to the viewport name (Left, Top, Perspective), go down to [Materials] and click either [Shaded materials with maps] or [Realistic materials with maps] depending on whether you want it quickly rendered in your viewport (shaded) or realistically rendered in the viewport. If you experience lag, this is the first thing to change.
Once there's a nice reference in our viewport we can make sure it's scaled right. If you have access to technical details this can aid you quite a bit but bear in mind you need to scale relative so that the object is then useful in KSP.
For example this Docking Module is 2.6M diameter x 4.7M length so these wouldn't be very useful if you tried to dock to it with the stock parts.
This module will be designed to fit on 2m radial pieces so firstly I created a cuboid that is 4m length, (remember radius is only the size to the center) and lined my plain up with it to make sure that the scale was correct.
Chapter 5: Modelling
Chapter 5.1: The Basic Geometry using Poligonal Modelling
Firstly I created a 2m cylinder since this is the sort of shape the end result kind of looks like.
I positioned it over the part where the docking port will be and rotated it so this will definitely fit on a 2m part.
I delete the two ends so that I have a hollow cylinder and I work from that.
At the bottom there is three numbers labeled X Y Z, these are absolute values hence if you set a parameter to 0 then we know it's centered as I have with the Z and Y axis.
Once it's all centered I add an [Edit Poly] modifier by clicking on the [MODIFIER LIST] on the right hand side. This means that we can now edit the subgeometry (Vertices, edges and faces).
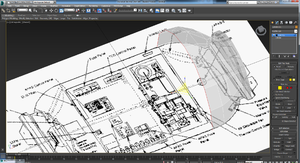
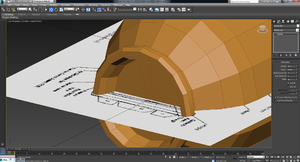
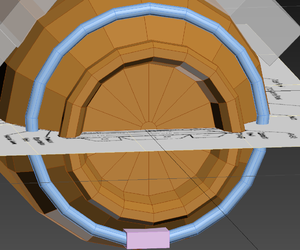
Once my first piece is in the right place. I then Extrude the edges byfirst entering the [Edges] subobject mode, located in the Edit Poly modifier and then holding [SHIFT] whilst I [Move], [Rotate] or [Scale] the edges I want to extrude and work my way across using the image as a guide only scaling on the Y/Z axis as I go. I find it useful to model with my camera on an angle whilst keeping the center of the geometry central on the design. Then if I need to reference how curvy it needs to be I can see that
A good shortcut key at this point is [ALT] + [X] this will make the piece of geometry selected transparent so you can work on it easier.
Once I've reached the end, I pull the geometry all the way in and apply a [CAP ENDS] Modifier to seal it closed, There are other ways to do this but I find a cap ends modifier is the easiest and best way.
Chapter 5.2: Solar Arrays and Spline Modelling
So now that our main shell is complete. I start to model the two solar arrays. Because there's no end view of these I'll have to just match the reference images.
Spline modelling is the name given to modelling from a single drawn line.
I make an accurate guess on what the end of the end looks like and I draw it out using the [Shapes] submenu under the [Create] tab.
Notice I do this as a separate shape far away from the rest of the model. We will construct everything together later on.
When creating your line, If you use the [Shift] key, it will keep your lines straight when working from the Top or Side view.
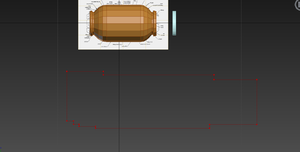
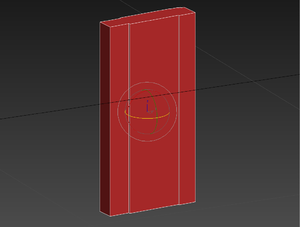
Once the end shape is complete, I then add an [Extrude] modifier which turns the line into geometry. I use reference imagery to get the scale about right.
Granted at the moment it is huge compared to the rest of the model but this doesn’t matter. I scale it down and see how it looks next to the rest of the model.
One thing you’ll find when extruding a model like this is that the pivot point will be incorrect. This can be fixed by going to the [Hierarchy] tab, clicking
[Affect Pivot Only] and then clicking [Center on Object]. Be sure to deselect the [Affect Pivot Only] after you’ve centered it, otherwise when you try and move or rotate your object, you’ll only be moving or rotating the pivot point.
I used spline modelling again to create the second array.
So now we have the basic geometry we need to be detailed.
Chapter 5.3 Adding Detail
Detailing is what makes an object look better. You have to base how much detail you can afford to do on your tricount.
You can view your Tricount by clicking the [+] next to the viewport name and opening the [Configure Viewports] window. In here under the [Statistics] tab, click [Show statistics in Active View] and your TriCount will be displayed.
Currently I have 1,140 so I'm ok for now and will aim for a final tricount of about 2000 Tris.
Piping
Piping, Surprisingly is one of the easiest things to do in 3ds Max. Start off by creating a spline that follows the direction you'd like your pipe
Once this is done, [Create] a small cylinder, delete all [Faces] apart from the circle ends and line it up with the beginning of your spline.
Select this face and convert it to an [Editable Poly] in the [Modifiers] panel. Then using the [Polygon] subobject selection, click [Extrude Along Spline]
One thing I have found with this method is that it seems to struggle doing entire circles and it can also increase your tricount dramatically.
Using these techniques, I add a lot of detail on this and my final TriCount comes in at 2,364
Optimizing
Optimising your model is good practice when modelling for game engines, it means that the Game Engine doesn't have to work too hard when it wants to load your model.
Chapter 6: Texturing
You can only get so far with detailing before your Tricount goes sky high to stupid levels. For this we have texturing,
Texturing is adding the colours and 2d detail to the geometry.
To start off open your favorite image editor, I'll be using Photoshop CS5.1
Be certain you're happy with your geometry before you start UVW Mapping
ONCE YOU'VE ADDED THE UNWRAP MODIFIER, ANY ALTERATION TO GEOMETRY WILL MEAN YOU HAVE TO START AGAIN WITH UVW MAPPING.
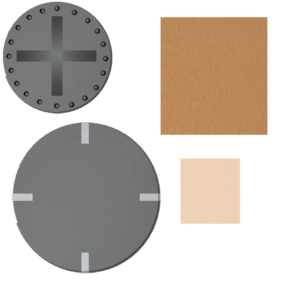
Chapter 6.1: Creating the textures
Firstly you have to decide which parts of your model will reuse specific textures. In my example I've split it up into two different texture files.
One will contain all of the textures for any piping and the other will be for the solar arrays and the module itself.
This section is difficult to explain as each model will be different and different programs will create different qualities of texture, If you're unsure on creating the texture yourself ask someone to help you as you do have to have a skill at digital art sometimes.
In the pipes texture it contains the texture used for the external docking target which is simply four rectangles with a bit of noise on them since metal isn't flawless.
Chapter 6.2: Assigning textures
To then assign the texture I need to import my texture; I go to [Rendering] --> [Material Editor] --> [Compact Material Editor]. Once the Material editor has opened I find the Diffuse colour which is a basic object texture. Next to diffuse there is a gray box (by default) this is the colour of that particular material. Next to that gray box is another darker gray box which is for your maps. For this we will use a [BITMAP] so I click on the gray box next to the lighter gray box and then select [BITMAP]. This then opens my file explorer, I find the image and it is applied to the material.
Now we need to assign that material to our geometry; I click and drag the material from the material editor onto the parts that will use that particular texture.
By default the image will not be displayed on the geometry, You have to click on your viewport render style which is next to the viewport name (Left, Top, Perspective), go down to [Materials] and click either [Shaded materials with maps] or [Realistic materials with maps] depending on whether you want it quickly rendered in your viewport (shaded) or realistically rendered in the viewport. If you experience lag, this is the first thing to change.
Chapter 6.3 UVW Unwrapping
Select the object you wish to texture and apply a [Unwrap UVW] Modifier to it.
Then open the UV Editor by clicking [Open UV Editor]
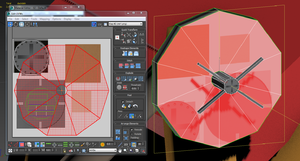
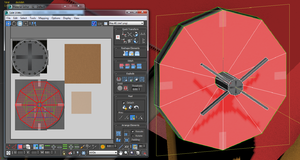
The idea now is to select which part of the texture goes to which side of your models. If you cannot see your texture in the UVW editor, you need to make sure it's assigned to the part you're working on.
Once it's assigned, to make sure you can see it in the UVW Editor there's a dropdown menu in the top right of the UV Editor where you can change the background of the UV Editor to your texture.
Once I'm setup, using the [Polygon] subselection, I select the front faces which will highlight them in the [UV Editor]
You can separate them from the rest of the model by clicking one of the flattening options under the [Explode] panel. Just click each option until you find which one works best, for example one splits them up into each individual polygon, another separates them but keeps them attached.
Once it's separate, you then simply move, scale and rotate it until it's covering the correct part of your texture.
Yes it really is that easy to texture.
Chapter 7: Animation
Chapter 7.1: Preparation
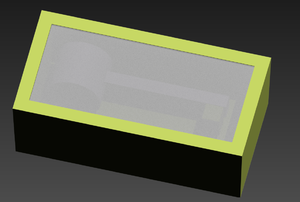
The model that I decided to create unfortunately doesn't require any animation so for this section of the tutorial I will give the very basics by doing an opening gear door.
Firstly for any animation you need to decide on the order of events for any animation and how long each part will take.
In my example it will go as follows.
Gear down
1. gear door opens - 4 seconds
2. Delay - 1 second
3. gear drops down - 5 seconds
Gear up
1. gear lifts up - 6 seconds
2. delay - 1 second
3. gear door closes 4 seconds
Now all animation is done with bones, This has the advantage of being able to use the same piece of software but stops any accidental damage to the model, which in some cases will have been worked on by another person.
In my example I have three objects:
1. Gear Door
2. Gear Housing
3. The gear itself
Chapter 7.2: Bones and Parenting
The easiest way to get your head around bones is to think of them as hinges.
For ease, I will be working on mine upside down.
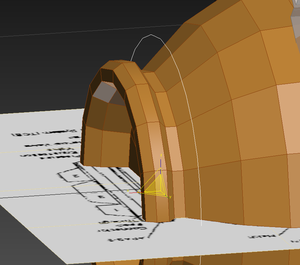
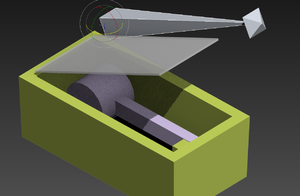
I start off by entering the [Systems] tab of the [CREATE] tab in the [MODIFIERS] stack. I select [BONES], To start the bone you click once, you don't click and drag for this. I click where the hinge would be and then extend the bone over the geometry in question. I then click once more and right click to finish.
You always want the extra little nub as this is useful for moving the bone. Note that you have to be in an orthographic view (Top, left, bottom etc.) to create bones.
Notice that the bone doesn't have to be on top of the geometry. I usually offset the bones to make it a bit easier when I'm working on one axis.
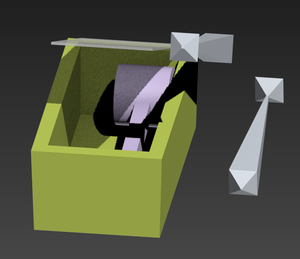
Once you've positioned your bone correctly you can then parent the object in question to it.
In the toolbar at the furthest left, there's a button labelled [Select and Link] click this and then click and drag from your geometry to the control bone.
Now moving the bone controls the geometry.
I do this for the wheels too so they also have a control bone
Chapter 7.3: Keyframe animation
Keyframe animation works by the animator setting how the geometry should look on specific frames and letting the computer work out the bits in between.
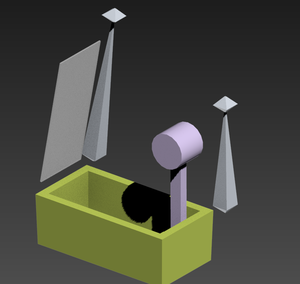
To start I set my initial state. This is the state that the scene starts at so in my case it's door closed, gear up.
I select my bones and click [Set Key] on the timeline at the bottom. A red border will appear on your screen.
If you're on the default, your timeline might not go up to the number of frames you need.
In this case click [Time Configuration] on the timeline and change the [End Time] to the total number of frames you'll need.
To set a key you can either press the [K] key, or click the key next to the [Set Key] button on the timeline.
Remember that setting a key will only effect the objects selected and any that are parented to it.
I setup my first keyframe, select the two bones and press [K]
I then go to my next event frame which in my case would be frame 96
I work this out by timing how many seconds the animation should do and multiplying it by 24 since i'm working at 24fps
I then set up the new state, make sure the bones are selected and press [K] again.
I continue like this until my animation is how I like it.
You can fine tune your animation by using the [Curve Editor] which can be accessed on the right click menu
Chapter 8: To Unity
Chapter 8.1: Setting up Unity
Firstly you'll need the following:
- Unity - Found at The Unity Website
- The current version Part Tools - Found in This thread
Once you've downloaded Unity and the Part tools you'll need to install them.
Unity has a GUI installer so that should be easy enough.
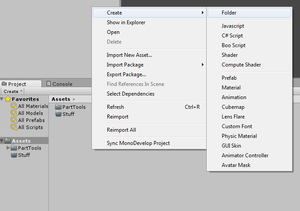
Then for the Part Tools, they need to be extracted into your Unity packages, which will probably be found at
C:\Program Files\Unity\Editor\Standard Packages\
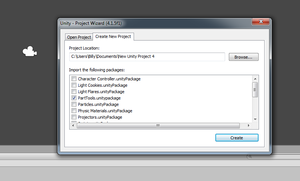
In Unity start a new project by going to [File] and [New Project]
Set a good project location and make sure to import the [PartTools.unitypackage]
Create a new GameObject by clicking [Create Empty] under the [GameObject] menu
At the right then click [Add Component], go down to [KSP] and then [PartTools]
This is the program that actually generates the .Mu file
Chapter 8.2: Importing your model
Out of Max you want to export as a .Dae Make sure that the scale factor under the [Units] section is equal to 1.0 Other tutorials talk about the [Unit Conversion] tab, Personally I've never had any issues with [Y-Up] Export it and then you can then drag this file to your asset bin in unity.
Once in unity, then drag it into your game object.
Assign any materials by first importing them to unity and then dragging them to the correct objects.
Make sure everything looks ok before moving onto meshes.
Chapter 8.3: Colision meshes
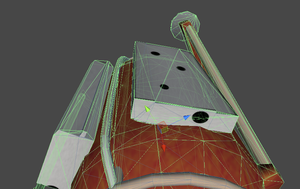
For your mesh coliders, this is where splitting up your model will come in exceptionally handy otherwise you may have to go back and do it again.
Select a part of your model in the left hand panel and then click [Add Component] go to [Physics] and [Mesh Collider]
Once it's been added it will appear on the right hand side of Unity. Make sure that Convex is selected and have a look at the green lines that have appeared on your mesh, these should line up with the geometry as best as possible. If they don't then you need to break up your model further.
Do this for all of your parts.
I opted to leave out the two rings so these will not have any kind of collision since it's designed for the stock 2M docking ports to fit nicely inside it.
Chapter 8.4: Unity Export
Once you've done everything above, you're ready to hand over your part to the kerbals to have their fun with it.
Click the [GameObject] on the left hand side and you'll see a component called a Part Tools (Script)
In this component, select where you want to export the .mu file to in the [File URL] Give your model a name (Remember linux can be fussy with case so keep it all lowercase) and finally:
Click [WRITE]
Chapter 9: Kerbals and CGFs
Chapter 9.1: CFGs
Now you will have a folder with a model file named whatever_you_named_your_model.mu, plus a couple of textures.
These are all ready to go into Kerbal Space Program so create a new folder in Kerbal Space Program\GameData\ with your name and inside that folder create another with the name Parts and a third with your part's name. You're all set bar one last thing.
You need a little file so that KSP knows what to do with your model, for this we have the CFG file
This will be an absolute BASIC .cfg File since I'm a modeller not a programmer.
There's details on how to create a CFG file: CFG File Documentation
CFG files are all different and they require their own tutorial so one will not be provided here..... mainly because I'm no good at creating them.
Chapter 9.2: Troubleshooting
Be sure to test your part out before any kind of release, the [Alt] + [F12] menu is very helpful in this situation.
Chapter 10: Finale
I hope you enjoyed this tutorial, any questions feel free to PM Bilsta1000 and I'll try and answer as best i can.
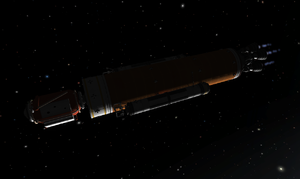
Once the model is finished we need to make sure it's working fine.
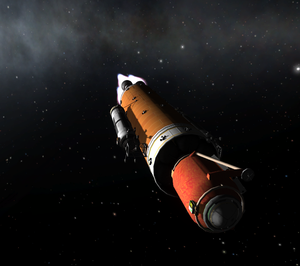
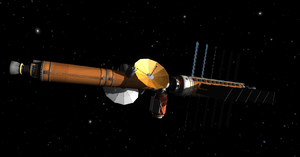
I built a quick rocket to get it to my thrown together space station and make sure all docking is fine.
