Difference between revisions of "Setting up MonoDevelop"
From Kerbal Space Program Wiki
m (Add KSPUtil.dll to the list of required resources.) |
(→Setting Up) |
||
| Line 21: | Line 21: | ||
# Click '''Project > Edit References''' and follow the steps below: | # Click '''Project > Edit References''' and follow the steps below: | ||
#* Click the .NET Assembly tab and use the navigation menu on the left to browse to your KSP installation folder. | #* Click the .NET Assembly tab and use the navigation menu on the left to browse to your KSP installation folder. | ||
| − | #* On Windows navigate to (<KSP_win>\KSP_Data\Managed) or on mac click "Browse..." and navigate to (/Users/<user>/Applications/ | + | #* On Windows navigate to (<KSP_win>\KSP_Data\Managed) or on mac click "Browse..." and navigate to (/Users/<user>/Applications/Steam/steamapps/common/Kerbal Space Program/KSP.app/Contents/Resources/Data/Managed). Note that the KSP.app folder will show as just "KSP" (without the .app) and you can't navigate into it. Instead, navigate into there in the Finder, then right click/ctrl-click on KSP, choose "Show Package Contents", continue to the Managed directory, then drag & drop '''Assembly-CSharp.dll''', '''KSPUtil.dll''' and '''UnityEngine.dll''' into the "Browse" dialog. |
#* Select '''Assembly-CSharp.dll''', '''KSPUtil.dll''' and '''UnityEngine.dll'''. More assemblies may be required depending on exactly which things your mod needs access to.[[File:MonoDevelop-Refs.png|thumb|right|Adding References]] | #* Select '''Assembly-CSharp.dll''', '''KSPUtil.dll''' and '''UnityEngine.dll'''. More assemblies may be required depending on exactly which things your mod needs access to.[[File:MonoDevelop-Refs.png|thumb|right|Adding References]] | ||
#* Press Add then Ok, they should now be visible under the "References" directory of your solution. | #* Press Add then Ok, they should now be visible under the "References" directory of your solution. | ||
Revision as of 12:16, 15 September 2016
MonoDevelop is an IDE primarily designed for C# and other .NET languages. It is also cross compatible, as in; it will run under windows as well as Mac OSX and Linux.
Prerequisites
- Microsoft Windows XP or above, Mac OS X, or any Linux distribution which supports Mono.
- .NET Framework 4.0
- GTK# for .NET 2.12.10
- Kerbal Space Program 0.14 X1 or above.
PCL assemblies for Linux systems
Linux systems may be missing the PCL assembly libraries, which will cause compilation to fail.
- .deb and .rpm based systems can follow the instructions on the Mono Project site to add the appropriate repository, and the package name is "referenceassemblies-pcl".
- Arch Linux users will need to get the package from the Arch User Repository (AUR), and are looking for the "mono-pcl" package.
Setting Up
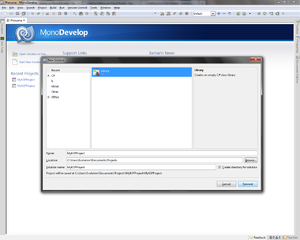
- Start a new solution either by selection "Start new solution" on the welcome screen or File > New > Solution...
- Select "Library" in the C# tree (Visible by default). Name it whatever you like. (We're using MyKSPProject for this tutorial. Click forward. Then Ok.
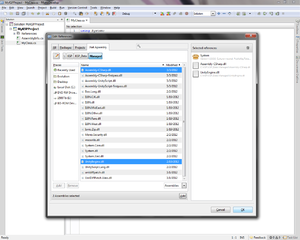
- Click Project > Edit References and follow the steps below:
- Click the .NET Assembly tab and use the navigation menu on the left to browse to your KSP installation folder.
- On Windows navigate to (<KSP_win>\KSP_Data\Managed) or on mac click "Browse..." and navigate to (/Users/<user>/Applications/Steam/steamapps/common/Kerbal Space Program/KSP.app/Contents/Resources/Data/Managed). Note that the KSP.app folder will show as just "KSP" (without the .app) and you can't navigate into it. Instead, navigate into there in the Finder, then right click/ctrl-click on KSP, choose "Show Package Contents", continue to the Managed directory, then drag & drop Assembly-CSharp.dll, KSPUtil.dll and UnityEngine.dll into the "Browse" dialog.
- Select Assembly-CSharp.dll, KSPUtil.dll and UnityEngine.dll. More assemblies may be required depending on exactly which things your mod needs access to.
- Press Add then Ok, they should now be visible under the "References" directory of your solution.
Great, you're all set! Now continue to creating your first module!

