Difference between revisions of "Tutorial: Apollo 11/ko"
Ysjbserver (talk | contribs) |
SlayerGames (talk | contribs) m (Moved to /ko categories) |
||
| (51 intermediate revisions by 3 users not shown) | |||
| Line 1: | Line 1: | ||
| − | [[Category:Tutorials]] | + | [[Category:Tutorials/ko]] |
| − | [[Category:Historical Spaceflights]] | + | [[Category:Historical Spaceflights/ko]] |
| − | {{Quote|나는 | + | {{Quote|나는 황홀하고 우리가 성공해서 매우 놀랐습니다. |닐 암스트롱|그가 달에 착륙하고 느낀 점의 설명}} <!-- no, I'm not going to quote "one small step" - that sentence is so overused it became meaningless. --> |
| − | + | 우리는 마침내 다른 천체의 첫 번째 유인 착륙을 할 것입니다. 이 임무 동안 우리의 도킹 및 EVA 노하우가 모두 필요합니다. [[Tutorial: Gemini 6A and 7/ko|제미니 6호와 7호]] 미션뿐만 아니라, 우리는 [[Tutorial: Luna 9/ko|루나 9호]] 미션에서 달 착륙에 대해서 배웠습니다. | |
| − | + | 아폴로 프로그램의 여섯 번의 달 착륙은 역사에 있는 다른 천체에 인간의 첫 번째이자 유일한 착륙입니다. 그것은 아마도 세계 역사상 가장 큰 엔지니어링 프로젝트였습니다. 40만 명 이상의 사람들이 프로젝트에 참여했습니다. 전체 비용은 250억 이상의 미국 달러로 추정됩니다(인플레이션을 막기 위한 오늘날 쓰여지는 미국 달러는 120억 달러입니다). 많은 사람들은 이를 단지 인간 우주 비행의 절정 뿐만이 아니라 인간 진화 자체의 절정으로 봅니다. 아폴로 프로그램은 우리가 기술적으로 우리의 지구를 떠나 다른 행성으로 이주할 수 있는 능력이 있다는 것을 보여주기 때문입니다. 슬프게도, 지구 궤도 외의 인간의 우주 비행은 지난 40년 동안 없었습니다. | |
| − | == | + | == 선체 구조 == |
| − | + | 이 임무를 위해 우리는 지금까지 만들어진 가장 크고 가장 강력한 로켓, 새턴 V를 다시 만들 겁니다. 이 로켓은 우주선 조립 건물의 천장에 닿을만큼 크기 때문에, 우리는 KSP에서 사용 가능한 전체 높이 제한을 전부 이용해야 합니다. | |
| − | + | 우리의 페이로드는 실제 아폴로 임무와 같이 사령선 및 기계선(CSM)과 거기에 도킹된 착륙선(LM)이 될 것입니다. 실제 아폴로 임무와 같이 시작할 때에는 착륙선을 기계선 뒤에 두지만, 비행 도중에 착륙선을 기계선 앞으로 이동시킬 것입니다. | |
[[File:Apollo-ground.jpg|right|185px|launch vessel]] | [[File:Apollo-ground.jpg|right|185px|launch vessel]] | ||
| − | * | + | * 사령선 |
| − | ** 1x [[Clamp-O-Tron Docking Port]] | + | ** 1x [[Clamp-O-Tron Docking Port/ko|Clamp-O-Tron Docking Port]] |
| − | ** 1x [[FL-R25 RCS Fuel Tank]] | + | ** 1x [[FL-R25 RCS Fuel Tank/ko|FL-R25 RCS Fuel Tank]] |
| − | ** 1x [[Mk1-2 Command Pod]] ( | + | ** 1x [[Mk1-2 Command Pod/ko|Mk1-2 Command Pod]] (1차 명령 모듈) |
| − | ** 2x [[Mk2-R Radial-Mount Parachute]] | + | ** 2x [[Mk2-R Radial-Mount Parachute/ko|Mk2-R Radial-Mount Parachute]] |
| − | * | + | * 기계선 |
| − | ** 1x [[Rockomax Brand Decoupler]] | + | ** 1x [[Rockomax Brand Decoupler/ko|Rockomax Brand Decoupler]] |
| − | ** 1x [[Rockomax X200-32 Fuel Tank]] | + | ** 1x [[Rockomax X200-32 Fuel Tank/ko|Rockomax X200-32 Fuel Tank]] |
| − | ** 4x [[RV-105 RCS Thruster Block]] ( | + | ** 4x [[RV-105 RCS Thruster Block/ko|RV-105 RCS Thruster Block]] (정확히 착륙선을 제외한 사령선/기계선의 질량 중심에 배치해야 합니다.) |
| − | ** 1x [[Rockomax "Poodle" Liquid Engine]] | + | ** 1x [[Rockomax "Poodle" Liquid Engine/ko|Rockomax "Poodle" Liquid Engine]] |
| − | * | + | * 착륙선 |
| − | ** 1x [[TR-2C Stack Separator]] | + | ** 1x [[TR-2C Stack Separator/ko|TR-2C Stack Separator]] |
| − | ** 1x [[Clamp-O-Tron Docking Port]] | + | ** 1x [[Clamp-O-Tron Docking Port/ko|Clamp-O-Tron Docking Port]] |
| − | ** 1x [[FL-R25 RCS Fuel Tank]] | + | ** 1x [[FL-R25 RCS Fuel Tank/ko|FL-R25 RCS Fuel Tank]] |
| − | ** 1x [[Mk2 Lander-can]] ( | + | ** 1x [[Mk2 Lander-can/ko|Mk2 Lander-can]] (2차 포드, 발사될때 무인이어야 합니다.) |
| − | ** 4x [[EAS-4 Strut Connector]] ( | + | ** 4x [[EAS-4 Strut Connector/ko|EAS-4 Strut Connector]] (Mk2 Lander-can과 기계선 연료 탱크 사이를 연결합니다. 해치를 방해하지 않도록 주의!) |
| − | ** 4x [[RV-105 RCS Thruster Block]] | + | ** 4x [[RV-105 RCS Thruster Block/ko|RV-105 RCS Thruster Block]] |
| − | ** 1x [[Rockomax X200-8 Fuel Tank]] | + | ** 1x [[Rockomax X200-8 Fuel Tank/ko|Rockomax X200-8 Fuel Tank]] |
| − | ** 1x [[Telus Mobility Enhancer]] ( | + | ** 1x [[Telus Mobility Enhancer/ko|Telus Mobility Enhancer]] (문 아래의 미니 사다리 아래에 배치) |
| − | ** 4x [[LT-2 Landing Strut]] | + | ** 4x [[LT-2 Landing Strut/ko|LT-2 Landing Strut]] |
| − | ** 1x [[LV-909 Liquid Fuel Engine]] | + | ** 1x [[LV-909 Liquid Fuel Engine/ko|LV-909 Liquid Fuel Engine]] |
| − | * | + | * 3단 |
| − | ** 1x [[TR-18A Stack Decoupler]] | + | ** 1x [[TR-18A Stack Decoupler/ko|TR-18A Stack Decoupler]] |
| − | ** 2x [[Rockomax X200-32 Fuel Tank]] | + | ** 2x [[Rockomax X200-32 Fuel Tank/ko|Rockomax X200-32 Fuel Tank]] |
| − | ** 4x [[EAS-4 Strut Connector]] ( | + | ** 4x [[EAS-4 Strut Connector/ko|EAS-4 Strut Connector]] (상단의 연료 탱크와 착륙선의 연료 탱크 사이) |
| − | ** 1x [[Rockomax "Mainsail" Liquid Engine]] | + | ** 1x [[Rockomax "Mainsail" Liquid Engine/ko|Rockomax "Mainsail" Liquid Engine]] |
| − | * | + | * 2단 |
| − | ** 1x [[Rockomax Brand Decoupler]] | + | ** 1x [[Rockomax Brand Decoupler/ko|Rockomax Brand Decoupler]] |
| − | ** 10x [[Rockomax X200-32 Fuel Tank]] ( | + | ** 10x [[Rockomax X200-32 Fuel Tank/ko|Rockomax X200-32 Fuel Tank]] (두 개씩 쌓아서 중앙에 하나, 둘레에 방사형으로 4개 장착) |
| − | ** 24x [[EAS-4 Strut Connector]] ( | + | ** 24x [[EAS-4 Strut Connector/ko|EAS-4 Strut Connector]] (바깥쪽 탱크끼리는 하나씩 수평으로 각각 연결하고 중앙 탱크와는 두 개씩 연결-그림 참고) |
| − | ** 4x [[Protective Rocket Nose Mk7]] | + | ** 4x [[Protective Rocket Nose Mk7/ko|Protective Rocket Nose Mk7]] |
| − | ** 4x [[EAS-4 Strut Connector]] ( | + | ** 4x [[EAS-4 Strut Connector/ko|EAS-4 Strut Connector]] (각각의 Protective Rocket Nose Mk7과 3단 하부의 연료 탱크를 각각 연결) |
| − | ** 4x [[RV-105 RCS Thruster Block]] ( | + | ** 4x [[RV-105 RCS Thruster Block/ko|RV-105 RCS Thruster Block]] (가능한 한 낮게 배치) |
| − | ** 5x [[Rockomax "Mainsail" Liquid Engine]] | + | ** 5x [[Rockomax "Mainsail" Liquid Engine/ko|Rockomax "Mainsail" Liquid Engine]] |
| − | * | + | * 1단 |
| − | ** 5x [[Rockomax Brand Decoupler]] | + | ** 5x [[Rockomax Brand Decoupler/ko|Rockomax Brand Decoupler]] |
| − | ** 15x [[Rockomax X200-32 Fuel Tank]] ( | + | ** 15x [[Rockomax X200-32 Fuel Tank/ko|Rockomax X200-32 Fuel Tank]] (세 개씩 쌓아서 중앙에 하나, 2단의 바깥쪽 4개에 각각 하나씩 붙여서 장착. '''절대로''' 1단 중앙에 붙여서 장착하지 않는다) |
| − | ** 36x [[EAS-4 Strut Connector]] ( | + | ** 36x [[EAS-4 Strut Connector/ko|EAS-4 Strut Connector]] (바깥쪽 탱크끼리는 하나씩 수평으로 각각 연결하고 중앙 탱크와는 두 개씩 연결-그림 참고) |
| − | ** 8x [[Standard Canard]] | + | ** 8x [[Standard Canard/ko|Standard Canard]] |
| − | ** 5x [[Rockomax "Mainsail" Liquid Engine]] | + | ** 5x [[Rockomax "Mainsail" Liquid Engine/ko|Rockomax "Mainsail" Liquid Engine]] |
| − | + | 마지막 다섯 엔진을 붙일 공간이 거의 없을 것입니다. 엔진들은 VAB의 바닥과 겹칠 것입니다. 하지만 걱정하지 마십시오. 발사대에 로켓을 세웠을 때, 엔진들은 땅 위에 나타날 것입니다. | |
| − | + | 모두 완료되면, 스테이지 구성을 다시 한번 확인하십시오. 기계선의 엔진이 작동한 다음에 착륙선의 엔진이 활성화되야합니다. | |
| − | == | + | == 임무 계획 == |
| − | + | === 전이궤도로 진입하기 === | |
| − | === | ||
[[File:Apollo-liftoff.jpg|right|150px|liftoff]] | [[File:Apollo-liftoff.jpg|right|150px|liftoff]] | ||
| − | + | 첫번째와 두번째 단을 사용하여 궤도에 진입하고 세번째 단으로 원형화합니다. 그리고 [[Tutorial: Luna 9/ko|루나 9호]] 미션에서 했던 것처럼 [[Mun/ko|문]] 전이 궤도를 형성합니다. 나중에 할 도킹을 위해 가능한 한 적은 양의 일원추진제를 사용하여야 합니다. 실수로 모든 추진제를 사용하지 않기 위해, 발사하기 전에 두 개의 탱크 중 하나를 비활성화해야 합니다(마우스 오른쪽 버튼으로 클릭 한 다음 녹색 화살표를 클릭해 금지 표시로 변경). | |
| − | + | 1단은 오직 카나드만으로 제어가 가능하고, 또한 - 엔진 짐벌 덕분에 - 1, 2단은 (엔진이) 켜져 있는 한 RCS 없이 조작이 가능하므로, 따라서 RCS는 엔진이 꺼져있는 동안 자세를 변경할 때만 필요합니다. | |
| − | + | 만약 현실성을 최고로 살리고 싶다면, [[Tutorial:Free Return Trajectory/ko|자동 귀환 궤도]]를 따라 가십시오. | |
| − | === | + | === 모듈들을 재구성 === |
[[File:Apollo-prepare-reorg.jpg|300px|preparing reorg]] | [[File:Apollo-prepare-reorg.jpg|300px|preparing reorg]] | ||
| − | + | 이제 미션의 까다로운 부분이 시작됩니다. 실제 아폴로 미션처럼 착륙선은 기계선의 엔진 바로 밑에 있습니다. 이 엔진을 사용하기 전에, 우리는 사령선의 반대쪽 끝에 착륙선을 둘 필요가 있습니다. | |
| − | # | + | # 3단을 분리하십시오. |
| − | # | + | # 우주선이 회전하지 않는지 확인하십시오. 't'를 눌러 멈출 수 있습니다. |
| − | # | + | # 착륙선과 사령선 모두 일원추진제가 있는지 확인하십시오. 필요하다면 일원추진체를 분배하십시오. |
| − | # | + | # 착륙선과 사령선 사이 도킹 포트를 분리하십시오 '''절대로 분리대(stack separator)를 사용하지 마십시오''' |
| − | # | + | # 사령선의 RCS 추력기로 조금만 앞으로 추진하고 1m 가량 전진한 뒤 RCS 추력기를 역방향으로 작동해 멈추십시오. |
| − | # | + | # 착륙선의 도킹 포트를 타겟으로 지정하십시오. |
| − | # | + | # 사령선을 정확히 180° 돌립니다. SAS 및 RCS 추력기를 끄고 작업하는 것이 좋습니다. 이 방법은 느리지만 RCS 추력기가 질량 중심에 정확히 위치하지 않을 경우 발생하는 불필요한 움직임을 막을 수 있습니다. |
| − | # | + | # 전방으로 추진해 착륙선의 맨 위에 있는 도킹 포트에 다시 도킹합니다. |
| − | # | + | # 분리대를 사용해서 서비스 모듈의 하단을 분리합니다. (그런데: 이 분리기의 유일한 기능은 엔진의 주위에 덮개를 막는 것이었습니다. 이것 없이는 엔진 주위 덮개가 착륙선의 도킹 포트를 가릴 것입니다.) |
[[File:Apollo-reorg.jpg|300px|after reorg]] | [[File:Apollo-reorg.jpg|300px|after reorg]] | ||
| − | === | + | == 착륙선으로 승무원 이동 == |
| − | |||
[[File:Apollo-eva.jpg|150px|right|crew transfer]] | [[File:Apollo-eva.jpg|150px|right|crew transfer]] | ||
| − | + | 실제 아폴로 미션동안 승무원들은 도킹 해치를 통해 착륙 모듈에 탑승할 수 있었습니다. 불행하게도 KSP의 현재 버전(0.23)으로는 가능하지 않습니다, 그래서 우리는 승무원을 탑승시키는 두 번의 EVA로 할 필요가 있습니다.첫번째 커발을 날려서 Lander-can에 도달해 들어갑니다. 그런 다음 두 번째 커발도 동일한 작업을 합니다. 세 번째 커발은 사령선에 남아서 문 궤도를 돌고 재도킹을 할 때 CSM을 작동합니다. | |
| − | === | + | === 문 공전궤도 진입 === |
| + | 문 주위 20킬로미터의 궤도를 형성하십시오. 가능한 한 윈형으로요. 그러면 재도킹을 할 때 쉬워질 것입니다. | ||
| − | + | === 착륙 === | |
| + | 당신은 이미 까다로운 부분을 완료한 상태입니다, 지금은 또 까다로운 부분이 시작됩니다. | ||
| − | = | + | # 착륙선의 도킹 포트를 클릭하고 "control from here"를 선택합니다. 그래서 당신은 분리 후 바로 착륙선를 제어할 수 있습니다. |
| + | # 착륙선의 도킹을 해제하십시오. | ||
| + | # 잊지 않도록 미리 랜딩 기어를 펴십시오. | ||
| + | # 역분사를 하여 커빈의 멋진 전망을 즐길 착륙 지역을 향하는 준 궤도를 만드십시오. (이 작업을 하는 동안 기계선에 돌진하는 일이 없어야 합니다) | ||
| + | # 10km의 고도까지 내려오기를 기다립니다. | ||
| + | # 당신은 루나 9호와 동일한 규칙을 따릅니다: 지면 속도=고도/100 이 되도록 가속하십시오. 당신의 착륙선은 RCS 추력기와 연료를 가지고 있지만, 당신은 그들없이 착륙을 수행해야 합니다. Lander-Can부터의 회전력만으로 충분한 정도를 넘습니다. 추력기는 나중에 사령선과 재도킹을 할 때 필요합니다. | ||
| + | # 가능 한 한 수직으로 내려갑니다. 우리의 랜딩 기어는 최대 12m/s의의 충격을 견딜 수 있지만, 안전 허용치를 줘서 그보다 느린 속도를 유지해야 합니다. | ||
| + | # 지상에 주저앉도록 합니다. | ||
| + | # 이제 다시 숨을 쉬어도 됩니다. | ||
| − | + | 축하합니다. 이글은 착륙하였습니다. | |
| − | |||
| − | |||
| − | |||
| − | |||
| − | |||
| − | |||
| − | |||
| − | |||
| − | |||
| − | |||
| − | |||
| − | |||
[[File:Apollo-landed.jpg|200px|successful landing]] | [[File:Apollo-landed.jpg|200px|successful landing]] | ||
| − | + | 이제 착륙선에서 커발을 나오게 하고, 뭔가 작은 걸음과 큰 도약에 대한 인용할만한 말을 한 뒤, 땅으로 점프하십시요. 깃발을 꽃고, 미래 세대들을 위해 스크린샷과 동영상을 찍고, 확실히 알맞게 이름이 적혀 있는지 확인하십시오. 어딘가 다른 우주 기관에서 그랬던 것처럼 실수로 테이프를 덮어쓰지 않도록요.<ref>http://en.wikipedia.org/wiki/Apollo_11_missing_tapes</ref> | |
[[File:Apollo-small-step.jpg|200px|successful landing]] [[File:Apollo-posing.jpg|200px|successful landing]] [[File:Apollo-looking-at-kerbin.jpg|200px|successful landing]] | [[File:Apollo-small-step.jpg|200px|successful landing]] [[File:Apollo-posing.jpg|200px|successful landing]] [[File:Apollo-looking-at-kerbin.jpg|200px|successful landing]] | ||
| − | === | + | === 이륙과 재도킹 === |
| − | + | 착륙 지역을 탐험한 후, 이제 집에 귀환하는 시간입니다. 승무원을 착륙선으로 데려오고 사다리를 다시 접으십시오. 기계선의 위치를 확인하고 수평선에 나타날 때까지 기다립니다. 그리고 발사합니다. | |
| − | |||
[[File:Apollo-moon-start.jpg|200px|start from surface]] | [[File:Apollo-moon-start.jpg|200px|start from surface]] | ||
| − | + | 커빈과 달리 문은 대기가 없기 때문에 출발이 상당히 쉬워집니다. 수직으로 발사할 필요가 없고, 대기권 밖에서 궤도 속도를 수정할 필요가 없습니다. 언덕이나 분화구의 벽과 충돌하지 않도록 충분한 높이까지 올라간 뒤에는 동쪽이나 서쪽 어느 방향이든(기계선의 궤도 방향에 따라) 택할 수 있습니다. 네비볼의 노란색 마커가 항상 수평선 위에 유지되기만 하면 됩니다. 사령선과 동일한 궤도로 가서 제미니 튜토리얼에서 했던 것처럼 도킹을 수행합니다. | |
[[File:Apollo-redock.jpg|300px|redocking in orbit]] | [[File:Apollo-redock.jpg|300px|redocking in orbit]] | ||
| − | === | + | === 커빈 귀환 === |
[[File:Apollo-reentry.jpg|right|300px|reentry]] | [[File:Apollo-reentry.jpg|right|300px|reentry]] | ||
| − | + | 다시 착륙선에서 사령선으로 두 커발을 바로 옮깁니다. 그리고 착륙선을 버립니다. 사령선의 남은 연료를 사용해 문이 커빈 주위를 도는 궤도에 역행하는 방향으로 문 궤도를 떠납니다. 문 주위의 궤도 방향이 순행 때(90도, 시계 반대 방향)는 커빈에서 가장 가까울 때 가속합니다. 역행일 때(270도, 시계 방향)는 커빈에 대해 정면에 있을 때 가속합니다. 궤도가 커빈에 닿을 때까지 가속하십시오. | |
| − | + | 커빈의 대기권에 진입할 때까지 기다린 후, 기계선을 버리고, 사령선의 낙하산을 전개하고, 바다에 부드럽게 떨어집니다. 미션 성공입니다! | |
[[File:Apollo-splashdown.jpg|300px|splashdown]] | [[File:Apollo-splashdown.jpg|300px|splashdown]] | ||
| − | == | + | == 이번에는? == |
| − | + | 이 우주선으로 재미있는 일을 좀 더 하고 싶다면, 당신은 "성공적인 실패" 라고 불려지는 아폴로 13호를 재현해 볼 수 있습니다. 아폴로 13호의 임무 중에 기계선은 고장으로 사용할 수 없게 되었고, 승무원들은 달에 착륙하려는 계획을 취소해, 착륙선의 로켓 연료를 사용하여 지구로 돌아갔습니다. | |
| − | + | 사령선의 꼭대기에 착륙선을 붙이고 정상적인 임무를 수행하십시오. 그 다음 "사고로" 사령선과 기계선 간의 분리대를 사용합니다. 착륙선의 추력기와 연료만을 사용하여 사령선과 착륙선으로 커빈에 귀환해야 합니다. | |
| − | == | + | == 참조 == |
<references/> | <references/> | ||
Latest revision as of 18:48, 2 May 2019
| “ | 나는 황홀하고 우리가 성공해서 매우 놀랐습니다. — 닐 암스트롱, 그가 달에 착륙하고 느낀 점의 설명 |
” |
우리는 마침내 다른 천체의 첫 번째 유인 착륙을 할 것입니다. 이 임무 동안 우리의 도킹 및 EVA 노하우가 모두 필요합니다. 제미니 6호와 7호 미션뿐만 아니라, 우리는 루나 9호 미션에서 달 착륙에 대해서 배웠습니다.
아폴로 프로그램의 여섯 번의 달 착륙은 역사에 있는 다른 천체에 인간의 첫 번째이자 유일한 착륙입니다. 그것은 아마도 세계 역사상 가장 큰 엔지니어링 프로젝트였습니다. 40만 명 이상의 사람들이 프로젝트에 참여했습니다. 전체 비용은 250억 이상의 미국 달러로 추정됩니다(인플레이션을 막기 위한 오늘날 쓰여지는 미국 달러는 120억 달러입니다). 많은 사람들은 이를 단지 인간 우주 비행의 절정 뿐만이 아니라 인간 진화 자체의 절정으로 봅니다. 아폴로 프로그램은 우리가 기술적으로 우리의 지구를 떠나 다른 행성으로 이주할 수 있는 능력이 있다는 것을 보여주기 때문입니다. 슬프게도, 지구 궤도 외의 인간의 우주 비행은 지난 40년 동안 없었습니다.
Contents
선체 구조
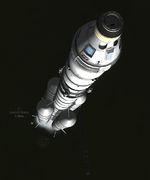
이 임무를 위해 우리는 지금까지 만들어진 가장 크고 가장 강력한 로켓, 새턴 V를 다시 만들 겁니다. 이 로켓은 우주선 조립 건물의 천장에 닿을만큼 크기 때문에, 우리는 KSP에서 사용 가능한 전체 높이 제한을 전부 이용해야 합니다.
우리의 페이로드는 실제 아폴로 임무와 같이 사령선 및 기계선(CSM)과 거기에 도킹된 착륙선(LM)이 될 것입니다. 실제 아폴로 임무와 같이 시작할 때에는 착륙선을 기계선 뒤에 두지만, 비행 도중에 착륙선을 기계선 앞으로 이동시킬 것입니다.
- 사령선
- 1x Clamp-O-Tron Docking Port
- 1x FL-R25 RCS Fuel Tank
- 1x Mk1-2 Command Pod (1차 명령 모듈)
- 2x Mk2-R Radial-Mount Parachute
- 기계선
- 1x Rockomax Brand Decoupler
- 1x Rockomax X200-32 Fuel Tank
- 4x RV-105 RCS Thruster Block (정확히 착륙선을 제외한 사령선/기계선의 질량 중심에 배치해야 합니다.)
- 1x Rockomax "Poodle" Liquid Engine
- 착륙선
- 1x TR-2C Stack Separator
- 1x Clamp-O-Tron Docking Port
- 1x FL-R25 RCS Fuel Tank
- 1x Mk2 Lander-can (2차 포드, 발사될때 무인이어야 합니다.)
- 4x EAS-4 Strut Connector (Mk2 Lander-can과 기계선 연료 탱크 사이를 연결합니다. 해치를 방해하지 않도록 주의!)
- 4x RV-105 RCS Thruster Block
- 1x Rockomax X200-8 Fuel Tank
- 1x Telus Mobility Enhancer (문 아래의 미니 사다리 아래에 배치)
- 4x LT-2 Landing Strut
- 1x LV-909 Liquid Fuel Engine
- 3단
- 1x TR-18A Stack Decoupler
- 2x Rockomax X200-32 Fuel Tank
- 4x EAS-4 Strut Connector (상단의 연료 탱크와 착륙선의 연료 탱크 사이)
- 1x Rockomax "Mainsail" Liquid Engine
- 2단
- 1x Rockomax Brand Decoupler
- 10x Rockomax X200-32 Fuel Tank (두 개씩 쌓아서 중앙에 하나, 둘레에 방사형으로 4개 장착)
- 24x EAS-4 Strut Connector (바깥쪽 탱크끼리는 하나씩 수평으로 각각 연결하고 중앙 탱크와는 두 개씩 연결-그림 참고)
- 4x Protective Rocket Nose Mk7
- 4x EAS-4 Strut Connector (각각의 Protective Rocket Nose Mk7과 3단 하부의 연료 탱크를 각각 연결)
- 4x RV-105 RCS Thruster Block (가능한 한 낮게 배치)
- 5x Rockomax "Mainsail" Liquid Engine
- 1단
- 5x Rockomax Brand Decoupler
- 15x Rockomax X200-32 Fuel Tank (세 개씩 쌓아서 중앙에 하나, 2단의 바깥쪽 4개에 각각 하나씩 붙여서 장착. 절대로 1단 중앙에 붙여서 장착하지 않는다)
- 36x EAS-4 Strut Connector (바깥쪽 탱크끼리는 하나씩 수평으로 각각 연결하고 중앙 탱크와는 두 개씩 연결-그림 참고)
- 8x Standard Canard
- 5x Rockomax "Mainsail" Liquid Engine
마지막 다섯 엔진을 붙일 공간이 거의 없을 것입니다. 엔진들은 VAB의 바닥과 겹칠 것입니다. 하지만 걱정하지 마십시오. 발사대에 로켓을 세웠을 때, 엔진들은 땅 위에 나타날 것입니다.
모두 완료되면, 스테이지 구성을 다시 한번 확인하십시오. 기계선의 엔진이 작동한 다음에 착륙선의 엔진이 활성화되야합니다.
임무 계획
전이궤도로 진입하기
첫번째와 두번째 단을 사용하여 궤도에 진입하고 세번째 단으로 원형화합니다. 그리고 루나 9호 미션에서 했던 것처럼 문 전이 궤도를 형성합니다. 나중에 할 도킹을 위해 가능한 한 적은 양의 일원추진제를 사용하여야 합니다. 실수로 모든 추진제를 사용하지 않기 위해, 발사하기 전에 두 개의 탱크 중 하나를 비활성화해야 합니다(마우스 오른쪽 버튼으로 클릭 한 다음 녹색 화살표를 클릭해 금지 표시로 변경).
1단은 오직 카나드만으로 제어가 가능하고, 또한 - 엔진 짐벌 덕분에 - 1, 2단은 (엔진이) 켜져 있는 한 RCS 없이 조작이 가능하므로, 따라서 RCS는 엔진이 꺼져있는 동안 자세를 변경할 때만 필요합니다.
만약 현실성을 최고로 살리고 싶다면, 자동 귀환 궤도를 따라 가십시오.
모듈들을 재구성
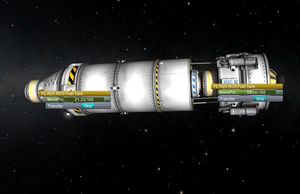
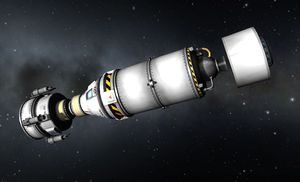
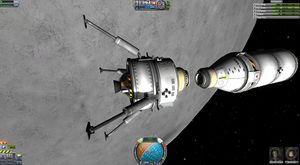
이제 미션의 까다로운 부분이 시작됩니다. 실제 아폴로 미션처럼 착륙선은 기계선의 엔진 바로 밑에 있습니다. 이 엔진을 사용하기 전에, 우리는 사령선의 반대쪽 끝에 착륙선을 둘 필요가 있습니다.
- 3단을 분리하십시오.
- 우주선이 회전하지 않는지 확인하십시오. 't'를 눌러 멈출 수 있습니다.
- 착륙선과 사령선 모두 일원추진제가 있는지 확인하십시오. 필요하다면 일원추진체를 분배하십시오.
- 착륙선과 사령선 사이 도킹 포트를 분리하십시오 절대로 분리대(stack separator)를 사용하지 마십시오
- 사령선의 RCS 추력기로 조금만 앞으로 추진하고 1m 가량 전진한 뒤 RCS 추력기를 역방향으로 작동해 멈추십시오.
- 착륙선의 도킹 포트를 타겟으로 지정하십시오.
- 사령선을 정확히 180° 돌립니다. SAS 및 RCS 추력기를 끄고 작업하는 것이 좋습니다. 이 방법은 느리지만 RCS 추력기가 질량 중심에 정확히 위치하지 않을 경우 발생하는 불필요한 움직임을 막을 수 있습니다.
- 전방으로 추진해 착륙선의 맨 위에 있는 도킹 포트에 다시 도킹합니다.
- 분리대를 사용해서 서비스 모듈의 하단을 분리합니다. (그런데: 이 분리기의 유일한 기능은 엔진의 주위에 덮개를 막는 것이었습니다. 이것 없이는 엔진 주위 덮개가 착륙선의 도킹 포트를 가릴 것입니다.)
착륙선으로 승무원 이동
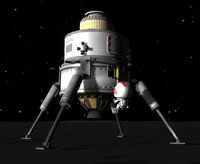
실제 아폴로 미션동안 승무원들은 도킹 해치를 통해 착륙 모듈에 탑승할 수 있었습니다. 불행하게도 KSP의 현재 버전(0.23)으로는 가능하지 않습니다, 그래서 우리는 승무원을 탑승시키는 두 번의 EVA로 할 필요가 있습니다.첫번째 커발을 날려서 Lander-can에 도달해 들어갑니다. 그런 다음 두 번째 커발도 동일한 작업을 합니다. 세 번째 커발은 사령선에 남아서 문 궤도를 돌고 재도킹을 할 때 CSM을 작동합니다.
문 공전궤도 진입
문 주위 20킬로미터의 궤도를 형성하십시오. 가능한 한 윈형으로요. 그러면 재도킹을 할 때 쉬워질 것입니다.
착륙
당신은 이미 까다로운 부분을 완료한 상태입니다, 지금은 또 까다로운 부분이 시작됩니다.
- 착륙선의 도킹 포트를 클릭하고 "control from here"를 선택합니다. 그래서 당신은 분리 후 바로 착륙선를 제어할 수 있습니다.
- 착륙선의 도킹을 해제하십시오.
- 잊지 않도록 미리 랜딩 기어를 펴십시오.
- 역분사를 하여 커빈의 멋진 전망을 즐길 착륙 지역을 향하는 준 궤도를 만드십시오. (이 작업을 하는 동안 기계선에 돌진하는 일이 없어야 합니다)
- 10km의 고도까지 내려오기를 기다립니다.
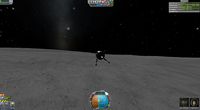
- 당신은 루나 9호와 동일한 규칙을 따릅니다: 지면 속도=고도/100 이 되도록 가속하십시오. 당신의 착륙선은 RCS 추력기와 연료를 가지고 있지만, 당신은 그들없이 착륙을 수행해야 합니다. Lander-Can부터의 회전력만으로 충분한 정도를 넘습니다. 추력기는 나중에 사령선과 재도킹을 할 때 필요합니다.
- 가능 한 한 수직으로 내려갑니다. 우리의 랜딩 기어는 최대 12m/s의의 충격을 견딜 수 있지만, 안전 허용치를 줘서 그보다 느린 속도를 유지해야 합니다.
- 지상에 주저앉도록 합니다.
- 이제 다시 숨을 쉬어도 됩니다.
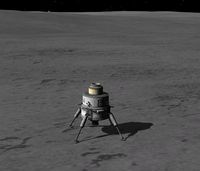
축하합니다. 이글은 착륙하였습니다.
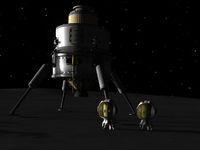
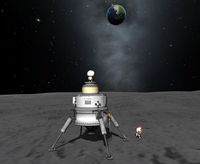
이제 착륙선에서 커발을 나오게 하고, 뭔가 작은 걸음과 큰 도약에 대한 인용할만한 말을 한 뒤, 땅으로 점프하십시요. 깃발을 꽃고, 미래 세대들을 위해 스크린샷과 동영상을 찍고, 확실히 알맞게 이름이 적혀 있는지 확인하십시오. 어딘가 다른 우주 기관에서 그랬던 것처럼 실수로 테이프를 덮어쓰지 않도록요.[1]
이륙과 재도킹
착륙 지역을 탐험한 후, 이제 집에 귀환하는 시간입니다. 승무원을 착륙선으로 데려오고 사다리를 다시 접으십시오. 기계선의 위치를 확인하고 수평선에 나타날 때까지 기다립니다. 그리고 발사합니다.
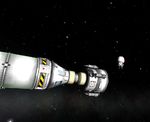
커빈과 달리 문은 대기가 없기 때문에 출발이 상당히 쉬워집니다. 수직으로 발사할 필요가 없고, 대기권 밖에서 궤도 속도를 수정할 필요가 없습니다. 언덕이나 분화구의 벽과 충돌하지 않도록 충분한 높이까지 올라간 뒤에는 동쪽이나 서쪽 어느 방향이든(기계선의 궤도 방향에 따라) 택할 수 있습니다. 네비볼의 노란색 마커가 항상 수평선 위에 유지되기만 하면 됩니다. 사령선과 동일한 궤도로 가서 제미니 튜토리얼에서 했던 것처럼 도킹을 수행합니다.
커빈 귀환
다시 착륙선에서 사령선으로 두 커발을 바로 옮깁니다. 그리고 착륙선을 버립니다. 사령선의 남은 연료를 사용해 문이 커빈 주위를 도는 궤도에 역행하는 방향으로 문 궤도를 떠납니다. 문 주위의 궤도 방향이 순행 때(90도, 시계 반대 방향)는 커빈에서 가장 가까울 때 가속합니다. 역행일 때(270도, 시계 방향)는 커빈에 대해 정면에 있을 때 가속합니다. 궤도가 커빈에 닿을 때까지 가속하십시오.
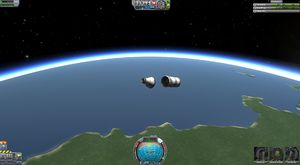
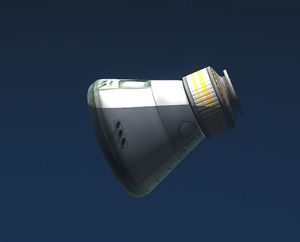
커빈의 대기권에 진입할 때까지 기다린 후, 기계선을 버리고, 사령선의 낙하산을 전개하고, 바다에 부드럽게 떨어집니다. 미션 성공입니다!
이번에는?
이 우주선으로 재미있는 일을 좀 더 하고 싶다면, 당신은 "성공적인 실패" 라고 불려지는 아폴로 13호를 재현해 볼 수 있습니다. 아폴로 13호의 임무 중에 기계선은 고장으로 사용할 수 없게 되었고, 승무원들은 달에 착륙하려는 계획을 취소해, 착륙선의 로켓 연료를 사용하여 지구로 돌아갔습니다.
사령선의 꼭대기에 착륙선을 붙이고 정상적인 임무를 수행하십시오. 그 다음 "사고로" 사령선과 기계선 간의 분리대를 사용합니다. 착륙선의 추력기와 연료만을 사용하여 사령선과 착륙선으로 커빈에 귀환해야 합니다.

