Tutorial:LF Laythe
Thanks for reading this "Let's Fly!" tutorial for help in getting you to Laythe, the first moon in the Jool system! This guide assumes that you have a basic knowledge of orbital terms and how to fly a spaceship (including use of the maneuver nodes), but not much else. Of course, if you're more advanced, you could always learn a thing or two anyway! The point of the "Let's Fly!" series of tutorials is to be as thorough as possible, and as such, you may have a firm handle on some of this information. Also, please keep in mind that this is just one of many ways to get to Laythe, so feel free to pick and choose information as you find necessary.
Contents
Why Travel to Laythe?
Laythe is the innermost moon in the Jool system. With a similar size and gravity well as Kerbin, as well as liquid water and an atmosphere with comparable pressure and composition, it is naturally a desirable location for the Kerbals to colonize the outer reaches of the system.
Specifications
- Length: 1-3 hours
- Difficulty: Moderate
- For version: 0.18 or above
This tutorial will help you to put a satellite onto the surface (or oceans) of Laythe with the aid of parachutes. To land with fuel and a rocket, as well as picking a more precise landing location or planning a return trip, is entirely possible and is a natural next step after completing this tutorial.
Steps
Step 1 - The Rocket
Depending upon your skill with transferring to other planets, course correction, and aerobraking, a fairly large rocket will be needed for this trip. I've described below the rocket design that I use for most every interplanetary mission. It generally has plenty of excess delta-V by the time I reach my destination, but it's nice to know that I don't have to be precise with each maneuver. There are many different types of rockets and designs that can get you to Laythe (and back!), so feel free to skip this section if you're comfortable with rocket design.
Lower Stage
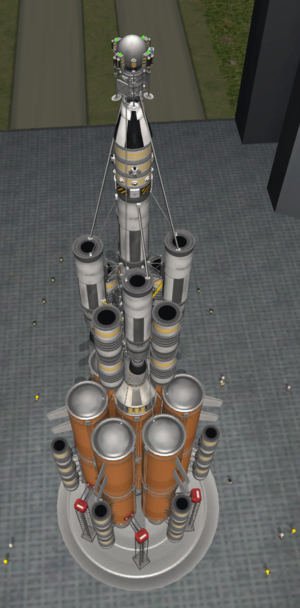
This stage consists of a two-tall center column of Rockomax Jumbo-64 Fuel Tanks with a Mainsail engine at the bottom. From there, radially attach six more two-tall columns of Rockomax Jumbo-64 Fuel Tank with Mainsail engines at the bottom of each also. You can play around with staging these fuel columns if you like, but I don't find it necessary.
Next, each outer Rockomax Jumbo-64 Fuel Tank column gets three Radial Decouplers vertically up the bottom half of the column. On each of these, place a small Solid Fuel Booster (for a total of 18 around the entire rocket). Stage the Mainsails with the bottom six small Solid Fuel Boosters to fire upon launch (don't forget the Stability Enhancers!) The next stage should consist of the Radial Decouplers for the bottom set of small Solid Fuel Boosters (SRBs), as well as the middle set of SRBs themselves. Likewise for the last set of SRBs, and finally another stage that separates the final Decouplers on the third set of SRBs.
I generally place two AV-R8 Winglets towards the top of each Rockomax Jumbo-64 Fuel Tank, as well as various RCS ports around the bottom of the assembly.
Upper Stage
This stage contains the rest of the fuel you should need for the trip to Laythe. Above the center of the Lower Stage is a three-tall column of FL-T800 Fuel Tanks with an LV-N Nuclear Engine at the bottom. Above the fuel tanks are an Advanced S.A.S Module and three small RCS Tanks. Attached to the center FL-T800 Fuel Tank are four Radial Decouplers, each with one FL-T800 fuel tank that has been linked to the center column via a Fuel Duct. At the bottom of each are an LV-N Nuclear Engine. Between these four fuel columns are two levels of four small Solid Fuel Boosters attached and staged to the middle FL-T800 fuel tank with staging similar to that of the lower stage. It's important to remember to keep the five LV-N Nuclear Engines on an earlier stage than the bottom four Solid Fuel Boosters. These small SRBs are useful for circularizing a Kerbin orbit or for assisting with the transfer to Jool.
On top of this upper stage is the payload. For this mission, a simple satellite core with Science Instruments, a Small Engine, two Small Fuel Tanks, some Batteries, Solar Panels, and of course, a Parachute were chosen. Don't forget the Stack Decoupler!
Step 2 - The Launch
Once you have a rocket designed, let's launch it!
Planetary Alignment
It's important to make sure that Kerbin and Jool are in the proper alignment relative to each other. A handy way to find the correct alignment is by visiting The Interplanetary Guide and Calculator. For the purposes of this guide, all we care about is the Phase Angle and not the Ejection Angle. A quick way to make sure the planets are in alignment are by visiting the Orbital Map screen. With Kerbin at the 3:00 position in its orbit around the Sun, Jool should be at about 11:45. With your rocket on the launchpad and the game on the Orbital Map screen, warp at full speed until the planets are correctly aligned.
Blast-off!
Once Kerbin and Jool are aligned properly, it's time to launch! There are several different ways to launch, which will be discussed in an upcoming "Let's Fly!" tutorial. However, for this mission, let's choose a bit of an unconventional option. While it's not quite as efficient as an eastward facing launch, it doesn't require much additional delta-V and is very simple to master. Wait until the launchpad is facing in the prograde direction of Kerbin's orbit. In other words, if you are on the Map screen looking at the Solar System with Kerbin at the 3:00 position, zoom into Kerbin and wait until the launchpad is on the upper side of Kerbin. It should be right around sunrise on the ground at this point. Once your rocket is facing towards Kerbin's prograde direction, launch straight up. Do not perform a gravity turn. This launch requires only that you point straight up for the entire time that the rocket is in Kerbin's Sphere of Influence.
Step 3 - The Transfer to Jool
The goal here is to raise your Solar apoapsis to the same height as Jool's orbit. After you've launched your rocket and are gaining altitude and velocity, keep checking with your Map screen. Eventually, after a while of continuous burning (remember, no gravity turn!), your spacecraft's orbit will have you leaving Kerbin's Sphere of Influence. Zoom out on the Map screen to see the whole Solar System. Don't stop firing your rockets! You'll find that your Solar periapsis remains at the same height as Kerbin's orbit, but your Solar apoapsis is rising. Keep burning until your apoapsis is at the same height as Jool's orbit. Make sure to click on Jool in the Map screen and select it as your target. If your planetary alignment was correct when you launched your rocket, you should see that you have a Jool intercept point. If not, try adding a maneuver node as soon as you exit Kerbin's Sphere of Influence and play a bit with the green and blue handles to get the intersection points as close as possible.
Match Jool's Inclination
Somewhere between your exit from Kerbin and your approach to Jool, you should pass either an AN (Ascending Node) or DN (Descending Node) if you have Jool selected as your target. Create a maneuver node at that point. If it is an AN, pull on the bottom purple handle of the maneuver node, and if it is a DN, pull on the top purple handle of the node, until your orbit intersects Jool's orbit at the same angle. Play around with the camera angle in the Map screen so that you get a better view of what this maneuver node is doing. You can also play around with the green and blue handles (just small adjustments are needed, nothing major) and watch your planned Jool periapsis point shrink or grow. Try to get this as small as you can.
Orbital Adjustments
As you approach your Jool intercept, try adding maneuver nodes at different points to get your Jool periapsis to as small as possible. Large changes in your direction should not be necessary here, but don't worry, trial and error is your friend! If you perform a maneuver and overshoot, just face the opposite direction and fire your engines again.
Protip: It's very important that your orbit's inclination match Jool's at Jool's periapsis. Use small maneuvers to get this as close as possible!
Step 4 - The Approach to Jool
Eventually, you'll come to Jool's Sphere of Influence. If you've made it this far, congratulations!
Course Corrections
As soon as you enter Jool's Sphere of Influence, set up a maneuver node close to your spaceship. At this point, you have two very important goals.
- Fix your angle of attack so that you orbit Jool as close to the equator as possible.
- Reduce your Jool periapsis in order to aerobrake.
Both of these can be accomplished with the same maneuver node, but you may find it easier to break it up into two different maneuvers. The first maneuver should be focused on fixing your angle of attack. Depending on what angle you are coming into the Jool system on, any combination of the node knobs may be needed (though if you've been able to follow this guide, you shouldn't need a lot of adjusting). Your goal here is for your Jool periapsis to be as close to Jool's equator as possible. Another important note: you want to make sure that your path has your Jool periapsis on the right side of the planet as you approach it so that you end up orbiting Jool counter-clockwise when viewed from the top (like a standard orbit around Kerbin). Adjust the knobs until it looks as though your orbit near Jool is as flat as possible.
After you've performed the burn maneuver needed to get a good angle of attack, set up another maneuver node close to your spaceship. This time, the goal is to lower (or raise) your periapsis to between 119,500 and 120,000 meters. This can generally be done with the blue knobs. When you burn your engines for this node, remember patience, as it doesn't take much power to make a big change to your periapsis.
Protip: If you have a Laythe encounter (or any other moon for that matter) at a point in your path at any time that is not at your Jool apoapsis, do not attempt to get into that moon's orbit! Unless you have some serious excess fuel or have some experience with aerobraking, you will be moving too fast to be captured by the moon. Be patient, you'll be there soon!
Aerobraking
Once that burn is finished, you can warp forward until a few minutes before Jool periapsis. Be careful not to warp too fast, as your ship speeds up greatly as it approaches Jool and periapsis may take you by surprise. It's more than likely unnecessary, but I always feel more comfortable retracting any extended solar panels during an aerobrake maneuver (just remember to deploy them when you are done!) so that they don't break off in the atmosphere. As you approach periapsis, you should notice your Jool Escape point on the Map screen changing. It should begin curving back toward Jool, and eventually, it should create an orbit around Jool. Your goal is to have your Jool apoapsis as close to Laythe's orbit as possible. If you've left Jool's atmosphere and your apoapsis is too high or low, perform a burn in the retrograde or prograde direction.
Jool Orbit
Set Laythe as your target. Adjust your inclination at an AN or DN (as you did with Jool earlier). If you do not intercept Laythe on your first apoapsis after your Jool aerobrake (and you probably won't), don't forget to raise your Jool periapsis so that you are no longer aerobraking (200,000 meters is a good safe number). At this point, getting in to a Laythe orbit is very similar to getting into a Mün orbit from Kerbin orbit. Just keep orbiting Jool until you have a Laythe encounter. If you have some extra fuel and some knowledge of orbital maneuvers, you can try to speed the process up. Otherwise, just have a little patience, and you will eventually get a Laythe orbit.
Protip: It may be possible to get stuck in an Orbital Resonance with Laythe, depending on your periapsis. If you have gone around Jool 10-20 times or more and have not gotten a Laythe encounter, try raising your periapsis some (not much is needed here) by burning prograde at your apoapsis.
Step 5 - The Laythe Transfer
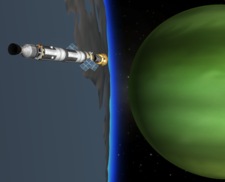
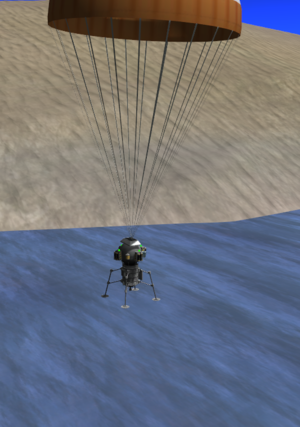
Once you enter Laythe's Sphere of Influence, wait until you reach Laythe periapsis and burn retrograde until you have an orbit around the moon. If you're feeling adventurous (or low on fuel), try aerobraking here as well. Congrats, you've made it into Laythe orbit! From this point, you can stay in Laythe orbit, though if you packed a parachute, you should put it to good use! Keep in mind that Laythe's atmosphere is not as thick as Kerbin's, so if you have only one parachute, you won't be able to land much more than a light probe or single capsule unless you also have rockets to help slow your descent. Try to time your re-entry to land your ship on one of Laythe's many small islands.
Closing Thoughts
Any thoughts you'd like to share? Feel free to use the discussion button!


