Tutorial: Gemini 6A and 7
| “ | Space is big. You just won't believe how vastly, hugely, mind- bogglingly big it is. I mean, you may think it's a long way down the road to the chemist's, but that's just peanuts to space. — Douglas Adams, The Hitchhiker's Guide to the Galaxy |
” |
While the NASA was planning the moon landing they soon realized that landing on the moon with all the fuel required for getting back to earth would be impossible. The lander would have been extremely heavy making the landing both wasteful and dangerous. To solve this problem they decided that as soon as they were in moon orbit they would decouple the lander from the command module, land it on the moon, launch it back into moon orbit and redock the two vessels. This, however, required a rendevouz and docking in orbit - something never attempted before. Nobody knew if this was going to work. And in case of a failure, the landing crew would have been stranded on the moon and unable to return to earth.
So they decided that it would be much more wise to practice orbital rendevouz and docking in the (relative) safety of low-earth orbit before attempting to do the same in moon orbit. To do this the Gemini program was started.
In this tutorial we will re-enact the flights of Gemini 7 and Gemini 6A, the first time in history where two manned vessels docked in space. We are also going to do an EVA - we will let a Kerbal exit the vessel, fly around it using his jetpack, and get back into it.
Contents
Ship design
The Gemini capsule was housing a crew of two, so we will use the Mk2 Lander-can as control pod. Just like the original Gemini capsules, our capsules will be powered solely by monopropellant when in orbit. That's why we will take the large-diameter monopropellant fuel tank.
This time we will add a S.A.S. Module to our capsule - it will make both the launch and the docking much easier. Note that we are intentionally not using an Advanced S.A.S. Module. The A.S.A.S. will use thrusters for roll control when they are switched on, which also results in slight lateral accelerations. These would be rather a curse than blessing during the high-precision docking maneuvers we are going to perform.
Now about the launch vehicle: While the Soviets just added more and more stages to their existing R-7 Semyorka base design, the Americans believed in "bigger is better" and used larger stages. This design philosophy is also apparent in the Titan II GLV (Gemini Launch Vehicle). It had only two stages, but these stages were enormous. We will represent these with Rockomax fuel tanks and Rockomax Mainsail engines.
The Rockomax Mainsail is the most powerful engine in KSP. It generates almost as much thrust as 7 LV-T30 engines. On the one hand it uses slightly more fuel than 7 LV-T30, but on the other it weights much less. These two factors cancel each other out.
- Payload stage
- 1x Clamp-o-tron Docking Port
- 1x S.A.S. Module
- 4x RV-105 RCS Thruster Block (around the top of the capsule)
- 1x Rockomax Brand Adapter
- 2x Mk2-R Radial mount parachute
- 1x Mk2 Lander-can
- 1x FL-R1 RCS Fuel Tank
- 4x RV-105 RCS Thruster Block (around the bottom of the capsule)
- Second Stage
- First Stage
You might wonder why we use the X200-32 tanks here instead of the Jumbo-64. One reason is that the Jumbo tanks for some reason cause the rocket to be a lot less stable, so we would needs struts for stabilization. But there is also another strange effect: The Mainsail engine will overheat when running on full thrust and placed below a Jumbo tank, but when below two functionally identical X200-32 tanks it will not. I have no idea what causes this.
Mission phases
Before you start your vessels, you should rename them so you can tell them apart. When you want to be historically correct, name the first one Gemini 7 and the second Gemini 6A (why not the other way around? Long story...).
Lift-Off - Gemini 7
Start the first rocket into an orbit of about 100km. That should be routine by now.
Try to make your orbit as circular as possible. Every meter difference between apoapsis and periapsis will make the rendevouz more difficult, so take your time. Then kill your engine, press Esc and go to the space center to launch a second vessel.
Lift-Off - Gemini 6A
We will then launch a second, identical vessel.
We will try to get it as close as possible, so before you ignite your engine accelerate time until the first vessel has traveled around Kerbin and is 2 minutes before passing over the launch site again.
Then start just like you started the first one. Make sure your apoapsis is on exactly the same height as the orbit of the first vessel. Just like with the first one, take your time to make your orbit as circular as possible.
Aligning orbits
Now separate both capsules from their rockets. All further orbital maneuvers will be done with monopropellant only. Instead of increasing and decreasing thrust with shift and ctrl, you can now accelerate forward and backward with H and N. This gives you a much more precise control over your thrust vectors - and you will need every bit of precision for this mission.
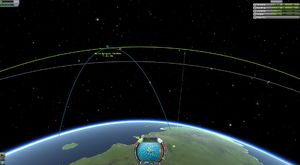
Your vessels will now be on circular orbits with an equal height, but their orbits will likely have some degree of declination. To fix that, set the other vessel as a target. The orbital view will now show two points on your orbit marked as "ascending node" and "descending node". It's the point where the orbital declinations of the trajectories intersect. When you boost north or south at these points, you can make the orbits of your vessels exactly identical, just like you learned in the Orbiting 101 tutorial.
Doing an EVA
Before we try to dock, we will practice moving in space by letting one of our kerbonauts fly around in space with his jetpack.
First, make sure that the capsule isn't rotating. Otherwise it would be quite suicidal to leave it.
Click on the portraits of one of your crew members, click "EVA" and immediately press F to grab the ladder at the hatch. Your kerbonaut will now cling to the capsule. When you feel confident, you can release it. The kerbonaut will now drift away slowly from the capsule. To get him back, activate his rocket pack with "R". You can control it with the keys A, W, S, D, Q, E, Ctrl and Shift. Use it to maneuver back to the hatch and grab it with F. When you did this successfully, you can attempt some more bold maneuvers like flying a tour around the capsule.
But keep in mind that the fuel for the jetpack is not unlimited! Click on your kerbonaut to check how much fuel he has left.
Should you screw up and end up with not enough fuel to return to the capsule, you can still attempt a rescue by switching control to the capsule and try to move it closer to the kerbonaut. Losing the kerbonaut would be tragic, but it would not be the end of the mission - you only need one kerbonaut per capsule to complete it.
Rendezvous with the other capsule
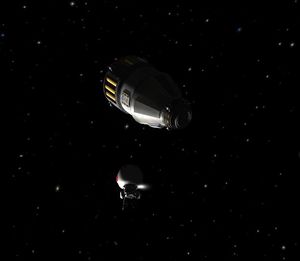
After you practiced control of the jetpack it's time to rendezvous with the other capsule.
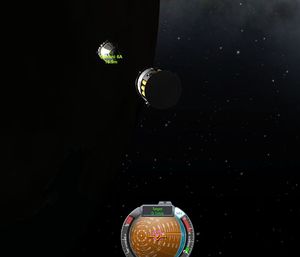
Select the other capsule as your target by clicking on its trajectory on the map view. Make sure you haven't selected the debris of the carrier rocket which is likely still on a very similar orbit.
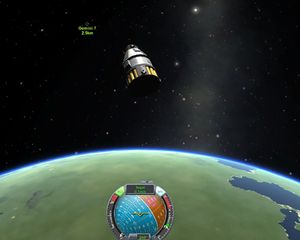
Your capsules are currently on exactly the same orbit, but they will lead each other by a few hundred km. So how do we fix that? Remember that objects on lower orbits take less time for one round around the planet than those on higher orbits. That means when your current vessel is in front, get into a higher orbit. When you are in the back, get into a lower orbit. Wait until your capsules are closer, and return to the original orbit so that they match exactly again. Your goal is to get the capsules closer than 5km. This is quite tricky, you will likely need several attempts.
While you do so, watch your monopropellant reserve. When it falls below 100, switch to the other capsule by double-clicking it in the orbital view. When both are below 100, you can consider the mission failed. All you can do now is to use the remaining monopropellant to get into a reentry orbit to at least bring the crew back alive.
Docking maneuver
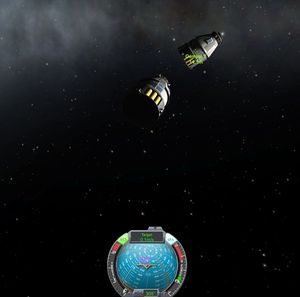
As soon as your distance is below 10km, your nav-ball will switch from "Orbit" mode to "Target" mode. That means that the meanings of the indicators on it has changed.
- The speed will now show your relative speed to the target - how quickly you get closer or away from it.
- The yellow indicators now shows the direction you have to accelerate in to increase or decrease your relative speed.
- The purple indicators shows the direction you have to accelerate in to get closer or away from the target
first face the yellow indicator and thrust backwards until your relative speed is 0.0 m/s. You are now traveling exactly parallel to the target. Now face the purple indicator and thrust a bit forward to start moving in the direction which gets you closer to it. Don't go too fast - be patient. Docking is like seducing a woman - try doing it too fast and all you get is a slap in the face. Before you collide with your target, get to a standstill by again thrusting backwards while facing the yellow indicator. Repeat acceleration and stopping until you are just a few meters away from your target and have a relative speed of zero.
You could now almost grab your target, but its docking port will very likely face in the wrong direction. You could try to fly around it to approach it from another angle, but there is a much easier way to solve this dilemma. Just orient your docking port exactly into the direction of the other capsule, activate SAS, and then switch to the other one using the map view.
Now you just have to orient the second capsule towards the first one and thrust forward just a tiny bit to bring the docking ports closer until they snap together.
Congratulations, you have just docked.
Docking operations
OK, so we are now docked. What does that mean exactly? It means that the two vessels now merged into one for all practical purposes. Try using your thrusters for rotation. You will notice that the thrusters of both vessels act in unison and try to turn the whole contraption, not just the half of it they were originally installed on. The same would apply to any rocket engines when we had them.
Another neat thing you can do now is exchange fuel and other resources. Click on one of the tanks, hold Alt, and then click the other. You can now pump propellant from one tank to the other. When the monopropellant of one of your ships is significantly lower than the other, you should try to even them out.
As of version 0.18.4 it is not yet possible to transfer crew through the docking ports. Currently the only way to get them from one to the other is by performing an EVA to leave the first pod and enter the other (this would work just as well without docking).
Return to Kerbin
Right-click on one of the docking rings and click on "undock" to separate your vessel into two separate ones again. Use your remaining monopropellant to decelerate the first capsule (keep in mind that the yellow indicator still shows your speed relative to the other vessel, not relative to your orbit!) and land it.
After it returned successfully, do the same with the other.
Don't try to deorbit both at the same time - the parachutes don't work on a vessel you don't control!
Landing them together while still docked also seems like an alluring idea, but when I tried that once, one of them broke up during descend and the crew was killed, so try at your own risk!
What next?
You have now learned an important skill - how to rendezvous and dock two ships in orbit. Being able to do this will be very valuable for missions to other planets. The amount of payload you can bring into orbit with one launch is limited. But through docking you can build ships of nearly unlimited size by launching their individual components and assembling them in orbit. People say returning a crew from the surface of Eve is impossible? Prove them wrong - given enough hardware, nothing is impossible!
But there is still a long way until we are ready for that. Let's aim for an easier target for now: The Mün!

