Difference between revisions of "Tutorial: Apollo 11"
(added pictures) |
m (→Ship setup) |
||
| (47 intermediate revisions by 27 users not shown) | |||
| Line 1: | Line 1: | ||
| + | {{Outdated| | ||
| + | * This article is based on a version of KSP which is over a year old and doesn't account for several gameplay changes and content additions.}} | ||
| + | |||
{{Quote|I was elated, ecstatic and extremely surprised that we were successful.|Neil Armstrong|describing what he felt after landing on the moon}} <!-- no, I'm not going to quote "one small step" - that sentence is so overused it became meaningless. --> | {{Quote|I was elated, ecstatic and extremely surprised that we were successful.|Neil Armstrong|describing what he felt after landing on the moon}} <!-- no, I'm not going to quote "one small step" - that sentence is so overused it became meaningless. --> | ||
It's time, we will finally do the first manned landing on another celestial body. During this mission we will require both the docking and EVA know-how from the [[Tutorial: Gemini 6A and 7|Gemini 6A and 7]] mission, as well as what we learned about moon landing from [[Tutorial: Luna 9|Luna 9]]. | It's time, we will finally do the first manned landing on another celestial body. During this mission we will require both the docking and EVA know-how from the [[Tutorial: Gemini 6A and 7|Gemini 6A and 7]] mission, as well as what we learned about moon landing from [[Tutorial: Luna 9|Luna 9]]. | ||
| + | |||
| + | The six moon landings of the Apollo program were the first and only landings of humans on another celestial body in history. It was perhaps the biggest engineering project in world history. Over 400,000 people took part in it and the overall cost is estimated to be over $25 billion US (corrected for inflation this would be $120 billion US today). Many consider it not just the pinnacle of human spaceflight but the overall pinnacle of human evolution, as it has shown that we are technologically capable of leaving our planet and migrating to another. Sadly, no human spaceflight beyond earth orbit has taken place for over 40 years now. | ||
| + | |||
| + | For an up-to-date video tutorial on recreating Apollo 11, click [http://www.youtube.com/watch?v=v3sO8iYo648 here]. | ||
== Ship setup == | == Ship setup == | ||
| − | For this mission we will recreate the largest and most powerful rocket ever built: The Saturn V. | + | For this mission we will recreate the largest and most powerful rocket ever built: The Saturn V. If you are using KSP 0.20 or before, this time we will use the whole height limit KSP has to offer - It will be so large that it nears the ceiling of the vehicle assembly building. In later versions this will not happen. |
| − | Just like on the real Apollo missions our payload will be a command | + | Just like on the real Apollo missions our payload will be a command and service module (CSM) with a docked landing module (LM). And just like on the real Apollo mission we will put the landing module behind the service module during the start, and then move it in front of it during the flight. |
[[File:Apollo-ground.jpg|right|185px|launch vessel]] | [[File:Apollo-ground.jpg|right|185px|launch vessel]] | ||
| − | |||
* Command Module | * Command Module | ||
| − | ** 1x [[Clamp- | + | ** 1x [[Clamp-O-Tron Docking Port]] |
| − | ** 1x [[FL-R25 RCS Fuel Tank]] | + | ** 1x [[FL-R25 RCS Fuel Tank]] (renamed to FL-R120 RCS Fuel Tank in version 1.12.2) |
| − | ** 1x [[ | + | ** 1x [[Mk1-2 Command Pod]] (primary command pod) (replaced by Mk1-3 Command Pod in version 1.4) |
| − | ** 2x [[Mk2-R Radial | + | ** 2x [[Mk2-R Radial-Mount Parachute]] |
* Service Module | * Service Module | ||
| − | ** 1x [[Rockomax Brand Decoupler]] | + | ** 1x [[Rockomax Brand Decoupler]] (renamed to TD-25 Decoupler in version 1.4) |
** 1x [[Rockomax X200-32 Fuel Tank]] | ** 1x [[Rockomax X200-32 Fuel Tank]] | ||
| − | ** 4x [[RV-105 RCS Thruster Block]] (make sure to place them EXACTLY on the center of mass of the command | + | ** 4x [[RV-105 RCS Thruster Block]] (make sure to place them EXACTLY on the center of mass of the command and service module without the lander) |
** 1x [[Rockomax "Poodle" Liquid Engine]] | ** 1x [[Rockomax "Poodle" Liquid Engine]] | ||
* Landing Module | * Landing Module | ||
| − | ** 1x [[TR-2C Stack Separator]] | + | ** 1x [[TR-2C Stack Separator]] (replaced by TS-06 Stack Separator in version 1.4) |
| − | ** 1x [[Clamp- | + | ** 1x [[Clamp-O-Tron Docking Port]] |
| − | ** 1x [[FL-R25 RCS Fuel Tank]] | + | ** 1x [[FL-R25 RCS Fuel Tank]] (renamed to FL-R120 RCS Fuel Tank in version 1.12.2) |
** 1x [[Mk2 Lander-can]] (secondary pod, unmanned at launch) | ** 1x [[Mk2 Lander-can]] (secondary pod, unmanned at launch) | ||
| − | ** 4x [[EAS-4 Strut Connector]] (between lander-can and fuel tank of service module) | + | ** 4x [[EAS-4 Strut Connector]] (between lander-can and fuel tank of service module. Be careful not to obstruct the hatch!) |
** 4x [[RV-105 RCS Thruster Block]] | ** 4x [[RV-105 RCS Thruster Block]] | ||
** 1x [[Rockomax X200-8 Fuel Tank]] | ** 1x [[Rockomax X200-8 Fuel Tank]] | ||
| − | ** 1x [[Telus Mobility Enhancer]] (place below the mini-ladder below the door) | + | ** 1x [[Telus Mobility Enhancer]] (place below the mini-ladder below the door, renamed to Kelus Mobility Enhancer in version 1.1.3) |
** 4x [[LT-2 Landing Strut]] | ** 4x [[LT-2 Landing Strut]] | ||
** 1x [[LV-909 Liquid Fuel Engine]] | ** 1x [[LV-909 Liquid Fuel Engine]] | ||
* Stage 3 | * Stage 3 | ||
| − | ** 1x [[TR-18A Stack Decoupler]] | + | ** 1x [[TR-18A Stack Decoupler]] (renamed to TD-12 Decoupler in version 1.4) |
** 2x [[Rockomax X200-32 Fuel Tank]] | ** 2x [[Rockomax X200-32 Fuel Tank]] | ||
** 4x [[EAS-4 Strut Connector]] (between upper fuel tank and fuel tank of lander) | ** 4x [[EAS-4 Strut Connector]] (between upper fuel tank and fuel tank of lander) | ||
| − | ** 1x [[Rockomax "Mainsail" Liquid Engine]] | + | ** 1x [[Rockomax "Mainsail" Liquid Engine]] (a.k.a RE-M3 "Mainsail" Liquid Engine) |
* Stage 2 | * Stage 2 | ||
| − | ** 1x [[ | + | ** 1x [[Rockomax Brand Decoupler]] (renamed to TD-25 Decoupler in version 1.4) |
** 10x [[Rockomax X200-32 Fuel Tank]] (one stack of two in the center and four stacks of two mounted radially around it) | ** 10x [[Rockomax X200-32 Fuel Tank]] (one stack of two in the center and four stacks of two mounted radially around it) | ||
** 24x [[EAS-4 Strut Connector]] (link each of the outer tank to its two horizontal neighbors and twice to the center tank - see image) | ** 24x [[EAS-4 Strut Connector]] (link each of the outer tank to its two horizontal neighbors and twice to the center tank - see image) | ||
| − | ** 4x [[Protective | + | ** 4x [[Protective Rocket Nose Mk7]] |
** 4x [[EAS-4 Strut Connector]] (link each nose to the lower fuel tank of stage 3) | ** 4x [[EAS-4 Strut Connector]] (link each nose to the lower fuel tank of stage 3) | ||
** 4x [[RV-105 RCS Thruster Block]] (place as low as possible) | ** 4x [[RV-105 RCS Thruster Block]] (place as low as possible) | ||
| − | ** 5x [[Rockomax "Mainsail" Liquid Engine]] | + | ** 5x [[Rockomax "Mainsail" Liquid Engine]] (a.k.a RE-M3 "Mainsail" Liquid Engine) |
* Stage 1 | * Stage 1 | ||
| − | ** | + | ** 5x [[Rockomax Brand Decoupler]] (renamed to TD-25 Decoupler in version 1.4) |
| − | ** 15x [[Rockomax X200-32 Fuel Tank]] (one stack of three in the center and four stacks of three mounted | + | ** 15x [[Rockomax X200-32 Fuel Tank]] (one stack of three in the center and four stacks of three mounted to the outer stacks of the stage above, '''not''' the center stage) |
| − | ** | + | ** 24x [[EAS-4 Strut Connector]] (link each of the outer tank to its two horizontal neighbors and twice to the center tank - see image) |
| − | |||
| − | |||
** 8x [[Standard Canard]] | ** 8x [[Standard Canard]] | ||
| − | ** 5x [[Rockomax "Mainsail" Liquid Engine]] | + | ** 5x [[Rockomax "Mainsail" Liquid Engine]] (a.k.a RE-M3 "Mainsail" Liquid Engine) |
| + | |||
| + | In older versions, there was almost no room left for the last five engines, which clipped through the floor of the VAB. IF you experience this, do not worry. When you put the rocket on the launchpad, they will be above ground. | ||
When you are finished building this, double-check the staging. Make sure the engine of the lander activates AFTER the engine of the service module. | When you are finished building this, double-check the staging. Make sure the engine of the lander activates AFTER the engine of the service module. | ||
== Mission phases == | == Mission phases == | ||
| − | |||
=== Getting into transfer orbit === | === Getting into transfer orbit === | ||
| − | |||
[[File:Apollo-liftoff.jpg|right|150px|liftoff]] | [[File:Apollo-liftoff.jpg|right|150px|liftoff]] | ||
| − | Use the first two stages to get into orbit and the third to circularize it and get into a Mün transfer orbit just like you did for Luna 9. Do this with using as | + | Use the first two stages to get into orbit and the third to circularize it and get into a Mün transfer orbit just like you did for [[Tutorial: Luna 9|Luna 9]]. Do this with using as little monopropellant as possible because you will need it for the docking maneuvers later. To make sure that you don't accidentally use up all the monopropellant, deactivate one of the two tanks before the launch (right-click it and then click the green arrow to turn it into a denied-sign). |
| − | You can control stage 1 with only the canards | + | You can control stage 1 with only the canards and - thanks to engine gimbal - stages one and two also behave well without RCS thrusters as long as they (the engines) are on, so you'll only need RCS to correct your bearing while the engines are off. |
| − | When you want to go for maximum authenticity, go for a [[Tutorial: | + | When you want to go for maximum authenticity, go for a [[Tutorial:Free Return Trajectory|free return trajectory]]. |
=== Reorganizing the modules === | === Reorganizing the modules === | ||
| Line 71: | Line 75: | ||
Now begins the tricky part of the mission. Just like it was done on the real Apollo missions, we placed the landing module right under the main engine of the command and service module. Before we can use the engine we need to get the LM on the other end of the CSM. | Now begins the tricky part of the mission. Just like it was done on the real Apollo missions, we placed the landing module right under the main engine of the command and service module. Before we can use the engine we need to get the LM on the other end of the CSM. | ||
| − | # Drop the third stage | + | # Drop the third stage. |
| − | # Make sure that the ship is perfectly still and not rotating | + | # Make sure that the ship is perfectly still and not rotating, this can be achieved by pressing 't' to activate reaction wheels. |
| − | # | + | # Make sure that both LM and CSM have monopropellant. Pump some from one to the other if it's necessary. |
| − | # | + | # Decouple the docking node between LM and CSM. '''Do not use the stack separator!''' |
| − | # | + | # Thrust just a tiny bit forward with the RCS thrusters of the CSM and stop the movement after about a meter with a backwards RCS thrust. |
| − | # | + | # Set the LM docking port as your target. |
| − | # | + | # Turn the CSM by exactly 180°. I recommend doing this while the RCS thrusters are switched off. This is slower, but you avoid any unwanted movement in case the RCS thrusters aren't exactly on the center of mass. |
| − | # | + | # Thrust forward to redock the LM at the top docking node. |
| − | # | + | # Engage the stack decoupler at the bottom of the service module. (By the way: the sole function of this separator was to hold the cover around the engine. Without it is would have stayed on the docking port of the LM and would have blocked your view during the docking maneuvers) |
[[File:Apollo-reorg.jpg|300px|after reorg]] | [[File:Apollo-reorg.jpg|300px|after reorg]] | ||
| − | === | + | === Transferring the landing crew === |
| − | |||
[[File:Apollo-eva.jpg|150px|right|crew transfer]] | [[File:Apollo-eva.jpg|150px|right|crew transfer]] | ||
| − | During the real Apollo missions the crew could board the landing module through the docking hatch. | + | During the real Apollo missions the crew could board the landing module through the docking hatch. With version 0.25 of KSP you can transfer crew by clicking on the crew hatch and then clicking the crew capable module you want to transfer to, in this case, the lander. Transfer the first two brave kerbonauts over. The third one stays behind in the CSM to control it while in Mün orbit and when redocking the CSM. |
=== Enter Mün orbit === | === Enter Mün orbit === | ||
| + | Get into an orbit with a height of about 20 km around the Mün. Make it as circular as possible. This will make the later redocking easier. | ||
| − | + | === The Landing === | |
| − | + | You have already completed the tricky part, now begins the insanely tricky part: the landing. | |
| − | === The | ||
| − | |||
| − | You already completed the tricky part, now begins the insanely tricky part: the landing. | ||
# Click on the docking port of the landing stage and select "control from here" so you gain control of the lander right after the separation | # Click on the docking port of the landing stage and select "control from here" so you gain control of the lander right after the separation | ||
| Line 101: | Line 102: | ||
# Deploy the landing gear so you don't forget about it | # Deploy the landing gear so you don't forget about it | ||
# Boost retrograde to get into a suborbital trajectory, preferably one which leads you to a landing area on the day side with a nice view of Kerbin (try to do it without ramming the service module) | # Boost retrograde to get into a suborbital trajectory, preferably one which leads you to a landing area on the day side with a nice view of Kerbin (try to do it without ramming the service module) | ||
| − | # | + | # Wait until you descended to a height of 10 km |
| − | # | + | # Follow the same rule you followed with the Luna probe: boost so your ground speed = your altitude / 100. Note that although your lander *has* RCS thrusters and fuel, you should do the landing without them. The torque from the lander-can is more than enough. You need the thrusters for redocking with the CSM later. |
| − | # | + | # Get down as vertical as possible. Your landing gear can withstand an impact of up to 12 m/s, but try to stay under that so you have some security tolerance. |
| − | |||
| − | |||
| − | Congratulations, the | + | Congratulations, the Eagle has landed. |
[[File:Apollo-landed.jpg|200px|successful landing]] | [[File:Apollo-landed.jpg|200px|successful landing]] | ||
| − | Now get your Kerbonaut out of your lander can, say something quotable about small steps and giant leaps, and jump to the ground. | + | Now get your Kerbonaut out of your lander can, say something quotable about small steps and giant leaps, and jump to the ground. Plant your flag, take some screenshots and videos for future generations, and make sure they are labelled properly, so nobody tapes them over like it happened at a certain other space administration.<ref>http://en.wikipedia.org/wiki/Apollo_11_missing_tapes</ref> |
[[File:Apollo-small-step.jpg|200px|successful landing]] [[File:Apollo-posing.jpg|200px|successful landing]] [[File:Apollo-looking-at-kerbin.jpg|200px|successful landing]] | [[File:Apollo-small-step.jpg|200px|successful landing]] [[File:Apollo-posing.jpg|200px|successful landing]] [[File:Apollo-looking-at-kerbin.jpg|200px|successful landing]] | ||
| − | === Start and | + | === Start and Redocking === |
| − | |||
When you explored the landing area properly it's time to return home. Get your crew back into the lander and retract the ladder. Check the position of the service module and wait until it appears at the horizon. Then start. | When you explored the landing area properly it's time to return home. Get your crew back into the lander and retract the ladder. Check the position of the service module and wait until it appears at the horizon. Then start. | ||
[[File:Apollo-moon-start.jpg|200px|start from surface]] | [[File:Apollo-moon-start.jpg|200px|start from surface]] | ||
| − | Unlike Kerbin the Mün has no atmosphere, which makes a start considerably easier. You don't have to start vertically and fix your orbital speed after you are out of the atmosphere. You can head east or west (depending on the orbital direction of your command module) after you gained enough height to not collide with any hills or crater walls. Just make sure that the yellow heading marker always stays above the horizon. Get into an orbit identical to the CSM and perform docking just like you did during the Gemini tutorial. | + | Unlike Kerbin the Mün has no atmosphere, which makes a start considerably easier. You don't have to start vertically and fix your orbital speed after you are out of the atmosphere. You can head east or west (depending on the orbital direction of your command module) after you gained enough height so as to not collide with any hills or crater walls. Just make sure that the yellow heading marker always stays above the horizon. Get into an orbit identical to the CSM and perform docking just like you did during the Gemini tutorial. |
[[File:Apollo-redock.jpg|300px|redocking in orbit]] | [[File:Apollo-redock.jpg|300px|redocking in orbit]] | ||
=== Return to Kerbin === | === Return to Kerbin === | ||
| − | |||
[[File:Apollo-reentry.jpg|right|300px|reentry]] | [[File:Apollo-reentry.jpg|right|300px|reentry]] | ||
| − | Get the two kerbonauts from the lander back into the command module. Then drop the lander. Use the remaining fuel of the CSM to leave the Mün orbit in a direction retrograde to the orbit of Mün around Kerbin. When your orbital direction around Mün is prograde (90°, anticlockwise), accelerate when you are closest to Kerbin. When you are retrograde (270°, clockwise) accelerate when you are | + | Get the two kerbonauts from the lander back into the command module. Transfer the remaining fuel to the CSM if needed. Then drop the lander. Use the remaining fuel of the CSM to leave the Mün orbit in a direction retrograde to the orbit of Mün around Kerbin. When your orbital direction around Mün is prograde (90°, anticlockwise), accelerate when you are closest to Kerbin. When you are retrograde (270°, clockwise) accelerate when you are facing retrograde relative to Kerbin, but prograde relative to the Mun. Keep accelerating until your trajectory hits Kerbin. |
| − | + | then follow the same reentry procedure you used for the previous missions | |
| + | [[File:Apollo-splashdown.jpg|300px|splashdown]] | ||
| − | + | == What now? == | |
| + | When you want to have some more fun with this ship, you could simulate the "successful failure" Apollo 13. During this moon landing mission the service module became unusable due to a technical defect, so that the crew had to cancel the landing on the moon and return to earth using the thruster and fuel of the landing module. | ||
| + | |||
| + | Play the mission normally until after you moved the landing module on top of the command module. Then "accidentally" activate the decoupler between the command and service module. Try to get back to Kerbin with only the CM and LM by using the thrusters and fuel of the LM. | ||
== References == | == References == | ||
| + | <references/> | ||
| − | + | [[Category:Tutorials|Apollo 11]] | |
| + | [[Category:Historical Spaceflights|Apollo 11]] | ||
Latest revision as of 19:48, 25 May 2022
This page or section is in need of being brought up to date. Please help Kerbal Space Program Wiki by fixing inaccurate or outdated information.
|
| “ | I was elated, ecstatic and extremely surprised that we were successful. — Neil Armstrong, describing what he felt after landing on the moon |
” |
It's time, we will finally do the first manned landing on another celestial body. During this mission we will require both the docking and EVA know-how from the Gemini 6A and 7 mission, as well as what we learned about moon landing from Luna 9.
The six moon landings of the Apollo program were the first and only landings of humans on another celestial body in history. It was perhaps the biggest engineering project in world history. Over 400,000 people took part in it and the overall cost is estimated to be over $25 billion US (corrected for inflation this would be $120 billion US today). Many consider it not just the pinnacle of human spaceflight but the overall pinnacle of human evolution, as it has shown that we are technologically capable of leaving our planet and migrating to another. Sadly, no human spaceflight beyond earth orbit has taken place for over 40 years now.
For an up-to-date video tutorial on recreating Apollo 11, click here.
Contents
Ship setup
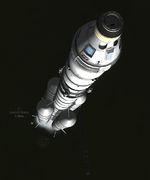
For this mission we will recreate the largest and most powerful rocket ever built: The Saturn V. If you are using KSP 0.20 or before, this time we will use the whole height limit KSP has to offer - It will be so large that it nears the ceiling of the vehicle assembly building. In later versions this will not happen.
Just like on the real Apollo missions our payload will be a command and service module (CSM) with a docked landing module (LM). And just like on the real Apollo mission we will put the landing module behind the service module during the start, and then move it in front of it during the flight.
- Command Module
- 1x Clamp-O-Tron Docking Port
- 1x FL-R25 RCS Fuel Tank (renamed to FL-R120 RCS Fuel Tank in version 1.12.2)
- 1x Mk1-2 Command Pod (primary command pod) (replaced by Mk1-3 Command Pod in version 1.4)
- 2x Mk2-R Radial-Mount Parachute
- Service Module
- 1x Rockomax Brand Decoupler (renamed to TD-25 Decoupler in version 1.4)
- 1x Rockomax X200-32 Fuel Tank
- 4x RV-105 RCS Thruster Block (make sure to place them EXACTLY on the center of mass of the command and service module without the lander)
- 1x Rockomax "Poodle" Liquid Engine
- Landing Module
- 1x TR-2C Stack Separator (replaced by TS-06 Stack Separator in version 1.4)
- 1x Clamp-O-Tron Docking Port
- 1x FL-R25 RCS Fuel Tank (renamed to FL-R120 RCS Fuel Tank in version 1.12.2)
- 1x Mk2 Lander-can (secondary pod, unmanned at launch)
- 4x EAS-4 Strut Connector (between lander-can and fuel tank of service module. Be careful not to obstruct the hatch!)
- 4x RV-105 RCS Thruster Block
- 1x Rockomax X200-8 Fuel Tank
- 1x Telus Mobility Enhancer (place below the mini-ladder below the door, renamed to Kelus Mobility Enhancer in version 1.1.3)
- 4x LT-2 Landing Strut
- 1x LV-909 Liquid Fuel Engine
- Stage 3
- 1x TR-18A Stack Decoupler (renamed to TD-12 Decoupler in version 1.4)
- 2x Rockomax X200-32 Fuel Tank
- 4x EAS-4 Strut Connector (between upper fuel tank and fuel tank of lander)
- 1x Rockomax "Mainsail" Liquid Engine (a.k.a RE-M3 "Mainsail" Liquid Engine)
- Stage 2
- 1x Rockomax Brand Decoupler (renamed to TD-25 Decoupler in version 1.4)
- 10x Rockomax X200-32 Fuel Tank (one stack of two in the center and four stacks of two mounted radially around it)
- 24x EAS-4 Strut Connector (link each of the outer tank to its two horizontal neighbors and twice to the center tank - see image)
- 4x Protective Rocket Nose Mk7
- 4x EAS-4 Strut Connector (link each nose to the lower fuel tank of stage 3)
- 4x RV-105 RCS Thruster Block (place as low as possible)
- 5x Rockomax "Mainsail" Liquid Engine (a.k.a RE-M3 "Mainsail" Liquid Engine)
- Stage 1
- 5x Rockomax Brand Decoupler (renamed to TD-25 Decoupler in version 1.4)
- 15x Rockomax X200-32 Fuel Tank (one stack of three in the center and four stacks of three mounted to the outer stacks of the stage above, not the center stage)
- 24x EAS-4 Strut Connector (link each of the outer tank to its two horizontal neighbors and twice to the center tank - see image)
- 8x Standard Canard
- 5x Rockomax "Mainsail" Liquid Engine (a.k.a RE-M3 "Mainsail" Liquid Engine)
In older versions, there was almost no room left for the last five engines, which clipped through the floor of the VAB. IF you experience this, do not worry. When you put the rocket on the launchpad, they will be above ground.
When you are finished building this, double-check the staging. Make sure the engine of the lander activates AFTER the engine of the service module.
Mission phases
Getting into transfer orbit
Use the first two stages to get into orbit and the third to circularize it and get into a Mün transfer orbit just like you did for Luna 9. Do this with using as little monopropellant as possible because you will need it for the docking maneuvers later. To make sure that you don't accidentally use up all the monopropellant, deactivate one of the two tanks before the launch (right-click it and then click the green arrow to turn it into a denied-sign).
You can control stage 1 with only the canards and - thanks to engine gimbal - stages one and two also behave well without RCS thrusters as long as they (the engines) are on, so you'll only need RCS to correct your bearing while the engines are off.
When you want to go for maximum authenticity, go for a free return trajectory.
Reorganizing the modules
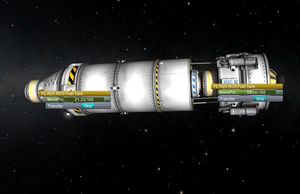
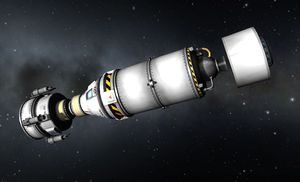
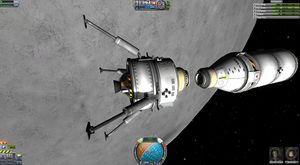
Now begins the tricky part of the mission. Just like it was done on the real Apollo missions, we placed the landing module right under the main engine of the command and service module. Before we can use the engine we need to get the LM on the other end of the CSM.
- Drop the third stage.
- Make sure that the ship is perfectly still and not rotating, this can be achieved by pressing 't' to activate reaction wheels.
- Make sure that both LM and CSM have monopropellant. Pump some from one to the other if it's necessary.
- Decouple the docking node between LM and CSM. Do not use the stack separator!
- Thrust just a tiny bit forward with the RCS thrusters of the CSM and stop the movement after about a meter with a backwards RCS thrust.
- Set the LM docking port as your target.
- Turn the CSM by exactly 180°. I recommend doing this while the RCS thrusters are switched off. This is slower, but you avoid any unwanted movement in case the RCS thrusters aren't exactly on the center of mass.
- Thrust forward to redock the LM at the top docking node.
- Engage the stack decoupler at the bottom of the service module. (By the way: the sole function of this separator was to hold the cover around the engine. Without it is would have stayed on the docking port of the LM and would have blocked your view during the docking maneuvers)
Transferring the landing crew
During the real Apollo missions the crew could board the landing module through the docking hatch. With version 0.25 of KSP you can transfer crew by clicking on the crew hatch and then clicking the crew capable module you want to transfer to, in this case, the lander. Transfer the first two brave kerbonauts over. The third one stays behind in the CSM to control it while in Mün orbit and when redocking the CSM.
Enter Mün orbit
Get into an orbit with a height of about 20 km around the Mün. Make it as circular as possible. This will make the later redocking easier.
The Landing
You have already completed the tricky part, now begins the insanely tricky part: the landing.
- Click on the docking port of the landing stage and select "control from here" so you gain control of the lander right after the separation
- Undock the landing stage
- Deploy the landing gear so you don't forget about it
- Boost retrograde to get into a suborbital trajectory, preferably one which leads you to a landing area on the day side with a nice view of Kerbin (try to do it without ramming the service module)
- Wait until you descended to a height of 10 km
- Follow the same rule you followed with the Luna probe: boost so your ground speed = your altitude / 100. Note that although your lander *has* RCS thrusters and fuel, you should do the landing without them. The torque from the lander-can is more than enough. You need the thrusters for redocking with the CSM later.
- Get down as vertical as possible. Your landing gear can withstand an impact of up to 12 m/s, but try to stay under that so you have some security tolerance.
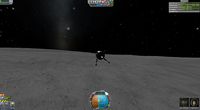
Congratulations, the Eagle has landed.
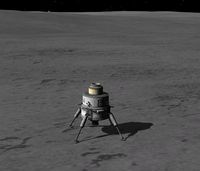
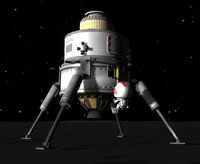
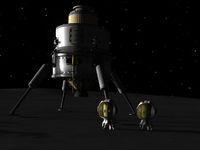
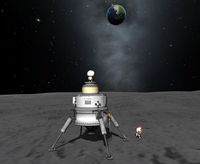
Now get your Kerbonaut out of your lander can, say something quotable about small steps and giant leaps, and jump to the ground. Plant your flag, take some screenshots and videos for future generations, and make sure they are labelled properly, so nobody tapes them over like it happened at a certain other space administration.[1]
Start and Redocking
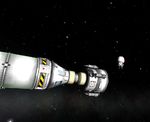
When you explored the landing area properly it's time to return home. Get your crew back into the lander and retract the ladder. Check the position of the service module and wait until it appears at the horizon. Then start.
Unlike Kerbin the Mün has no atmosphere, which makes a start considerably easier. You don't have to start vertically and fix your orbital speed after you are out of the atmosphere. You can head east or west (depending on the orbital direction of your command module) after you gained enough height so as to not collide with any hills or crater walls. Just make sure that the yellow heading marker always stays above the horizon. Get into an orbit identical to the CSM and perform docking just like you did during the Gemini tutorial.
Return to Kerbin
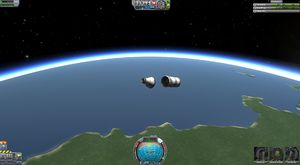
Get the two kerbonauts from the lander back into the command module. Transfer the remaining fuel to the CSM if needed. Then drop the lander. Use the remaining fuel of the CSM to leave the Mün orbit in a direction retrograde to the orbit of Mün around Kerbin. When your orbital direction around Mün is prograde (90°, anticlockwise), accelerate when you are closest to Kerbin. When you are retrograde (270°, clockwise) accelerate when you are facing retrograde relative to Kerbin, but prograde relative to the Mun. Keep accelerating until your trajectory hits Kerbin.
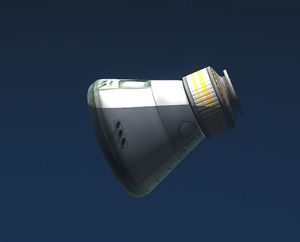
then follow the same reentry procedure you used for the previous missions
What now?
When you want to have some more fun with this ship, you could simulate the "successful failure" Apollo 13. During this moon landing mission the service module became unusable due to a technical defect, so that the crew had to cancel the landing on the moon and return to earth using the thruster and fuel of the landing module.
Play the mission normally until after you moved the landing module on top of the command module. Then "accidentally" activate the decoupler between the command and service module. Try to get back to Kerbin with only the CM and LM by using the thrusters and fuel of the LM.

