Difference between revisions of "Getting Started"
| Line 54: | Line 54: | ||
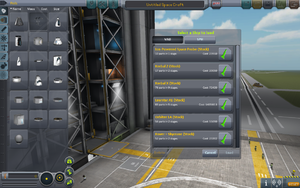
[[File:KerbalXstock.png|thumbnail|center|Figure 5 : Assembly Menu]] | [[File:KerbalXstock.png|thumbnail|center|Figure 5 : Assembly Menu]] | ||
| − | By selecting the Orange Folder in the top right section of the window, the menu shown in Figure 5 will appear. Find and select the Kerbal X (stock). This will load up the rocket, Kerbal X. This rocket is fairly simple and can easily achieve orbit around the planet. | + | By selecting the Orange Folder in the top right section of the window, the menu shown in Figure 5 will appear. Find and select the Kerbal X (stock). This will load up the rocket, Kerbal X. This rocket is fairly simple and can easily achieve orbit around the planet. If you are using the demo version, [http://dl.dropbox.com/u/27588455/Jam001.craft Here] is a simple rocket I made that has achieved orbit with more than enough fuel for the return to the planet. |
| + | |||
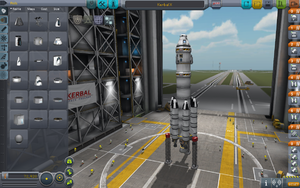
| + | [[File:TheKerbalX.png|thumbnail|center|Figure 6 : The Kerbal X]] | ||
| + | |||
| + | While this rocket appears to be a bit complex, it is really simple and can easily be explained. On the right side of the screen, shown in Figure 6, there are orange folders that have numbers ranging from 1 to 8. These are the launch stages that your rocket has. Launch stages are different than your rocket stages as the stages that make up the launch stages are what the spacebar triggers with each press. Each stage has at least one icon inside of it. These are the events of that stage. The launch stages are thus: | ||
| + | |||
| + | # Rocket Launch Stage 8 | ||
| + | #*# This is your initial launch stage | ||
| + | #*# There are a total of seven Liquid Fuel Thrusters that are activated on this stage | ||
| + | # Rocket Launch Stage 7 | ||
| + | #*# This is the second launch stage | ||
| + | #*# This launch stage releases the support braces, TT18-A Launch Stability Enhancers, that are shown at the bottom of the Kerbal X Rocket | ||
| + | #**# The TT18-A LSEs are the open frame supports capped with the red cap | ||
| + | # Rocket Launch Stage 6 | ||
| + | #*# This, the third, launch stage releases two of the boosters from the main rocket | ||
| + | #**# This stage should only be triggered after the first set of two boosters are out of fuel | ||
| + | #**# There is an audible cue as well as a visual indicator when a rocket engine is out of fuel | ||
| + | # Rocket Launch Stage 5 | ||
| + | #*# After a short while two more engines will run out, and pressing the spacebar will activate this stage to release them off of the main rocket | ||
| + | #**# Again, only trigger this stage *after* two more engines have run out of fuel | ||
| + | # Rocket Launch Stage 4 | ||
| + | #*# This is the same as the previous two launch stages | ||
| + | #**# The main difference here is that this is the last set of the booster engines for this rocket | ||
| + | # Rocket Launch Stage 3 | ||
| + | #*# This is the end of the first stage of the rocket | ||
| + | #**# When the spacebar is pressed, the main engine that helped the boosters get the rocket into space will separate from the second stage of the rocket | ||
| + | # Rocket Launch Stage 2 | ||
| + | #*# This stage starts up the smaller engine attached directly to the capsule | ||
| + | # Rocket Launch Stage 1 | ||
| + | #*# This is the last stage before the parachute is opened | ||
| + | #**# Since this is the last stage that will release the last engine, it is suggested *not* to activate it until you are on the return trip towards the planet | ||
| + | # Rocket Launch Stage 0 | ||
| + | #*# This is the absolute last stage that deploys the parachute when activated | ||
| + | |||
| + | That is the run down of the orange tabs on the right side of the screen. While there is nothing that really *needs* to be done to the Kerbal X Rocket, I strongly advise adding a couple of items that will make getting into orbit a bit easier. | ||
| + | |||
| + | |||
| + | |||
== Still To Do == | == Still To Do == | ||
Revision as of 03:02, 6 December 2012
This guide is intended to help you through your first few hours with Kerbal Space Program. Although it's far from comprehensive, you should have a decent understanding of the basics.
Buying
Squad provides a fairly straightforward storefront from which you can buy KSP.
- Visit http://kerbalspaceprogram.com
- Click on the store
Downloading
Squad, the makers of Kerbal Space Program, have a simple download tool used to download, update, and repair the game. It can also choose to download the game from the powerful Amazon S3 cloud when the main servers are under load.
- Go to the store.
- Log in with your username and password.
- Click on the Profile button.
- Scroll down to the bottom and select the download link next to the purchase invoice.
- Download the patcher for your platform into an empty folder.
- Mac users:
- Ensure the execute permission is set on the Patcher.command file.
- Install Mono from the bundled .dmg file, if needed.
- Run Patcher.command.
- Windows Users:
- Install .NET Framework 4.0 or above, if needed. (New versions of Windows already have it.)
- Run Patcher.exe.
- Mac users:
Running the Game
Once the game is installed, it is time to run it. This is done by browsing to the folder the game was unpacked in and running KSP.exe. A shortcut can be made on the Desktop to this file which will make running the game a bit faster, unless you want to run it from a USB drive and have all of your game information with you for playing on any computer.
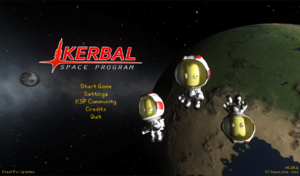
The main screen has the following links:
- Start Game
- Settings
- KSP Community
- Credits
- Quit
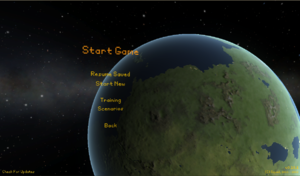
By selecting the Start Game menu item, the Start and Load Game menu will appear.
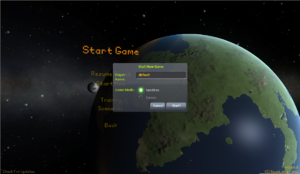
When starting a new game, which is what this portion of the WIKI is assuming, the save game name does not have to remain 'default'. Change this to what ever name you want the save file to be.
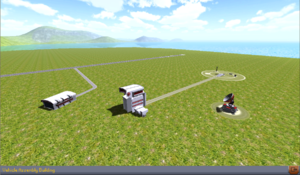
Once the new game is started, the Launch Compound with the two assembly bays, tracking station, and launch pad will appear.
Since a rocket is needed, select the middle structure, it will say Vehicle Assembly Building. From here we will begin the first rocket using a stock rocket.
By selecting the Orange Folder in the top right section of the window, the menu shown in Figure 5 will appear. Find and select the Kerbal X (stock). This will load up the rocket, Kerbal X. This rocket is fairly simple and can easily achieve orbit around the planet. If you are using the demo version, Here is a simple rocket I made that has achieved orbit with more than enough fuel for the return to the planet.
While this rocket appears to be a bit complex, it is really simple and can easily be explained. On the right side of the screen, shown in Figure 6, there are orange folders that have numbers ranging from 1 to 8. These are the launch stages that your rocket has. Launch stages are different than your rocket stages as the stages that make up the launch stages are what the spacebar triggers with each press. Each stage has at least one icon inside of it. These are the events of that stage. The launch stages are thus:
- Rocket Launch Stage 8
- This is your initial launch stage
- There are a total of seven Liquid Fuel Thrusters that are activated on this stage
- Rocket Launch Stage 7
- This is the second launch stage
- This launch stage releases the support braces, TT18-A Launch Stability Enhancers, that are shown at the bottom of the Kerbal X Rocket
- The TT18-A LSEs are the open frame supports capped with the red cap
- Rocket Launch Stage 6
- This, the third, launch stage releases two of the boosters from the main rocket
- This stage should only be triggered after the first set of two boosters are out of fuel
- There is an audible cue as well as a visual indicator when a rocket engine is out of fuel
- Rocket Launch Stage 5
- After a short while two more engines will run out, and pressing the spacebar will activate this stage to release them off of the main rocket
- Again, only trigger this stage *after* two more engines have run out of fuel
- Rocket Launch Stage 4
- This is the same as the previous two launch stages
- The main difference here is that this is the last set of the booster engines for this rocket
- Rocket Launch Stage 3
- This is the end of the first stage of the rocket
- When the spacebar is pressed, the main engine that helped the boosters get the rocket into space will separate from the second stage of the rocket
- Rocket Launch Stage 2
- This stage starts up the smaller engine attached directly to the capsule
- Rocket Launch Stage 1
- This is the last stage before the parachute is opened
- Since this is the last stage that will release the last engine, it is suggested *not* to activate it until you are on the return trip towards the planet
- Rocket Launch Stage 0
- This is the absolute last stage that deploys the parachute when activated
That is the run down of the orange tabs on the right side of the screen. While there is nothing that really *needs* to be done to the Kerbal X Rocket, I strongly advise adding a couple of items that will make getting into orbit a bit easier.
Still To Do
- Launching the Rocket
- Getting into an orbit with enough fuel for re-entry
- Getting back down safely
- Links for additional tips, tricks, and guidance
