Difference between revisions of "Tutorial:Spaceplane to Laythe"
m (Redirect) |
m (Redirect) |
||
| Line 36: | Line 36: | ||
*6x [[Elevon 2]] | *6x [[Elevon 2]] | ||
*2x [[SP-L 1x6 Photovoltaic Panels]] | *2x [[SP-L 1x6 Photovoltaic Panels]] | ||
| − | *4x [[ | + | *4x [[Adjustable Ramp Intake (Radial)]] |
*2x [[Small Delta Wing]] | *2x [[Small Delta Wing]] | ||
*1x [[Mk1 Inline Cockpit]] | *1x [[Mk1 Inline Cockpit]] | ||
Revision as of 16:06, 1 September 2018
This tutorial will cover spaceplane design, flight, docking maneuvers, inter-planetary transfers, and aerocapture/aerobraking. We're going to take advantage of the efficiency of spaceplanes to take a kerbal to Laythe and back. It assumes your familiarity with Orbital Terminology, use of Maneuver nodes, and Basic Maneuvers. This tutorial contains a lot of general information presented during the course of a specific mission to illustrate its use.
Note: Unfortunately due to migration problems all the pictures are from the previous version which is not functional in 1.0.2. All other content has been updated to 1.0.2.
Contents
- 1 Take a Spaceplane to Laythe (and Back)
- 2 Steps
- 3 Finishing word
Take a Spaceplane to Laythe (and Back)
Specifications
Laythe is the only body other than Kerbin where jet engines will operate (other than Jool and Duna), so it is a natural target for spaceplane missions.
- Length: 6-10 hours
- Difficulty: Advanced
- For version: 1.0.2 or later
This tutorial is designed to maximize fuel efficiency both in the air (by using jet engines and wings) and in space (using a highly efficient rocket). Once we are in space this tutorial can be applied just as easily to a rocket as to a spaceplane.
Steps
Step 1 - The Space Craft
There will be two space craft used for this tutorial. A spaceplane which will land on Laythe and a range extension fuel tank so we can make it to Laythe and back. I'm including a fully designed spaceplane for this tutorial, but feel free to use your own, or to customize the one provided.
Spaceplane
Before assembling the plane I recommend reading keptin's aircraft design forum post or Scott Manley's aerodynamics tutorial video. They explain the effects of design decisions better than I could and are excellent guides to putting together a spaceplane without focusing on a specific design. Building a spaceplane is an exercise in compromise and balance, for instance a stable plane will generally be less maneuverable, so there is no one guide that will fit every need. Everyone will pick a slightly different balance of aerodynamic characteristics so you'll often find different guides give you contradictory advice, which is why I prefer guides that focus on how choices affect aerodynamic characteristics over those that build a specific plane. This tutorial does include a specific plane, but it is included more as a reference and there is enough room to customize it to your needs.
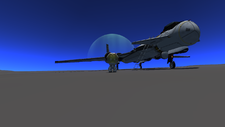
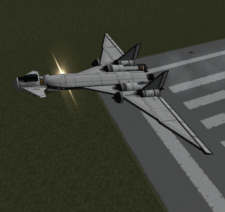
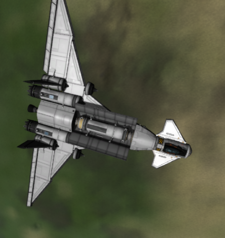
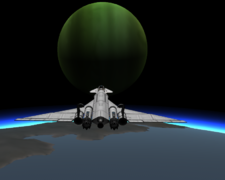
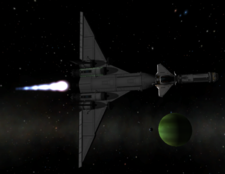
This spaceplane is designed for long-range, decent flight characteristics, and fuel efficiency. With the exception of some of the struts every part of the plane is visible and I've tried to capture enough angles to make this build-able from the pictures. It is mostly liquid fuel since both airbreathing engines and LV-N Atomic Rocket Motors use just liquid fuel. There is a small amount of oxidizer used to boost us into orbit of Kerbin. A pure liquid fueled SSTO is possible, but thus far every design I've come up with has had a very limited Δv.
- 1x PB-NUK Radioisotope Thermoelectric Generator
- 2x Z-400 Rechargeable Battery
- 4x RV-105 RCS Thruster Block
- 2x Adjustable Ramp Intake
- 1x Telus-LV Bay Mobility Enhancer
- 2x Delta Wing
- 3x LY-10 Small Landing Gear
- 4x FTX-2 External Fuel Duct
- 1x Mk2 Liquid Fuel Fuselage
- 1x RC-001S Remote Guidance Unit
- 2x A.I.R.B.R.A.K.E.S
- 4x Place-Anywhere 7 Linear RCS Port
- 6x Elevon 2
- 2x SP-L 1x6 Photovoltaic Panels
- 4x Adjustable Ramp Intake (Radial)
- 2x Small Delta Wing
- 1x Mk1 Inline Cockpit
- 2x CR-7 R.A.P.I.E.R. Engine
- 2x Standard Canard
- 4x OX-STAT Photovoltaic Panels
- 4x Mk1 Liquid Fuel Fuselage
- 1x Service Bay (1.25m)
- 2x EAS-4 Strut Connector
- 1x LV-N "Nerv" Atomic Rocket Motor
- 1x Mk2 Liquid Fuel Fuselage Short
- 1x Mk2 to 1.25m Adapter Long
- 1x Clamp-O-Tron Shielded Docking Port
Action Groups
- Toggle Air Intakes and Switch Mode for the R.A.P.I.E.R.
- Toggle LV-N Atomic Rocket Motor
- Toggle R.A.P.I.E.R.
Assembly
Start with the RC-001S Remote Guidance Unit. This will be a manned spaceplane, but I always put a probe core on my craft so I retain control when on EVA. There is an added benefit that when flight testing your plane you don't have to risk a kerbal in an unproven spaceplane. Build out the main fuselage (Mk1 Inline Cockpit, Mk2 to 1.25m Adapter Long, Mk2 Liquid Fuel Fuselage, Mk2 Liquid Fuel Fuselage Short, and LV-N Atomic Rocket Motor) and forward utilities (Service Bay (1.25m), Clamp-O-Tron Shielded Docking Port). The service bay protects the thermally sensitive RTG and batteries. Disable the Mk2 Liquid Fuel Fuselage Short so that we have a large thermal mass attached to the LV-N Atomic Rocket Motor to absorb heat at least until we need the fuel. 1 LV-N Atomic Rocket Motor gives this a very low thrust to weight ratio, too low to get all the way into orbit when the airbreathing mode of the R.A.P.I.E.R. becomes ineffective on Kerbin. We'll use the R.A.P.I.E.R. rocket mode to give us a boost before relying on the LV-N alone. Add fuel tanks on the side and the R.A.P.I.E.R. and the air intakes. Turn on the CoM and CoL indicators. Add in the vertical stabilizer/rudder (Small Delta Wing,Elevon 2) and the RCS thrusters. Add the wings and control surfaces. You generally want a CoL that is slightly behind the CoM which should be fairly easy with this design, but can take some fine tuning. Don't be afraid to move the side fuel tanks to get your wings into a better position. Once you have the wings in the proper place add struts to strengthen them. Add struts between the main fuselage and the side fuel tanks. Now that your CoM is pretty well defined add the rear landing gear slightly behind the CoM and your front landing gear wherever you want (within reason). Connect the side fuel tanks so with fuel lines so that fuel can flow in both directions. Finally add the ladder at an angle which allows it to barely touch the ground and puts you on top of the plane instead of on the side, so you fall onto the plane when you reach the top instead of on the ground.
Air Intakes
Air intakes are an important part of a spaceplane. There are a lot of air intake options, but for a spaceplane (as opposed to an airplane) you need to use one that has good high altitude characteristics. The Adjustable Ramp Intakes and Shock Cone Intakes both have excellent high altitude characteristics. The shock cone has slightly better performance and better thermal characteristics, but they are so close they can almost be used interchangeably. The various cylindrical air intakes are not as good, but if you need a cylindrical mount and maybe a little jet fuel you might as well use one with an air intake. The radial mounted air intakes are not as effective at high altitude, but they are easy to mount. With enough of them and a proper ascent profile they can be used, but I wouldn't recommend it. 2-3 Adjustable Ramp or Shock Cone Intakes per air breathing engine is a good rule of thumb (two radial intakes roughly equals one of these intakes). Adding more intakes than this adds weight with relatively little increase in operating envelope.
Flight Worthiness Test
You'll want to test out the plane on Kerbin, because the last thing you want to do is send a spaceplane to Laythe only to discover that it can't land or takeoff on a less than ideal runway or is unstable in flight. My worthiness test is pretty simple:
- Empty the pilot seat. We don't want to kill a kerbal for a test flight.
- Takeoff from the runway. You should be able to pull up once you reach 85 m/s or greater and get into the air.
- The plane must be able to takeoff before the runway ends. If it doesn't the landing gear is probably not optimally placed.
- If you strike your tail you either need to move the landing gear back or pull up more gradually.
- Turn around and head towards the open field on the opposite side of the KSC from the runway.
- You should be able to turn at a reasonable rate without stalling. If not check your wing placement.
- Check for wing deflection when you turn. The main wing should behave as one unit. If not you probably need more struts.
- Land on the open field.
- You should be able to land without striking the tail.
- You might want to land with the engines on to maintain low vertical speed (less than 10 m/s).
- Watch as you land and make sure nothing flexes too much.
- Point your plane towards an unobstructed, flat section and takeoff again.
- If you are new to piloting planes in KSP repeat the takeoff and landing steps until you are comfortable with the process.
- Land on the rougher fields behind the KSC.
- Take your plane into orbit.
- As you climb watch to see if the plane tends to pull to either side. This usually indicates your wings are flexing and you probably need to add struts somewhere. Some drifting is normal, but SAS should be able to keep you pretty much straight.
- Re-enter and land.
- If you can get through all of these steps it is probably a worthy spaceplane and your pilot skills are up to the task.
Range Extender
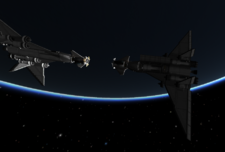
This desing is just the range extender. You'll need to build a rocket or spaceplane to lift it and the fuel necessary to refuel the spaceplane. I've done this with both traditional rockets and SSTOs built with Mk3 parts. The SSTOs ended up requiring two flights, which negated most of the fuel savings of using airbreathing engines, but it is an option if you want to minimize discarded stages.
- 2x Z-100 Rechargeable Battery Pack
- 1x Clamp-O-Tron Docking Port
- 8x RV-105 RCS Thruster Block
- 1x FL-R10 RCS Fuel Tank
- 2x Mk2 Liquid Fuel Fuselage
- 1x Probodobodyne OKTO2
- 4x OX-4L 1x6 Photovoltaic Panels
- 4x OX-STAT Photovoltaic Panels
Step 2 - Kerbin Orbit
General Notes
Getting a space plane into orbit is more complicated than a traditional rocket and you will find a large variance in recommendations between tutorials. Every plane is going to be a little different, so don't expect to be able to use the same ascent profile for every plane. They will be similar, but every plane has different weight, air intake count, lift rating, etc. and these are all factors that will change when you need to perform maneuvers during the ascent. Below I describe the ascent profile I use for this plane. No matter what plane you use, to get into orbit using as little fuel as possible you want to maximize the Δv you get from your air breathing engines before they cut out (where this happens varies from plane to plane and pilot to pilot). You must carefully balance your vertical and horizontal velocity especially as the air thins. You want to climb out of the thicker air to avoid drag, but you also need to keep a high airspeed so that you can force enough air through your intakes to keep the engines fed, and of course getting into orbit means you want a lot of horizontal velocity while you can use your efficient air breathing engines. Engine thrust also depends on airspeed which can lead to a frustrating situation where the only way to go faster is to go faster. This means that how you pilot a plane can dramatically influence how high you can go using jet power and how efficiently you get there. If you climb too fast you won't have enough airspeed and you will lose thrust as the atmosphere thins limiting your max thrust. If you climb too slowly you'll burn a lot of fuel heating up the atmosphere and your plane (which may cause it to explode).
Ascent Profile
Climb to 14 km as quickly as you can. You will need to build up speed before ascending, try to keep to just below 300 m/s. Keep pulling up as much as you can while maintaining that speed. Scott Manley posted a video of a similar ascent for those that prefer video Flying the Spaceplane To Orbit in KSP v1.0.4, keep in mind he is using a different plane with different characteristics (in particular the R.A.P.I.E.R. gives us a higher ceiling). At 14 km point prograde until you build up to 380 m/s (you will probably be losing altitude at this point). At this point the TWR of your plane should be high enough to keep climbing, so start to slowly pull up making sure your airspeed doesn't decrease. You should be able to pull up before you get much below 13 km. Continue to build speed until you are at 600 m/s and start climbing again at a roughly 20 degree pitch. At 18-18.5 km point prograde again and build up speed. You should reach about 1,250 m/s, but watch out for overheating. Slowly pitch up while maintaining airspeed. When you start to lose airspeed because your engines can't maintain thurst enable the LV-N. When your R.A.P.I.E.R. flames out or you drop below 1,200 m/s switch to rocket mode and pitch up to 30 degrees. Stay in this climb until you run out of oxidizer. Point prograde again to build up horizontal speed. You may not get up to orbital velocity before reaching your apoapsis and droping back into the atmosphere, but you will generally reach orbital velocity before the atmosphere gets too thick to pull out of. Circularize into a Kerbin orbit at 100km. This is a good orbit for a rendezvous. Generally the plane can reach a 100km orbit with slightly less than half of its pre-flight fuel, but this actually represents roughly 2 km/s of Δv.
Step 3 - Range Extender Rendezvous
There are a number of tutorials on rendezvous. This is a technique I like, but feel free to substitute your own or use any of the other docking tutorials out there for this step.
Intercept
Load the range extender and refueling rocket or plane. Time warp until the space plane is overhead the space center and launch. Enter a circular 80 km orbit. Set the spaceplane as a target and match orbital inclination. When you set the spaceplane as a target you should see "AN" and "DN" tabs on your orbit. These indicate optimal points for matching inclination and if you hover over them you will see how many degrees off your orbits are. Create a maneuver node on the nearest AN or DN and add normal or anti-normal velocity until your inclination is off by 0 degrees (or better yet NaN) and perform the maneuver. Create a maneuver node and add enough prograde velocity on the node to barely have two intercepts. Increase your orbit count on the node until your intercept is as close as possible. If your launch was in the right position it shouldn't be more than an orbit or two. Drag the node around until the first intercept is less than or equal to 0.5 km. Unfortunately there is a bug that often results in the orbit count changing when you drag a maneuver node, which is frustrating when using this technique, but I still prefer it because you generally only need one burn to get an intercept and it uses the minimum amount of fuel (you can mitigate it by timewarping so the maneuver doesn't require increasing the orbit count). Execute the burn and if you over or under burn use RCS to correct. I usually keep using RCS as long as my intercept distance continues to decrease. You should now be headed for a close encounter with your target.
Docking
Time warp until you are within 4km of your target. Start a burn to match velocity. As a rule of thumb I burn until my target relative velocity starts with the same digit as my range to the target (i.e. 3.9 km -> 30 m/s, 2.9 -> 20 m/s, 1.9 -> 10 m/s). Position your burn so that your retrograde marker moves toward the target retrograde marker. When burning retrograde the marker will move away from your level indicator. In other words if you want to move the retrograde marker down orient your ship so that your level indicator is above the retrograde marker. If your retrograde marker and target marker drift too far apart go ahead and burn a little to move them closer. You want to maintain some target relative velocity to close range with the target while slowly decreasing it to avoid overshooting. Once you are within 1km decrease to 5 m/s. At 300 m burn and decrease to 1 m/s. Turn your ship around so that the docking port faces the spaceplane and switch to the spaceplane, open the protected docking port and face it towards the range extender. Switch back to the range extender. Use RCS to line up your approach and when you are within 50 m use RCS to slow to <0.5 m/s and dock. Refill the spaceplane, then detach and discard or land the delivery vehicle.
Step 4 - Jool Transfer
Escape
Use Alex Moon's Launch Window Planner to determine the next launch window for a Kerbin to Jool transfer. We'll perform an aerocapture when we arrive, so make sure to check that box. I usually select the mid-course plane change. There should be a transfer requiring less than 2000 m/s, if not click on advanced settings and increase the departure time a couple of years. Once we have our launch window calculated, time warp to a couple of days before the launch window. Zoom out and set Jool as your target. Create a maneuver node at roughly the Ejection angle and set your node for a prograde burn of the ejection velocity. Drag you maneuver node to find the point where you are at your closest approach. Our TWR is not high enough to make this in one burn, so we'll split the transfer burn into two phases. The first will be a burn to raise our apoapsis to 9 Mm. This will be an eccentric orbit that retains the 100 km periapsis we currently have. Start with the maneuver for a Jool intercept and then reduce the Δv so that your apoapsis is 9 Mm (approximately 820 m/s). Perform the first burn splitting the burn time so that half is before the node and half is after the node. Once that is complete, setup a new one at the same spot (your new periapsis should be in roughly the same location as your old node) set to the remainder of the ejection velocity (ejection Δv - 820 m/s) and adjust it until you get an encounter with Jool and the lowest periaspsis you can achieve without altering your Δv. Take the burn time for the new maneuver and divide by two, this is when you should start the second burn in the transfer. At the appropriate time start the second burn. After the second burn you should only need minor corrections to achieve the approach you had planned with your maneuver.
Course Corrections
You are now on course to an encounter with Jool, but you will need to correct your inclination and periapsis. The launch window planner recommends a point at which to correct the inclination, but it assumes and equatorial orbit which may or may not be true. Still it is a good first approximation. Put a maneuver node where it recommends and experiment to find the maneuver that matches inclination with Jool with the least fuel. Try moving your node around to find the fuel optimal point. Time warp and carry out the maneuver. Now decrease your Jool periapsis to 195 km +/- 50 km (you're probably too far out to be more accurate than that). Again experiment until you find the fuel optimal maneuver. Make sure to try both prograde/retrograde and radial in/out changes as one will usually have a similar effect with significantly less fuel.
Step 5 - Jool Capture
You'll want to achieve Jool capture before moving on to Laythe. There are a couple of options, though we have a pretty limited Δv budget, so for this guide they are limited. If you sent more fuel you could just use engines to achieve capture, though the requirements are considerable. In the past many guides (including older versions of this one) recommended aerocapture, however as KSP has added in heating effects on re-entry this has become too dangerous to recommend. The safest way to achieve capture while minimizing Δv is to use a gravitational slingshot around one of the moons. Tylo is my usual target since it has a high gravitational pull and no atmosphere, which allows you to get closer. Laythe is also a good target for a slingshot, though I don't usually target it for initial capture. I have not done a lot of slingshots, but typically I setup my periapsis near the orbit of my slingshot body and adjust it until I get an encounter. I highly recommend using a mod with a precision maneuver editor for this since you want to be precise. I adjust the maneuver until my orbit after the encounter is as close to my target orbit as possible. You can probably use monoprop to perform the maneuver, which is my preference since we need precision and we're going to abandon the range extender anyway. Transfer any remaining fuel to the spaceplance. Undock the range extender and use the remaining monoprop to put the range extender on a collision course for Jool. Continue performing slingshots until you have either an encounter with Laythe or a good orbit for one. Ideally you want an apoapsis is low enough to avoid Vall's SOI ( < 34.6 Mm), but high enough that you will end up with a Laythe encounter ( > 20 Mm). You don't want a very eccentric orbit since it will mean more Δv you need to burn off on Laythe.
Step 6 - Laythe Aerocapture
Approach
Set Laythe as your target and match inclination. Set a maneuver node and advance the orbit until you have a Laythe encounter or close approach. Adjust your node to make your Laythe periapsis 40 km +/- 4km in a prograde direction (counter-clockwise). Again try multiple different combinations and positions. You may also want to reduce your orbit count to make an earlier adjustment (you can use a second maneuver node to see the effect on the latter orbit). If you are burning prior to your Jool periapsis make sure that the maneuver doesn't decrease your periapsis below 200 km or you'll have an unintended aerobraking that will throw off your approach (among other things). Make your burn, time warp up to the encounter, and cross into Laythe's SOI.
Aerocapture
I highly recommend installing the Trajectories plugin when aerobraking. It doesn't model wings, but it does give you a rough idea of your trajectory when an atmosphere is involved. 36 km is about the limit for a safe approach and 38 km is probably a good taget for capture, though it depends on how fast you are approaching Laythe. Engage the A.I.R.B.R.A.K.E.S., point prograde, and enter Laythe's atmosphere. You may not be captured by this, if that happens burn retrograde until you are captured.
Aerobrake
Now that we've reduced our velocity with the first aerobrake maneuver the second one should be at a much higher altitude where it is much safer to aerobrake. At your apoapsis adjust your periapsis with a maneuver node until Trajectories shows an apoapsis of about 100 km. Perform the second aerobrake maneuver. Generally a third aerobrake is required before we are close enough to our desired orbit. Once we are close enough circularize at a 100 km orbit.
Step 7 - Laythe Landing
Laythe is a great place to fly a spaceplane, but a challenging place to land one. There is very little land and most of it is covered with mountains. Fortunately there are a few decent landing spots on the equator, but there is really only one I would recommend. It is the largest equatorial island and as you orbit it is the last island before a large expanse of ocean. If you look at the topographical map on the Laythe page there is a peninsula at approximately 165°W and 2°N that is probably the best landing spot in my opinion. Time warp until this island is on the light side. Create a maneuver node 180 degrees from your landing site for a retrograde burn so that you'll land on the island. This is where the Trajectories mod comes in handy. It will project a landing point indicator based on a maneuver node, so just adjust it until you see an X just past the island. We'll be using your wings to slow us down, so we want a little extra margin. Time warp until your about ready for your maneuver. Remember that the planet is rotating, so you will probably need to move your node before you burn. Make your burn. Use RCS to correct for any under/over-burning. It is important to slow down high in the atmosphere before heating effects destroy your plan. The easiest way I've found is to simply pitch up aggressively until your vertical velocity is as low as possible. Keep doing this until you are at or below 1,300 m/s at which point you are slow enough that you can generally survive the heating effects. Before you go any further switch the R.A.P.I.E.R. engines to airbreathing mode and turn the LV-N Atomic Rocket Motor off. You might over or undershoot the landing site depending on a number of factors. If you undershoot use the engines to fly to the site. If you overshoot you can probably perform a gliding U-turn or spiral depending on how far you overshoot. If you overshoot by more than what you can glide, the middle of the island is also a good secondary landing site. This plane is capable of landing in a glide, but I recommend landing at 1/3rd thrust at least until you are familiar with the terrain. While this is one of the better landing sites it is not without its hazards and you may need to pull up to avoid a sand dune or sloping terrain which is much easier when the engines are running. Once you touch down do whatever exploration you want and get back into the plane.
Step 8 - Laythe Takeoff
Turn your plane towards 90 degrees. Find a relatively flat area long enough for a takeoff and hit full throttle. Getting into Laythe orbit is much easier than Kerbin orbit because of the lower gravity and jet engines operate up to a higher altitude. Start with a steep climb. Point prograde at 15 km and keep accelerating until you reach about 1,000 m/s and start pulling up to keep from overheating, but try not to climb too aggresively (I use about a 15-20 degree pitch). You want to reach 1,400 m/s on airbreathing engines if you can. As soon as your airbreathing engines cut out shut off the air intakes and activate the LV-N. You should be able to reach orbital velocity, though it may take practice.
Step 9 - Escaping Laythe
This isn't necessarily the most efficient way to do this, but it is easy to do without precise timing. Setup a maneuver node with just enough Δv to escape Laythe. Move the node around until you maximize your Jool apoapsis. This should be around 75 Mm. You might need to add a little bit of Δv to achieve this, but with the proper ejection angle you should be close. This will put you out past the other moons of Jool where you can avoid accidental slingshot maneuvers or accidental abrupt lithobraking as we time warp later on. Once you have set up a good maneuver time warp as needed and burn to escape Laythe. I don't usually split this burn because it is usually short and Laythe moves fast enough that in the next orbit the ejection angle will already be sub-optimal if we try to split it. Once you have escaped Laythe's SOI time warp to your Jool apoapsis and raise your periapsis to the same altitude.
Step 12 - Return To Kerbin
Basically this is the reverse of your trip to Laythe. Use the launch window calculator to find out when, how much Δv, and at what ejection angle. Time warp to within a few days and set up your maneuver node. Kerbin has a much smaller SOI, so it is a little harder to find an intercept. You'll probably need to include an inclination change to get one at all. Once you have a good maneuver planned execute the maneuver at the proper time (remember to re-enable the fuel tank we disabled earlier). As you return to Kerbin correct your inclination and lower your periapsis to about 30 km +/- 10 km. Once you are within Kerbin's SOI use the aerobraking calculator to figure out your aerocapture altitude. Use the same repeated aerocapture/aerobraking steps we used on Laythe to get into your desired orbit (or keep braking until you land).
Finishing word
If all went according to plan you have now taken a spaceplane from Kerbin to Laythe and back again.
Additional Ideas
- Refuel in orbit and go again. To make it more interesting send ahead a rover and/or a fuel tanker.
- Take the plane straight from the runway to Minimus.
Math (Optional)
- LF == Liquid Fuel (fuel units, in other words what you see in the resource dialog)
- O == Oxidizer (fuel units)
- Mass is in metric tons (1000 kg)
Delta-V Budget
For a mission of this complexity it is a good idea to create a Δv budget to figure out whether you can get where you want to and how much margin for error you have. Since we are refueling in orbit I'm ignoring the Δv needed to get into Kerbin orbit. We're also saving a lot of Δv by using aerocapture/aerobrake maneuvers where we can. Most of the values are approximate since they can vary based on launch window, inclination, eccentricity, and lot of other factors (basically I rounded up to the nearest 100 m/s). The Δv maps on the Cheat sheet page is helpful in building the budget, though they are just a first step. This budget assumes that you are trying to perform fuel optimal maneuvers where practical (with some extra margin since this is a tutorial).
- Low Kerbin Orbit To Jool - 2000 m/s
- Pre-SOI Orbit Corrections (Jool) - 100 m/s
- Orbital Insertion (Jool) - Aerocapture/Aerobrake + 200 m/s
- Pre-SOI Orbit Corrections (Laythe) - 300 m/s (Can vary wildly depending on where you intercept Laythe)
- Orbital Insertion (Laythe) - Aerocapture/Aerobrake + 200 m/s
- De-Orbit (Laythe) - 100 m/s
- One-way Total = 2900 m/s
- Re-Orbit (Laythe) - 3100 m/s (Jets) + 200 m/s
- Escape (Laythe) - 600 m/s
- Circularize (Jool) - 500 m/s
- Escape (Jool) - 1200 m/s
- Pre-SOI Orbit Corrections (Kerbin) - 100 m/s
- Orbital Insertion (Kerbin) - Aerocapture/Aerobrake + 200 m/s
- De-Orbit (Kerbin) - 100 m/s
- Two-way Total = 5800 m/s (LV-N) + 3100 m/s (Jets)
- Rocket Δv = 6430 m/s
- Over provision >= 630 m/s
I usually just guess on the jet fuel portion because jets are so efficient that I don't need to be too accurate. This is a rough estimate which we're going to add a safety margin to, so we don't need to be very precise or accurate.
Once you have a total Δv you can use the rocket equation re-written to solve for the fuel mass to avoid over provisioning too much. Sending too much fuel means you need to burn longer than you otherwise need to and if you are landing it means that you need more upward force (parachutes, wings, or descent engines) to land safely.
