Tutorial: Gravity Assist/ko
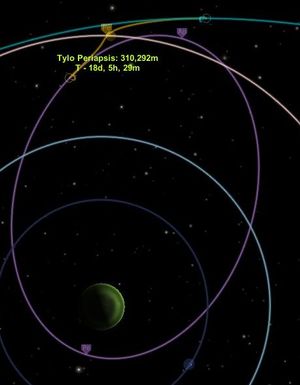
중력 조력 혹은 스윙바이 또는 슬링샷 이란 이름으로 알려진 이 방법은 연료를 굉장히 아끼면서 우주선의 속력을 천체의 궤도 속력과 중력을 이용하여 조절하는 방법입니다. 커볼은 제외합니다. 항성이니까요, 어쨋든 당신의 우주선이 한 천체의 중력 영향권에 포섭되어 진입을 하면 그 천체의 중력이 당신의 우주선에도 영향을 미칩니다. 그 후에, 당신은 그 천체의 중력과 궤도 속력을 이용하여 우주선의 속력을 감속, 혹은 가속할 수 있습니다. 그냥 무식하게 엔진만 켜서 가속하는 것보다 훨씬 효율적이죠
- Length: 30 minutes
- Difficulty: Medium
- For version: 0.18.4
How to do it
In this example we will leave from Kerbin to a trajectory to Duna by performing a gravity assist around the Mun. Usually you need to raise your apoapsis to 85 million km to escape from Kerbin. With this method we will just have to get to the Mun orbit (12 million km). This will save you fuel for several hundred m/s of delta-v.
- Get your ship into a circular Low Kerbin Orbit
- Zoom out so you can see the orbit of Kerbin around the sun.
- Arrange for a fly-by with the Mun just like you learned in the "Going to the Mun" ingame tutorial, but arrange for it to happen while the Mun is heading into the direction you want to go. In this case we want to get further way from the sun, so do it when the Mun is going in that direction - the moment it intersects the orbit of Kerbin.
- Accelerate time until you reach the sphere of influence of the Mun
- Now plan another course correction maneuver. The maneuver is more effective when you are close, so try to pass the Mun as close as possible without colliding. Your Mun periapsis needs to be behind Mun on Muns trajectory. When you pass in front of Mun, you will lose speed instead of gaining it. Also watch the declination of your trajectory - when it gets too high it will be problematic.
- Accelerate time until you left the SoI of the Mun.
- When you check the map you will notice that you are on a much wider orbit than you were before the Mun fly-by (likely with an apoapsis beyond Minmus orbit), but it's not a Kerbin escape trajectory yet. The Mun hasn't yet given you all the speed it can.
- So perform another correction maneuver which leads you to another close Mun fly-by and again try to pass it as close as possible. The best moment to perform this maneuver is usually when you are furthest away from Mun.
Congratulations, you should now be on an orbit leading you in the general direction of Duna with plenty of fuel left for the return trip. When you want to go back, perform the same trick with Ike.
Reverse Gravity assist

Should you enter the Duna-Ike system in a suitable trajectory, you can perform a reverse-gravity-assist to lose speed instead of gaining it. To do so just do an Ike-fly-by. In order to lose speed instead of gaining it, your Ike periapsis needs to be in front of Ike's trajectory instead of behind it.
Powered Gravity assist
To get even more out of a gravity assist, you can perform a powered gravity assist. As you know, accelerating at your periapsis has the greatest effect on your apoapsis. This still applies to your periapsis during a gravity assist. When you accelerate during your fly-by, this fuel is used very efficiently to increase the apoapsis of your final trajectory. This is, however, a very difficult technique, because it is hard to control your final trajectory, even when using a maneuver node.
See also
- Using Gravity Assists To Save Fuel by Scott Manley on YouTube
- How to perform a gravity assist (Narrated)
- Gravity assist on Wikipedia

