Difference between revisions of "Getting Started/ru"
(→Скачивание) |
(→Ракета!) |
||
| Line 57: | Line 57: | ||
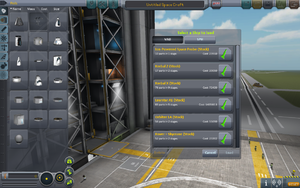
[[File:KerbalXstock.png|thumbnail|center|Рисунок 5 : Меню ЗВС]] | [[File:KerbalXstock.png|thumbnail|center|Рисунок 5 : Меню ЗВС]] | ||
| + | Нажав на значке жёлтой папки в верхнем правом углу, появится меню как на рисунке 5. Найдём и выберем Kerbal X (stock). Это загрузит готовую ракету, Kerbal X. Она очень проста и может легко выйти на орбиту вокруг планеты. Если Вы используете демо версию, то [http://dl.dropbox.com/u/27588455/Jam001.craft здесь] есть пример простой ракеты, подобной Kerbal X. | ||
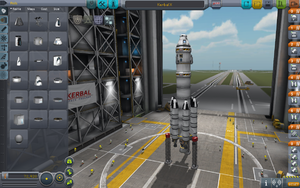
| − | + | [[File:TheKerbalX.png|thumbnail|center|Рисунок 6 : Kerbal X]] | |
| − | + | Хотя эта ракета кажется немного сложной, на самом деле она достаточно простая и С правой стороны экрана, показанного на рисунке 6, есть пронумерованные оранжевые папки от 0 до 8. Это этапы запуска, которые есть у твоей ракеты. Это не тоже самое, что ступени ракеты. При каждом нажатии пробела происходит переход к следующему этапу. Каждый этап имеет как минимум одну иконку внутри. Это события этого этапа. Таким образом, этапы запуска следующие: | |
| − | + | # Этап запуска ракеты 8 | |
| + | #*# Это Ваш начальный этап запуска | ||
| + | #*# Здесь семь жидкостных двигателей, которые активируются на этом этапе | ||
| + | # Этап запуска ракеты 7 | ||
| + | #*# Это второй этап запуска | ||
| + | #*# Этот этап убирает опоры, TT18-A Launch Stability Enhancers, которые видно внизу ракеты | ||
| + | #**# The TT18-A LSE - это каркасные опоры с красной шапкой | ||
| + | # Этап запуска ракеты 6 | ||
| + | #*# Этот, третий, этап запуска отсоединяет 2 ускорителя от основной ракеты | ||
| + | #**# Этот этап должен быть активирован только после того как первый комплект из двух ускорителей исрасходует всё топливо | ||
| + | #**# Понять, что двигатель истратил всё топливо, можно по звуку или же по индикатору топлива | ||
| + | # Этап запуска ракеты 5 | ||
| + | #*# После небольшого промежутка ещё у двух двигателей закончится топливо, нажатие пробела активирует этот этап и отсоединит их от ракеты | ||
| + | #**# Напоминаю, нажимаем пробел только *после* израсходования всего топлива ещё двумя двигателями | ||
| + | # Этап запуска ракеты 4 | ||
| + | #*# Этот этап идентичен двум предыдущим | ||
| + | #**# Основное отличие только в том, что это последний комплект ускорителей для этой ракеты | ||
| + | # Этап запуска ракеты 3 | ||
| + | #*# Это конец первой ступени ракеты | ||
| + | #**# Когда пробел будет нажат, основной двигатель, который помогал ускорителям вывести ракету в космос, будет отсоединён от второй ступени ракеты | ||
| + | # Этап запуска ракеты 2 | ||
| + | #*# Этот этап включает небольшой двигатель, присоединённый непосредственно к капсуле | ||
| + | # Этап запуска ракеты 1 | ||
| + | #*# Это последний этап перед тем как парашют будет раскрыт | ||
| + | #**# Так как это последний этап, который отсоединит оставшийся двигатель, рекомендуется *не* активировать его до тех пор пока Вы находитесь на обратном пути к планете | ||
| + | # Этап запуска ракеты 0 | ||
| + | #*# Это финальный этап, который раскрывает парашют | ||
| − | + | Вот полное описание значения оранжевых вкладок с правой стороны экрана. Хотя Kerbal X вполне самодостаточная ракета, я рекомендую добавить пару элементов, которые сделали бы выход на орбиту немного легче. | |
| − | |||
| − | |||
| − | |||
| − | |||
| − | |||
| − | |||
| − | |||
| − | |||
| − | |||
| − | |||
| − | |||
| − | |||
| − | |||
| − | |||
| − | |||
| − | |||
| − | |||
| − | |||
| − | |||
| − | |||
| − | |||
| − | |||
| − | |||
| − | |||
| − | |||
| − | |||
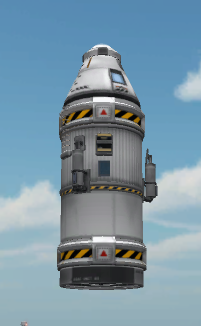
| − | + | [[File:SASLarge.png|thumbnail|center|Рисунок 7 : Подготовка к SAS модулю]] | |
| − | + | Рисунок 7 показывает, что основная ступень ракеты отсоединена для возможности добавить чёрный SAS модуль из вкладки Control. Чтобы "разобрать" ракету в правильном месте, просто наведите мышь на секцию ниже переходника, черно-жёлтое кольцо с красным треугольником, и щёлкните левой кнопкой мыши (ЛКМ) раз. Это выберет топливный бак под переходником и всё, что ниже этой секции. Затем просто передвиньте в сторону, но не на серое окно выбора компонентов слева (иначе выделенная секция удалится), и щёлкните ЛКМ ещё раз,чтобы оставить секцию там. | |
| − | + | Модуль SAS значительно помогает сохранить курс Вашей ракеты без лишнего вмешательства с Вашей стороны. С установленным SAS модулем, нажатие клавиши "t", после того как ракета установлена на стартовом комплексе, позволит держать курс ракеты почти строго по центру пока она летит. Есть и другие варианты для поддержания стабильности курса ракеты, но о них будет сказано позже. | |
| − | + | [[File:SASaddedFirstStage.png|thumbnail|center|Рисунок 8 : SAS модуль добавлен к основной ступени ракеты]] | |
| − | |||
| − | [[File:SASaddedFirstStage.png|thumbnail|center| | ||
In order to add the SAS module, do an LMC on the black SAS module, then move your cursor over to the rocket sections. There should now be the SAS module following your cursor, and if not simply go back and do another LMC to select the module again. With the module following your cursor, drag it to the base of the separator ring and you will see the SAS turn green when it is properly placed. Do one last LMC and the module will be placed underneath the separator as shown in Figure 8. The last step is to combine the lower section back onto the SAS module. This is done the same way as it was taken off, just in reverse. | In order to add the SAS module, do an LMC on the black SAS module, then move your cursor over to the rocket sections. There should now be the SAS module following your cursor, and if not simply go back and do another LMC to select the module again. With the module following your cursor, drag it to the base of the separator ring and you will see the SAS turn green when it is properly placed. Do one last LMC and the module will be placed underneath the separator as shown in Figure 8. The last step is to combine the lower section back onto the SAS module. This is done the same way as it was taken off, just in reverse. | ||
Revision as of 15:47, 9 March 2013
Целью данного руководства является помощь новичку в первые часы с Kerbal Space Program.
Contents
Покупка
Squad предоставляет довольно простой магазин, в котором вы можете купить KSP.
- Зайдите на сайт http://kerbalspaceprogram.com
- Кликните по вкладке Store.
Скачивание
Squad, создатели Kerbal Space Program, сделали патчер - небольшую утилиту, которая используется для скачивания, обновления и восстановления игры. Она также позволяет скачать игру с Amazon S3, когда основные сервера перегружены.
- Зайдите в магазин.
- Авторизуйтесь, используя Ваш логин и пароль.
- Кликните по кнопке Профайл.
- Прокрутите до конца страницы и выберите ссылку на скачивание рядом с инвойсом о покупке.
- Скачайте патчер для Вашей ОС в пустую папку.
- Пользователи Mac:
- Убедитесь, что установлено разрешение на выполнение на Patcher.command file.
- Установите Mono из прилагаемого .dmg файла, если нужно.
- Запустите Patcher.command.
- Пользователи Windows:
- Установите .NET Framework версии 4.0 или выше, если нужно. (В новых версия Windows он уже встроен.)
- Запустите Patcher.exe.
- Пользователи Mac:
Пользователи Linux тоже могут запускать игру, даже несмотря на отсутствие официальной поддержки. Используя Wine, Вы можете запустить игру полностью, но с небольшой проблемой - Вы не сможете использовать патчер; хотя это вовсе и не проблема, так как Вы можете просто скачать игру полностью, когда новые версии будут доступны. Для большей информации посетите Running KSP with wine.
Запуск игры
Когда установка игры завершена, самое время запустить её. Сделать это просто - зайдите в папку, куда была распакована игра и запустите KSP.exe. Для удобства можно сделать ярлык этого файла на рабочий стол, если же Вы не планируете запускать игру со съёмного носителя и иметь возможность играть с любого компьютера.
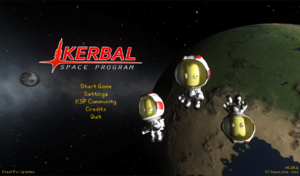
Основной экран имеет следующее меню:
- Start Game (Начать игру)
- Settings (Настройки)
- KSP Community (Сообщество KSP)
- Credits (Титры)
- Quit (Выход)
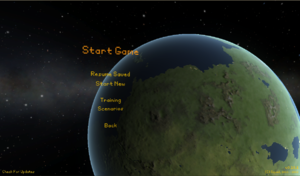
Выбрав Start Game, Вы увидите дополнительное меню Start New (Начать новую) и Resume Saved (Возобновить сохранённую).
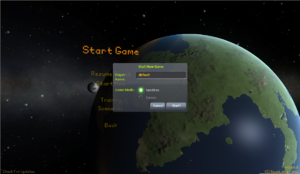
При начале новой игры Player Name (имя игрока) не должно оставаться 'default'. Измените его на любое другое имя, которое пожелаете.
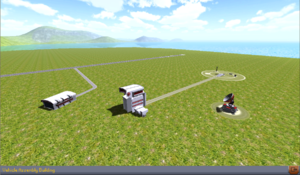
После того как игра запущена, на экране перед Вами появится стартовая площадка с двумя сборочных цехами, научно-измерительным пунктом (НИП), стартовым комплексом.
Ракета!
Так как нам нужна ракета, выбираем среднее здание - это Vehicle Assembly Building (здание вертикальной сборки - ЗВС). Здесь мы начнём нашу первую ракету, используя уже готовый, заводской (стоковый) экземпляр.
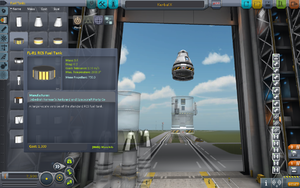
Нажав на значке жёлтой папки в верхнем правом углу, появится меню как на рисунке 5. Найдём и выберем Kerbal X (stock). Это загрузит готовую ракету, Kerbal X. Она очень проста и может легко выйти на орбиту вокруг планеты. Если Вы используете демо версию, то здесь есть пример простой ракеты, подобной Kerbal X.
Хотя эта ракета кажется немного сложной, на самом деле она достаточно простая и С правой стороны экрана, показанного на рисунке 6, есть пронумерованные оранжевые папки от 0 до 8. Это этапы запуска, которые есть у твоей ракеты. Это не тоже самое, что ступени ракеты. При каждом нажатии пробела происходит переход к следующему этапу. Каждый этап имеет как минимум одну иконку внутри. Это события этого этапа. Таким образом, этапы запуска следующие:
- Этап запуска ракеты 8
- Это Ваш начальный этап запуска
- Здесь семь жидкостных двигателей, которые активируются на этом этапе
- Этап запуска ракеты 7
- Это второй этап запуска
- Этот этап убирает опоры, TT18-A Launch Stability Enhancers, которые видно внизу ракеты
- The TT18-A LSE - это каркасные опоры с красной шапкой
- Этап запуска ракеты 6
- Этот, третий, этап запуска отсоединяет 2 ускорителя от основной ракеты
- Этот этап должен быть активирован только после того как первый комплект из двух ускорителей исрасходует всё топливо
- Понять, что двигатель истратил всё топливо, можно по звуку или же по индикатору топлива
- Этап запуска ракеты 5
- После небольшого промежутка ещё у двух двигателей закончится топливо, нажатие пробела активирует этот этап и отсоединит их от ракеты
- Напоминаю, нажимаем пробел только *после* израсходования всего топлива ещё двумя двигателями
- Этап запуска ракеты 4
- Этот этап идентичен двум предыдущим
- Основное отличие только в том, что это последний комплект ускорителей для этой ракеты
- Этап запуска ракеты 3
- Это конец первой ступени ракеты
- Когда пробел будет нажат, основной двигатель, который помогал ускорителям вывести ракету в космос, будет отсоединён от второй ступени ракеты
- Этап запуска ракеты 2
- Этот этап включает небольшой двигатель, присоединённый непосредственно к капсуле
- Этап запуска ракеты 1
- Это последний этап перед тем как парашют будет раскрыт
- Так как это последний этап, который отсоединит оставшийся двигатель, рекомендуется *не* активировать его до тех пор пока Вы находитесь на обратном пути к планете
- Этап запуска ракеты 0
- Это финальный этап, который раскрывает парашют
Вот полное описание значения оранжевых вкладок с правой стороны экрана. Хотя Kerbal X вполне самодостаточная ракета, я рекомендую добавить пару элементов, которые сделали бы выход на орбиту немного легче.
Рисунок 7 показывает, что основная ступень ракеты отсоединена для возможности добавить чёрный SAS модуль из вкладки Control. Чтобы "разобрать" ракету в правильном месте, просто наведите мышь на секцию ниже переходника, черно-жёлтое кольцо с красным треугольником, и щёлкните левой кнопкой мыши (ЛКМ) раз. Это выберет топливный бак под переходником и всё, что ниже этой секции. Затем просто передвиньте в сторону, но не на серое окно выбора компонентов слева (иначе выделенная секция удалится), и щёлкните ЛКМ ещё раз,чтобы оставить секцию там.
Модуль SAS значительно помогает сохранить курс Вашей ракеты без лишнего вмешательства с Вашей стороны. С установленным SAS модулем, нажатие клавиши "t", после того как ракета установлена на стартовом комплексе, позволит держать курс ракеты почти строго по центру пока она летит. Есть и другие варианты для поддержания стабильности курса ракеты, но о них будет сказано позже.
In order to add the SAS module, do an LMC on the black SAS module, then move your cursor over to the rocket sections. There should now be the SAS module following your cursor, and if not simply go back and do another LMC to select the module again. With the module following your cursor, drag it to the base of the separator ring and you will see the SAS turn green when it is properly placed. Do one last LMC and the module will be placed underneath the separator as shown in Figure 8. The last step is to combine the lower section back onto the SAS module. This is done the same way as it was taken off, just in reverse.
Another SAS module can be added to the section directly underneath the capsule. Simply repeat the same process to the separator that is underneath the capsule. While adding the SAS to the Capsule section, adding some RCS Fuel, Figure 9, will also assist in keeping the rocket stable in flight, by pressing "r" to turn on the rocket in flight. The last step is to add some RCS Thrusters, which I added to the capsule separation ring, see Figure 10. To add these thrusters in any sort of symmetry, use the symmetry icon in the bottom left of the screen, see Figure 11. Each LMC on this indicator will cycle through all of the cloning options, ie 1 - 8 duplicates of whatever item you are placing.
Once the rocket is all attached together again, it is time to move the rocket to the launch pad. Referring back to Figure 1, the Launch Pad is the green icon in the upper right corner of the screen. Clicking on this icon will move the rocket onto the launch pad.
Launching the rocket
Once you've made or selected a rocket, press the big green launch button in the top right.
Flight controls are not exactly straightforward. W, S, A, and D move the ship around, but they are relative to your rotation, controlled with Q and E. The easiest way to keep your rocket on target with WSAD is to look at the navball, in the bottom middle of the screen.
Before launching your rocket, take a second to look at your map, by pressing M. This will bring up Kerbin on the map. Scroll out to show kerbins moons, and even farther to see the rest of the solar system. It will be a while before you even learn how to make a rocket than can escape the sphere of influence of Kerbin, so experiment with different rocket designs, and see what works best for you.
Launching your rocket is the easy part. Just press space. But don't do that just yet, press T to turn SAS on. SAS is essentially autopilot, without SAS you just won't turn as well. Pure SAS allows you to control the movement of your rocket with the WSADQE keys faster, and with more power, however it is nothing compared to ASAS (Advanced SAS). Advanced SAS allows your rocket to use thrust vectoring (You'll learn about that later too) and it keeps you on course, instead of you having to turn manually.
Each time you run out of fuel in a stage, press space until the next stage of fuel and engines start burning.
If you don't want to read everything I said above all you need to know is before launching press T, than press space to launch and if your rocket stops going, press space again.
Getting into orbit
It's time to make your own rocket. The parts editor in the VAB is simple enough to use, but if I were you I would stay away from spaceplanes for a little while longer.
You already know a little bit about staging, but I'm going to generalize it even more for you.
The launching stage
Here you have a whole bunch of high powered engines and large fuel tanks, Solid rocket boosters are most often used here. The motto here is pack as much of it on as you can because you're not taking it with you.
If you do not already know, you can mount things radially (on the side) of other things, and by the magic of the symmetry button (Bottom of the parts menu) you can have the radially mounted things not make your poor rocket tip over.
Staging is one of the most important aspects of building a rocket. I still use staging, even though a lot of people have quickly traded it out for action groups. On the right there is a tall bar with everything in it's respective stage, however if you were to put half your rockets in one stage and the other half in another, you would go almost 3 times as far, in twice the time!
The other stages
Generally split into a circularization stage (I totally didn't make that word up), and an interplanetary stage but for you all you really need to know is everything after the stages in the atmosphere should be light, with medium to low power. Once you're out, if you're going into orbit all you need is a LV-N, 909 or a poodle, depending on your preference.
How to use these stages
Remember when I told you how to open the map? that's going to come in handy here. Your map also shows your orbital details, so what you need to do is burn just about directly up with your launcher stage. This may take a while, and I encourage you NOT to use the physics warp as with most rockets if you are burning and using the physics warp you will almost always veer wildly off course or explode in midair. Once your apoapsis (displayed on the map) is above about 70km press X or hold control to turn off your throttle. Turn off SAS and aim your rocket so it is facing sideways. On the navball the marker indicating your direction should be right on the border between blue and brown. Turn SAS back on and time warp (slowly) until your rocket is about 1km below your apoapsis, than start burning. On the map your orbit should get wider and wider (you can bring up your navball on the map and keep steering, and see your fuel on the map by pressing F2 twice), and once it gets wide enough your periapsis will pop out of the ground, see its shadow and go scampering off into space. Once your apoapsis and periapsis are both above 70km, you can rest and look at your work. Than you can start thinking, well great I have a piece of junk in orbit of my planet. To reenter kerbin, you need to burn retrograde. That sounds fancy, but if you have enough fuel just turn your rocket until you see the yellow circle with the small yellow lines in the middle. Point directly at it and burn baby burn. If you put a parachute on the top of your rocket, when you drop to 500m above the ground it will deploy and if you made your top stages light enough it will almost completely stop you before you hit the ground. If your rocket is too heavy, the parachute will rip off and your kerbals will fall gently to the ground, exploding upon impact.
If you run out of fuel while burning retrograd, don't worry! so long as your periapsis is less than 70 km you can just timewarp and the atmosphere around Kerbin will slow your rocket down every time it gets below 70km. For fancy points you can try to time your deorbit burn (retrogade burn) to when you are almost on top of kerbal space center, but you have to be aiming 90 degrees when you get your rocket into orbit for that to work well.
Still To Do
- Links for additional tips, tricks, and guidance
