Difference between revisions of "Getting Started/pl"
m (Blanked the page) |
m (Reverted edits by Rocketing Rudolph (talk) to last revision by Kostu) |
||
| Line 1: | Line 1: | ||
| + | Artykuł ten jest przeznaczony aby pomocy tobie w pierwszych kilku godzinach zabawy z Kerbal Space Program. Mimo, że jest daleko od zaawansowanych rzeczy, powinieneś łatwo zrozumieć podstawy. | ||
| + | == Kupno == | ||
| + | Squad dostarcza dość prosty sklep, w którym można kupić KSP. | ||
| + | |||
| + | #Wejdź na http://kerbalspaceprogram.com | ||
| + | #Kliknij na "store" | ||
| + | <!-- I forgot ;_; --> | ||
| + | |||
| + | == Pobieranie == | ||
| + | Squad, czyli twórcy Kerbal Space Program, posiadają [[Patcher|prosty patcher]] używany aby pobrać, zaktualizować oraz naprawić grę. Może on również pobierać z bardzo mocnego serwera [http://s3.amazonaws.com Amazon S3] (który jest chmurą) podczas gdy główne serwery KSP są zbyt obciążone. | ||
| + | |||
| + | # Wejdź na strone sklepu. | ||
| + | # Zaloguj się używając swojego loginu i hasła. | ||
| + | # Wciśnij przycisk "Profile". | ||
| + | # Przewiń na sam dół strony i kliknij "Download" obok twojego zakupionego produktu. | ||
| + | # Pobierz patcher dla twojego systemu do '''pustego folderu'''. | ||
| + | #* Macuserzy<!--sic-->: | ||
| + | #*#Upewnij się że plik Patcher.command ma uprawnienia wykonywania. | ||
| + | #*#Zainstaluj Mono z pliku .dmg jeśli potrzeba. | ||
| + | #*#Uruchom Patcher.command. | ||
| + | #* Windows Users: | ||
| + | #*# Zainstaluj .NET Framework 4.0 lub wyszy, jeśli potrzeba. (Nowe wersje systemu Windows posiadają już tą paczkę) | ||
| + | #*# Uruchom Patcher.exe. | ||
| + | |||
| + | == Uruchamianie gry == | ||
| + | |||
| + | Gdy gra jest już zainstalowana, czas na uruchomienie jej. Wystarczy uruchomić z zainstalowanej lokalizacji plik KSP.exe. Możesz również utworzyć skrót na pulpicie, możesz również skopiować pliki na pamięc USB i uruchamiać grę na każdym komputerze bez utraty save. | ||
| + | |||
| + | [[File:MainScreen.png|thumbnail|center|Figure 1 : KSP v0.18.1 Ekran główny]] | ||
| + | |||
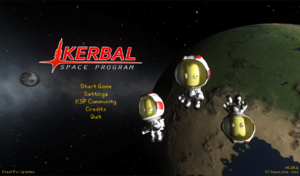
| + | Ekran główny posiada menu z następującymi linkami: | ||
| + | # Start Game - Uruchom grę | ||
| + | # Settings - Ustawienia | ||
| + | # KSP Community - Społeczność KSP | ||
| + | # Credits - O autorach | ||
| + | # Quit - Wyjście | ||
| + | |||
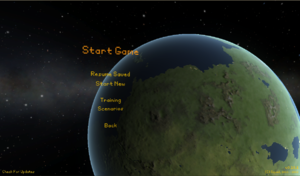
| + | Jeśli klikniesz już w "Start Game" pojawi się kolejne menu gdzie możesz wczytać lub stworzyć nową grę. | ||
| + | |||
| + | [[File:StartGameMenu.png|thumbnail|center|Kolejne menu w KSP]] | ||
| + | |||
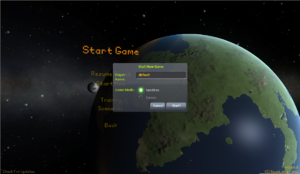
| + | Kiedy rozpoczniesz nową grę pojawi się opcja nazwania swojego save, zalecanie jest zmienić nazwę 'default' na coś innego. | ||
| + | |||
| + | [[File:NewGame.png|thumbnail|center|Okno nowej gry]] | ||
| + | |||
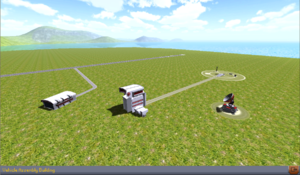
| + | Kiedy już gra się uruchomi, pojawi się twoje centrum kosmiczne widać tam 2 hangary, stację śledzenia, platforma startowa i lotnisko | ||
| + | |||
| + | == Rakieta! == | ||
| + | |||
| + | [[File:LaunchSite.png|thumbnail|center|Centrum kosmiczne]] | ||
| + | |||
| + | Potrzebujemy rakiety, wejdź w hangar do budowy rakiet. Dla tego artykułu użyjemy rakiety która jest domyślnie wgrana razem z grą. | ||
| + | |||
| + | [[File:KerbalXstock.png|thumbnail|center|Menu budowy]] | ||
| + | |||
| + | Kliknij na pomarańczowy folder znajdujący się w prawym górnym rogu okna, pojawi się menu pokazane na powyższym obrazku. Znajdź i wybierz '''Kerbal X (stock)'''. Załaduje to rakiete, Kerbal X. Jest to prosta rakieta, którą łatwo osiągniesz orbitę wokół planety. Jeśli używasz wersji Demonstracyjnej, [http://dl.dropbox.com/u/27588455/Jam001.craft Tutaj] jest przykładowa rakieta podobna do Kerbal X. | ||
| + | |||
| + | [[File:TheKerbalX.png|thumbnail|center|Kerbal X]] | ||
| + | |||
| + | Rakieta może wyglądać na skomplikowaną, ale jest prosta i łatwa do opisania. Po prawej stronie ekranu, znajdują się pomarańczowe "foldery" które mają oznaczenia od 0 do 8. Są to fazy lotu twojej rakiety. Fazy lotu twojej rakiety przełącza się za pomocą klawisza spacji. Każda faza ma przynajmniej jedną ikonę w sobie, są to zdarzenia przypisane do każdej fazy. Dla tego projektu są to: | ||
| + | |||
| + | # Faza 8 | ||
| + | #*# Jest to początkowa faza rakiety | ||
| + | #*# znajduje się tu 7 silników na ciekłe paliwo które są uruchamiane w tej fazie | ||
| + | # Faza 7 | ||
| + | #*# Jest to druga faza | ||
| + | #*# Ta faza odczepia rakietę od wspomagaczy startu "TT18-A Launch Stability Enhancers", które są umieszczone na dole rakiety Kerbal X | ||
| + | #**# TT18-A LSE jest to kratownica zakończona czerwoną nakładką | ||
| + | # Faza 6 | ||
| + | #*# Jest to trzecia faza, odłącza ona 2 zbiorniki dopalające. | ||
| + | #**# Ta faza powinna być uruchomiona tylko wtedy gdy w pierwszej parze zbiorników skończy się paliwo | ||
| + | #**# Stan paliwa jest pokazany na wskaźniku obok fazy lotu | ||
| + | # Faza 5 | ||
| + | #*# Po kilku chwilach skończy się paliwo w kolejnej parze zbiorników, ta faza odrzuca te zbiorniki. | ||
| + | #**# Przypominamy aby użyć tej fazy kiedy skończy się paliwo | ||
| + | # Faza 4 | ||
| + | #*# Tak samo jak w poprzednich fazach | ||
| + | #**# Jest to ostatnia faza rakiet dopalających | ||
| + | # Faza 3 | ||
| + | #*# Koniec fazy silnika głównego | ||
| + | #**# Po naciśnięciu spacji odpada silnik główny, który był wspomagany przez silniki dopalające. | ||
| + | # Faza 2 | ||
| + | #*# Ta faza uruchamia malutki silnik który umieszczony jest pod kapsułą załogową | ||
| + | # Faza 1 | ||
| + | #*# Ostatnia faza przed otwarciem spadochronu | ||
| + | #**# Jest to ostatnia faza silnika, zaleca się nie aktywować jej dopóki nie znajdziesz się na orbicie powracającej na planetę. | ||
| + | # Faza 0 | ||
| + | #*# Jest to ostatnia faza rakiety, gdy ją aktywujesz odpala się spadochron. | ||
| + | |||
| + | Mimo iż nie jest to konieczne zaleca się dodanie do rakiety kilku rzeczy które sprawią, że osiągnięcie orbity będzie znacznie łatwiejsze. | ||
| + | [[File:SASLarge.png|thumbnail|center|Dodanie modułu SAS]] | ||
| + | |||
| + | Screen pokazuje głowny człon rakiety odłączony po to aby można było dodać moduł SAS. Żeby rozdzielić rakietę we właściwym miejscu, najedź kursorem myszy na zbiornik pod docoplerem (czarno żółty pierścień z czerwonym trójkątem) i kliknij na niego lewym przyciskiem. W ten sposób odłączysz zbiornik i wszystko co znajduje się pod nim. Potem przesuń całość kawałek na bok (ale nie na szarą planszę przybornika z częściami, bo zostanie usunięta) i ponownie kliknij lewym przyciskiem myszy aby "odłożyć" zaznaczone elementy. | ||
| + | |||
| + | The SAS module will help greatly in keeping your rockets on course without much fuss from you. With the SAS added, a simple keypress, "t", after the rocket is moved out to the launchpad, will allow the rocket to stay almost perfectly centered while it is in flight. There are other concerns for keeping the rocket stable but those will be covered later. | ||
| + | |||
| + | [[File:SASaddedFirstStage.png|thumbnail|center|Figure 8 : The SAS Added to the Main Rocket Stage]] | ||
| + | |||
| + | In order to add the SAS module, do an LMC on the black SAS module, then move your cursor over to the rocket sections. There should now be the SAS module following your cursor, and if not simply go back and do another LMC to select the module again. With the module following your cursor, drag it to the base of the separator ring and you will see the SAS turn green when it is properly placed. Do one last LMC and the module will be placed underneath the separator as shown in Figure 8. The last step is to combine the lower section back onto the SAS module. This is done the same way as it was taken off, just in reverse. | ||
| + | |||
| + | [[File:RCSFuelLarge.png|thumbnail|center|Figure 9 : Selecting the RCS Module]] | ||
| + | |||
| + | Another SAS module can be added to the section directly underneath the capsule. Simply repeat the same process to the separator that is underneath the capsule. While adding the SAS to the Capsule section, adding some RCS Fuel, Figure 9, will also assist in keeping the rocket stable in flight, by pressing "r" to turn on the rocket in flight. The last step is to add some RCS Thrusters, which I added to the capsule separation ring, see Figure 10. To add these thrusters in any sort of symmetry, use the symmetry icon in the bottom left of the screen, see Figure 11. Each LMC on this indicator will cycle through all of the cloning options, ie 1 - 8 duplicates of whatever item you are placing. | ||
| + | |||
| + | [[File:RCSAdded.png|thumbnail|center|Figure 10 : RCS Thrusters Added to the Capsule Separator Ring]] | ||
| + | |||
| + | [[File:SymmetryIndicator.png|thumbnail|center|Figure 11 : The Symmetry Indicator]] | ||
| + | |||
| + | Once the rocket is all attached together again, it is time to move the rocket to the launch pad. Referring back to Figure 1, the Launch Pad is the green icon in the upper right corner of the screen. Clicking on this icon will move the rocket onto the launch pad. | ||
| + | |||
| + | ==Launching the rocket== | ||
| + | Once you've made or selected a rocket, press the big green launch button in the top right. | ||
| + | |||
| + | Flight controls are not exactly straightforward. W, S, A, and D move the ship around, but they are relative to your rotation, controlled with Q and E. The easiest way to keep your rocket on target with WSAD is to look at the navball, in the bottom middle of the screen. | ||
| + | |||
| + | Before launching your rocket, take a second to look at your map, by pressing M. This will bring up [[Kerbin]] on the map. Scroll out to show kerbins moons, and even farther to see the rest of the solar system. It will be a while before you even learn how to make a rocket than can escape the sphere of influence of [[Kerbin]], so experiment with different rocket designs, and see what works best for you. | ||
| + | |||
| + | Launching your rocket is the easy part. Just press space. But don't do that just yet, press T to turn SAS on. SAS is essentially autopilot, without SAS you just won't turn as well. Pure SAS allows you to control the movement of your rocket with the WSADQE keys faster, and with more power, however it is nothing compared to ASAS (Advanced SAS). Advanced SAS allows your rocket to use thrust vectoring (You'll learn about that later too) and it keeps you on course, instead of you having to turn manually. | ||
| + | |||
| + | Each time you run out of fuel in a stage, press space until the next stage of fuel and engines start burning. | ||
| + | |||
| + | If you don't want to read everything I said above all you need to know is before launching press T, than press space to launch and if your rocket stops going, press space again. | ||
| + | |||
| + | ==Getting into orbit== | ||
| + | |||
| + | It's time to make your own rocket. The parts editor in the VAB is simple enough to use, but if I were you I would stay away from spaceplanes for a little while longer. | ||
| + | |||
| + | You already know a little bit about staging, but I'm going to generalize it even more for you. | ||
| + | |||
| + | ====The launching stage==== | ||
| + | Here you have a whole bunch of high powered engines and large fuel tanks, Solid rocket boosters are most often used here. The motto here is pack as much of it on as you can because you're not taking it with you. | ||
| + | |||
| + | If you do not already know, you can mount things radially (on the side) of other things, and by the magic of the symmetry button (Bottom of the parts menu) you can have the radially mounted things not make your poor rocket tip over. | ||
| + | |||
| + | Staging is one of the most important aspects of building a rocket. I still use staging, even though a lot of people have quickly traded it out for action groups. On the right there is a tall bar with everything in it's respective stage, however if you were to put half your rockets in one stage and the other half in another, you would go almost 3 times as far, in twice the time! | ||
| + | |||
| + | ====The other stages==== | ||
| + | |||
| + | Generally split into a circularization stage (I totally didn't make that word up), and an interplanetary stage but for you all you really need to know is everything after the stages in the atmosphere should be light, with medium to low power. Once you're out, if you're going into orbit all you need is a LV-N, 909 or a poodle, depending on your preference. | ||
| + | |||
| + | ===How to use these stages=== | ||
| + | |||
| + | Remember when I told you how to open the map? that's going to come in handy here. Your map also shows your orbital details, so what you need to do is burn just about directly up with your launcher stage. This may take a while, and I encourage you NOT to use the physics warp as with most rockets if you are burning and using the physics warp you will almost always veer wildly off course or explode in midair. Once your apoapsis (displayed on the map) is above about 70km press X or hold control to turn off your throttle. Turn off SAS and aim your rocket so it is facing sideways. On the navball the marker indicating your direction should be right on the border between blue and brown. Turn SAS back on and time warp (slowly) until your rocket is about 1km below your apoapsis, than start burning. On the map your orbit should get wider and wider (you can bring up your navball on the map and keep steering, and see your fuel on the map by pressing F2 twice), and once it gets wide enough your periapsis will pop out of the ground, see its shadow and go scampering off into space. Once your apoapsis and periapsis are both above 70km, you can rest and look at your work. Than you can start thinking, well great I have a piece of junk in orbit of my planet. To reenter kerbin, you need to burn retrograde. That sounds fancy, but if you have enough fuel just turn your rocket until you see the yellow circle with the small yellow lines in the middle. Point directly at it and burn baby burn. If you put a parachute on the top of your rocket, when you drop to 500m above the ground it will deploy and if you made your top stages light enough it will almost completely stop you before you hit the ground. If your rocket is too heavy, the parachute will rip off and your kerbals will fall gently to the ground, exploding upon impact. | ||
| + | |||
| + | If you run out of fuel while burning retrograd, don't worry! so long as your periapsis is less than 70 km you can just timewarp and the atmosphere around [[Kerbin]] will slow your rocket down every time it gets below 70km. For fancy points you can try to time your deorbit burn (retrogade burn) to when you are almost on top of kerbal space center, but you have to be aiming 90 degrees when you get your rocket into orbit for that to work well. | ||
| + | |||
| + | == Still To Do == | ||
| + | |||
| + | # Links for additional tips, tricks, and guidance | ||
Latest revision as of 18:33, 17 March 2017
Artykuł ten jest przeznaczony aby pomocy tobie w pierwszych kilku godzinach zabawy z Kerbal Space Program. Mimo, że jest daleko od zaawansowanych rzeczy, powinieneś łatwo zrozumieć podstawy.
Contents
Kupno
Squad dostarcza dość prosty sklep, w którym można kupić KSP.
- Wejdź na http://kerbalspaceprogram.com
- Kliknij na "store"
Pobieranie
Squad, czyli twórcy Kerbal Space Program, posiadają prosty patcher używany aby pobrać, zaktualizować oraz naprawić grę. Może on również pobierać z bardzo mocnego serwera Amazon S3 (który jest chmurą) podczas gdy główne serwery KSP są zbyt obciążone.
- Wejdź na strone sklepu.
- Zaloguj się używając swojego loginu i hasła.
- Wciśnij przycisk "Profile".
- Przewiń na sam dół strony i kliknij "Download" obok twojego zakupionego produktu.
- Pobierz patcher dla twojego systemu do pustego folderu.
- Macuserzy:
- Upewnij się że plik Patcher.command ma uprawnienia wykonywania.
- Zainstaluj Mono z pliku .dmg jeśli potrzeba.
- Uruchom Patcher.command.
- Windows Users:
- Zainstaluj .NET Framework 4.0 lub wyszy, jeśli potrzeba. (Nowe wersje systemu Windows posiadają już tą paczkę)
- Uruchom Patcher.exe.
- Macuserzy:
Uruchamianie gry
Gdy gra jest już zainstalowana, czas na uruchomienie jej. Wystarczy uruchomić z zainstalowanej lokalizacji plik KSP.exe. Możesz również utworzyć skrót na pulpicie, możesz również skopiować pliki na pamięc USB i uruchamiać grę na każdym komputerze bez utraty save.
Ekran główny posiada menu z następującymi linkami:
- Start Game - Uruchom grę
- Settings - Ustawienia
- KSP Community - Społeczność KSP
- Credits - O autorach
- Quit - Wyjście
Jeśli klikniesz już w "Start Game" pojawi się kolejne menu gdzie możesz wczytać lub stworzyć nową grę.
Kiedy rozpoczniesz nową grę pojawi się opcja nazwania swojego save, zalecanie jest zmienić nazwę 'default' na coś innego.
Kiedy już gra się uruchomi, pojawi się twoje centrum kosmiczne widać tam 2 hangary, stację śledzenia, platforma startowa i lotnisko
Rakieta!
Potrzebujemy rakiety, wejdź w hangar do budowy rakiet. Dla tego artykułu użyjemy rakiety która jest domyślnie wgrana razem z grą.
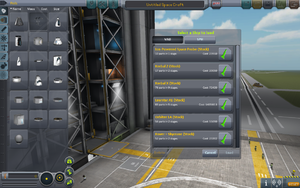
Kliknij na pomarańczowy folder znajdujący się w prawym górnym rogu okna, pojawi się menu pokazane na powyższym obrazku. Znajdź i wybierz Kerbal X (stock). Załaduje to rakiete, Kerbal X. Jest to prosta rakieta, którą łatwo osiągniesz orbitę wokół planety. Jeśli używasz wersji Demonstracyjnej, Tutaj jest przykładowa rakieta podobna do Kerbal X.
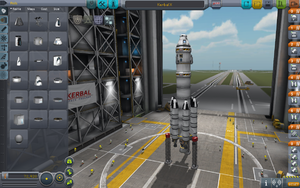
Rakieta może wyglądać na skomplikowaną, ale jest prosta i łatwa do opisania. Po prawej stronie ekranu, znajdują się pomarańczowe "foldery" które mają oznaczenia od 0 do 8. Są to fazy lotu twojej rakiety. Fazy lotu twojej rakiety przełącza się za pomocą klawisza spacji. Każda faza ma przynajmniej jedną ikonę w sobie, są to zdarzenia przypisane do każdej fazy. Dla tego projektu są to:
- Faza 8
- Jest to początkowa faza rakiety
- znajduje się tu 7 silników na ciekłe paliwo które są uruchamiane w tej fazie
- Faza 7
- Jest to druga faza
- Ta faza odczepia rakietę od wspomagaczy startu "TT18-A Launch Stability Enhancers", które są umieszczone na dole rakiety Kerbal X
- TT18-A LSE jest to kratownica zakończona czerwoną nakładką
- Faza 6
- Jest to trzecia faza, odłącza ona 2 zbiorniki dopalające.
- Ta faza powinna być uruchomiona tylko wtedy gdy w pierwszej parze zbiorników skończy się paliwo
- Stan paliwa jest pokazany na wskaźniku obok fazy lotu
- Faza 5
- Po kilku chwilach skończy się paliwo w kolejnej parze zbiorników, ta faza odrzuca te zbiorniki.
- Przypominamy aby użyć tej fazy kiedy skończy się paliwo
- Faza 4
- Tak samo jak w poprzednich fazach
- Jest to ostatnia faza rakiet dopalających
- Faza 3
- Koniec fazy silnika głównego
- Po naciśnięciu spacji odpada silnik główny, który był wspomagany przez silniki dopalające.
- Faza 2
- Ta faza uruchamia malutki silnik który umieszczony jest pod kapsułą załogową
- Faza 1
- Ostatnia faza przed otwarciem spadochronu
- Jest to ostatnia faza silnika, zaleca się nie aktywować jej dopóki nie znajdziesz się na orbicie powracającej na planetę.
- Faza 0
- Jest to ostatnia faza rakiety, gdy ją aktywujesz odpala się spadochron.
Mimo iż nie jest to konieczne zaleca się dodanie do rakiety kilku rzeczy które sprawią, że osiągnięcie orbity będzie znacznie łatwiejsze.
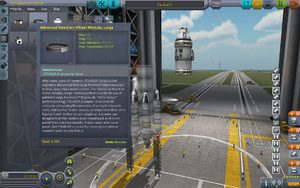
Screen pokazuje głowny człon rakiety odłączony po to aby można było dodać moduł SAS. Żeby rozdzielić rakietę we właściwym miejscu, najedź kursorem myszy na zbiornik pod docoplerem (czarno żółty pierścień z czerwonym trójkątem) i kliknij na niego lewym przyciskiem. W ten sposób odłączysz zbiornik i wszystko co znajduje się pod nim. Potem przesuń całość kawałek na bok (ale nie na szarą planszę przybornika z częściami, bo zostanie usunięta) i ponownie kliknij lewym przyciskiem myszy aby "odłożyć" zaznaczone elementy.
The SAS module will help greatly in keeping your rockets on course without much fuss from you. With the SAS added, a simple keypress, "t", after the rocket is moved out to the launchpad, will allow the rocket to stay almost perfectly centered while it is in flight. There are other concerns for keeping the rocket stable but those will be covered later.
In order to add the SAS module, do an LMC on the black SAS module, then move your cursor over to the rocket sections. There should now be the SAS module following your cursor, and if not simply go back and do another LMC to select the module again. With the module following your cursor, drag it to the base of the separator ring and you will see the SAS turn green when it is properly placed. Do one last LMC and the module will be placed underneath the separator as shown in Figure 8. The last step is to combine the lower section back onto the SAS module. This is done the same way as it was taken off, just in reverse.
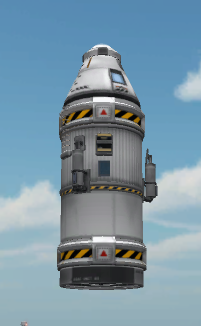
Another SAS module can be added to the section directly underneath the capsule. Simply repeat the same process to the separator that is underneath the capsule. While adding the SAS to the Capsule section, adding some RCS Fuel, Figure 9, will also assist in keeping the rocket stable in flight, by pressing "r" to turn on the rocket in flight. The last step is to add some RCS Thrusters, which I added to the capsule separation ring, see Figure 10. To add these thrusters in any sort of symmetry, use the symmetry icon in the bottom left of the screen, see Figure 11. Each LMC on this indicator will cycle through all of the cloning options, ie 1 - 8 duplicates of whatever item you are placing.
Once the rocket is all attached together again, it is time to move the rocket to the launch pad. Referring back to Figure 1, the Launch Pad is the green icon in the upper right corner of the screen. Clicking on this icon will move the rocket onto the launch pad.
Launching the rocket
Once you've made or selected a rocket, press the big green launch button in the top right.
Flight controls are not exactly straightforward. W, S, A, and D move the ship around, but they are relative to your rotation, controlled with Q and E. The easiest way to keep your rocket on target with WSAD is to look at the navball, in the bottom middle of the screen.
Before launching your rocket, take a second to look at your map, by pressing M. This will bring up Kerbin on the map. Scroll out to show kerbins moons, and even farther to see the rest of the solar system. It will be a while before you even learn how to make a rocket than can escape the sphere of influence of Kerbin, so experiment with different rocket designs, and see what works best for you.
Launching your rocket is the easy part. Just press space. But don't do that just yet, press T to turn SAS on. SAS is essentially autopilot, without SAS you just won't turn as well. Pure SAS allows you to control the movement of your rocket with the WSADQE keys faster, and with more power, however it is nothing compared to ASAS (Advanced SAS). Advanced SAS allows your rocket to use thrust vectoring (You'll learn about that later too) and it keeps you on course, instead of you having to turn manually.
Each time you run out of fuel in a stage, press space until the next stage of fuel and engines start burning.
If you don't want to read everything I said above all you need to know is before launching press T, than press space to launch and if your rocket stops going, press space again.
Getting into orbit
It's time to make your own rocket. The parts editor in the VAB is simple enough to use, but if I were you I would stay away from spaceplanes for a little while longer.
You already know a little bit about staging, but I'm going to generalize it even more for you.
The launching stage
Here you have a whole bunch of high powered engines and large fuel tanks, Solid rocket boosters are most often used here. The motto here is pack as much of it on as you can because you're not taking it with you.
If you do not already know, you can mount things radially (on the side) of other things, and by the magic of the symmetry button (Bottom of the parts menu) you can have the radially mounted things not make your poor rocket tip over.
Staging is one of the most important aspects of building a rocket. I still use staging, even though a lot of people have quickly traded it out for action groups. On the right there is a tall bar with everything in it's respective stage, however if you were to put half your rockets in one stage and the other half in another, you would go almost 3 times as far, in twice the time!
The other stages
Generally split into a circularization stage (I totally didn't make that word up), and an interplanetary stage but for you all you really need to know is everything after the stages in the atmosphere should be light, with medium to low power. Once you're out, if you're going into orbit all you need is a LV-N, 909 or a poodle, depending on your preference.
How to use these stages
Remember when I told you how to open the map? that's going to come in handy here. Your map also shows your orbital details, so what you need to do is burn just about directly up with your launcher stage. This may take a while, and I encourage you NOT to use the physics warp as with most rockets if you are burning and using the physics warp you will almost always veer wildly off course or explode in midair. Once your apoapsis (displayed on the map) is above about 70km press X or hold control to turn off your throttle. Turn off SAS and aim your rocket so it is facing sideways. On the navball the marker indicating your direction should be right on the border between blue and brown. Turn SAS back on and time warp (slowly) until your rocket is about 1km below your apoapsis, than start burning. On the map your orbit should get wider and wider (you can bring up your navball on the map and keep steering, and see your fuel on the map by pressing F2 twice), and once it gets wide enough your periapsis will pop out of the ground, see its shadow and go scampering off into space. Once your apoapsis and periapsis are both above 70km, you can rest and look at your work. Than you can start thinking, well great I have a piece of junk in orbit of my planet. To reenter kerbin, you need to burn retrograde. That sounds fancy, but if you have enough fuel just turn your rocket until you see the yellow circle with the small yellow lines in the middle. Point directly at it and burn baby burn. If you put a parachute on the top of your rocket, when you drop to 500m above the ground it will deploy and if you made your top stages light enough it will almost completely stop you before you hit the ground. If your rocket is too heavy, the parachute will rip off and your kerbals will fall gently to the ground, exploding upon impact.
If you run out of fuel while burning retrograd, don't worry! so long as your periapsis is less than 70 km you can just timewarp and the atmosphere around Kerbin will slow your rocket down every time it gets below 70km. For fancy points you can try to time your deorbit burn (retrogade burn) to when you are almost on top of kerbal space center, but you have to be aiming 90 degrees when you get your rocket into orbit for that to work well.
Still To Do
- Links for additional tips, tricks, and guidance
