Tutorial: Gemini 6A and 7/zh-cn
| “ | 我们嘴巴上常说浩瀚的宇宙,可你真体会不到它有多么的巨大、广袤,比你能想象的最大再大上一亿万倍都不止。嗯,有时你会觉得这么一路走到药房真尼玛挺远的,不过比起宇宙的疆界来,说实话这连沧海一粟都比不上。 — 道格拉斯·亚当斯, 银河系搭车客指南 |
” |
在 NASA 计划登月的过程中,他们很快就意识到携带全部的返航燃料进行登月任务是完全不可能的。飞船会变得非常重,而且很多重量实际上对于着陆飞行任务是毫无用处的,而且会大大增加着陆的难度。为了解决这一问题,他们决定采用这一策略:到达月球轨道后,登月舱会与指令舱分离,前者会独立完成登月任务,再返回轨道与指令舱会合对接。不过,这就要求进行在轨会合与对接 —— 这是一个全新的尝试,以前还没有进行过。没有人知道它是不是可行。假如失败的话,登月队员会被困在月球上,失去返回地球的机会。
所以他们决定最好先在相对安全的近地轨道演练飞行器的会合与对接,然后再在月球轨道进行类似的飞行。这就是“双子座 (Gemini)”计划诞生的初衷。
在本教程中,我们会重现“双子座” 6A 和 7 号的飞行,这是人类太空飞行史上载人航天器的第一次轨道对接。我们还会进行一次 EVA —— 一位 Kerbal 航天员会出舱,利用喷气背包在飞船周围飞行,再返回飞船。
Contents
飞船的设计
“双子座”飞船可以搭载两名乘员,所以我们选用 Mk2 型着陆舱 来作为指令舱。和真正的“双子座”计划一样,我们的飞船在轨飞行将只依靠单组元推进剂发动机。这就是为什么飞船装载了巨大的单组元推进剂燃料舱。
这次我们会在飞船加入 S.A.S. 模块,它可以大大降低发射和对接的难度。注意,我们在这里并没有采用 高级 S.A.S. 模块。因为 ASAS 模块打开后会利用推力矢量进行滚转控制,这会带来少量的侧向加速。这对于我们试图进行的高精度对接操作是害处很大的。
下面是运载火箭:苏联人的火箭设计思路是为最初设计的R-7 型运载火箭不断增加更多的级数来提高任务载荷量,而美国人信奉的设计哲学则是“越大越好”,他们试图提高每级火箭的质量。Titan II GLV 型运载火箭就体现了这一设计理念(Gemini Launch Vehicle)。它只有两级,但每一级都很巨大。相应的,我们会选用 Rockomax 燃料舱、Rockomax “主帆(mainsail)”型发动机和“船长(skipper)”型发动机。
Rockomax “主帆(mainsail)”型发动机是 KSP 中推力最大的发动机,可达 7 台 LV-T30 型发动机的推力之和。它的燃料消耗量稍大于 7 台 LV-T30 型发动机,不过另一方面它自身的质量要少得多。这两者互相抵消。而“船长(skipper)”型发动机推力比“主帆(mainsail)”型要低(大约相当于 3 台 LV-T30 型发动机),但它更轻,燃料消耗更少 —— 正如 Titan 型火箭的次级发动机。因此它非常适合用于次级火箭。
- 任务负载级
- 1x Clamp-o-tron Docking Port
- 1x S.A.S Module
- 4x RV-105 RCS Thruster Block (飞船顶部)
- 1x Rockomax Brand Adapter
- 2x Mk2-R Radial mount parachute
- 1x Mk2 Lander-can
- 1x FL-R1 RCS Fuel Tank
- 4x RV-105 RCS Thruster Block (飞船底部)
- 次级火箭
- 第一级火箭
你或许会问为什么我们不用 Jumbo-64 型燃料舱来代替 X200-32。原因之一是 Jumbo 燃料舱段会带来某些导致火箭不稳定的因素,我们需要加入支撑件来提高稳定性。还有一个奇怪的原因是:安装在 Jumbo 燃料舱下方的“主帆(mainsail)”型发动机在全推力下会迅速过热,但安装在两节功能相同的 X200-32 型燃料舱下方是却没有这个问题。我不知道原因是什么。
任务阶段
在发射之前,最好能给两艘飞船分别取名方便识别。假如喜欢重现历史的话,你可以把第一艘飞船叫做“双子座” 7 号,第二艘叫做“双子座” 6A 号(为什么倒着编号?那就是一个很长的故事了……)。
Lift-Off - Gemini 7
Start the first rocket into an orbit of about 100km. That should be routine by now.
Try to make your orbit as circular as possible. Every meter difference between apoapsis and periapsis will make the rendevouz more difficult, so take your time. Then kill your engine, press Esc and go to the space center to launch a second vessel.
Lift-Off - Gemini 6A
We will then launch a second, identical vessel.
We will try to get it as close as possible, so before you ignite your engine accelerate time until the first vessel has traveled around Kerbin and is 2 minutes before passing over the launch site again.
Then start just like you started the first one. Make sure your apoapsis is on exactly the same height as the orbit of the first vessel. Just like with the first one, take your time to make your orbit as circular as possible.
Aligning orbits
Now separate both capsules from their rockets. All further orbital maneuvers will be done with monopropellant only. Instead of increasing and decreasing thrust with shift and ctrl, you can now accelerate forward and backward with H and N. This gives you a much more precise control over your thrust vectors - and you will need every bit of precision for this mission.
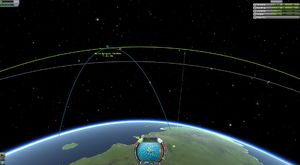
Your vessels will now be on circular orbits with an equal height, but their orbits will likely have some degree of declination. To fix that, set the other vessel as a target. The orbital view will now show two points on your orbit marked as "ascending node" and "descending node". It's the point where the orbital declinations of the trajectories intersect. When you boost north or south at these points, you can make the orbits of your vessels exactly identical, just like you learned in the Orbiting 101 tutorial.
Doing an EVA
Before we try to dock, we will practice moving in space by letting one of our kerbonauts fly around in space with his jetpack.
First, make sure that the capsule isn't rotating. Otherwise it would be quite suicidal to leave it.
Click on the portraits of one of your crew members, click "EVA" and immediately press F to grab the ladder at the hatch. Your kerbonaut will now cling to the capsule. When you feel confident, you can release it. The kerbonaut will now drift away slowly from the capsule. To get him back, activate his rocket pack with "R". You can control it with the keys A, W, S, D, Q, E, Ctrl and Shift. Use it to maneuver back to the hatch and grab it with F. When you did this successfully, you can attempt some more bold maneuvers like flying a tour around the capsule.
But keep in mind that the fuel for the jetpack is not unlimited! Click on your kerbonaut to check how much fuel he has left.
Should you screw up and end up with not enough fuel to return to the capsule, you can still attempt a rescue by switching control to the capsule and try to move it closer to the kerbonaut. Losing the kerbonaut would be tragic, but it would not be the end of the mission - you only need one kerbonaut per capsule to complete it.
Rendezvous with the other capsule
After you practiced control of the jetpack it's time to rendezvous with the other capsule.
Select the other capsule as your target by clicking on its trajectory on the map view. Make sure you haven't selected the debris of the carrier rocket which is likely still on a very similar orbit.
Your capsules are currently on exactly the same orbit, but they will lead each other by a few hundred km. So how do we fix that? Remember that objects on lower orbits take less time for one round around the planet than those on higher orbits. That means when your current vessel is in front, get into a higher orbit. When you are in the back, get into a lower orbit. Wait until your capsules are closer, and return to the original orbit so that they match exactly again. Your goal is to get the capsules closer than 5km. This is quite tricky, you will likely need several attempts.
While you do so, watch your monopropellant reserve. When it falls below 100, switch to the other capsule by double-clicking it in the orbital view. When both are below 100, you can consider the mission failed. All you can do now is to use the remaining monopropellant to get into a reentry orbit to at least bring the crew back alive.
Docking maneuver
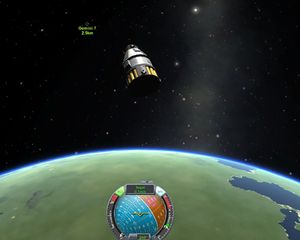
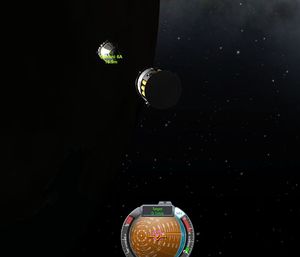
As soon as your distance is below 10km, your nav-ball will switch from "Orbit" mode to "Target" mode. That means that the meanings of the indicators on it has changed.
- The speed will now show your relative speed to the target - how quickly you get closer or away from it.
- The yellow indicators now shows the direction you have to accelerate in to increase or decrease your relative speed.
- The purple indicators shows the direction you have to accelerate in to get closer or away from the target
first face the yellow indicator and thrust backwards until your relative speed is 0.0 m/s. You are now traveling exactly parallel to the target. Now face the purple indicator and thrust a bit forward to start moving in the direction which gets you closer to it. Don't go too fast - be patient. Before you collide with your target, get to a standstill by again thrusting backwards while facing the yellow indicator. Repeat acceleration and stopping until you are just a few meters away from your target and have a relative speed of zero.
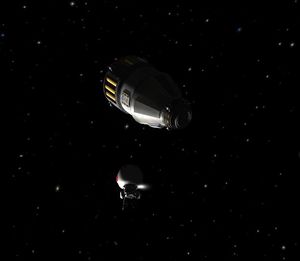
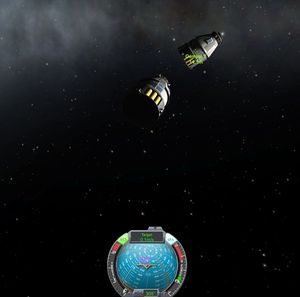
You could now almost grab your target, but its docking port will very likely face in the wrong direction. You could try to fly around it to approach it from another angle, but there is a much easier way to solve this dilemma. Just orient your docking port exactly into the direction of the other capsule, activate SAS, and then switch to the other one using the map view.
Now you just have to orient the second capsule towards the first one and thrust forward just a tiny bit to bring the docking ports closer until they snap together.
Congratulations, you have just docked.
Docking operations
OK, so we are now docked. What does that mean exactly? It means that the two vessels now merged into one for all practical purposes. Try using your thrusters for rotation. You will notice that the thrusters of both vessels act in unison and try to turn the whole contraption, not just the half of it they were originally installed on. The same would apply to any rocket engines when we had them.
Another neat thing you can do now is exchange fuel and other resources. Right-click on one of the tanks, hold Alt, and then right-click the other. You can now pump propellant from one tank to the other. When the monopropellant of one of your ships is significantly lower than the other, you should try to even them out.
As of version 0.19.1.54, it is not yet possible to transfer crew through the docking ports. Currently the only way to get them from one to the other is by performing an EVA to leave the first pod and enter the other (technically you don't need to be docked to do this - just very close and without relative speed).
Return to Kerbin
Right-click on one of the docking rings and click on "undock" to separate your vessel into two separate ones again. Use your remaining monopropellant to decelerate the first capsule (keep in mind that the yellow indicator still shows your speed relative to the other vessel, not relative to your orbit!) and land it.
After it returned successfully, do the same with the other.
Or you could try landing both vessels at the same time; just undock while entering the atmosphere and don't forget to deploy the parachutes on both vessels.
Landing them together while still docked also seems like an alluring idea, but when I tried that once, one of them broke up during descend and the crew was killed, so try at your own risk!
What next?
You have now learned an important skill - how to rendezvous and dock two ships in orbit. Being able to do this will be very valuable for missions to other planets. The amount of payload you can bring into orbit with one launch is limited. But through docking you can build ships of nearly unlimited size by launching their individual components and assembling them in orbit. People say returning a crew from the surface of Eve is impossible? Prove them wrong - given enough hardware, nothing is impossible!
But there is still a long way until we are ready for that. Let's aim for an easier target for now: The Mün!

