Difference between revisions of "Getting Started/zh-cn"
m (XZise moved page Getting Started:zh-cn to Getting Started/zh-cn without leaving a redirect: correct language suffix) |
|||
| Line 1: | Line 1: | ||
| − | + | 本指南希望能帮助你顺利进行坎巴拉太空计划(KSP)。尽管本文并不复杂,还是建议你能对太空飞行的基本概念有一定的了解。 | |
== 购买 == | == 购买 == | ||
| Line 21: | Line 21: | ||
#*#如果需要的话,安装 .dmg 文件中附带的 Mono; | #*#如果需要的话,安装 .dmg 文件中附带的 Mono; | ||
#*#解压文件至一个空目录; | #*#解压文件至一个空目录; | ||
| − | #*#在 Patcher.command | + | #*#在 Patcher.command 文件上设置执行属性; |
#* Windows 用户: | #* Windows 用户: | ||
#*# 首先,如果需要的话,请安装 .NET Framework 4.0 或更高的版本。(Windows 7以上版本已经安装有此软件。) | #*# 首先,如果需要的话,请安装 .NET Framework 4.0 或更高的版本。(Windows 7以上版本已经安装有此软件。) | ||
| Line 62: | Line 62: | ||
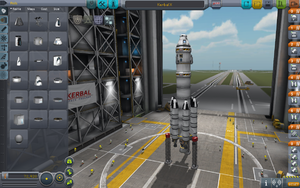
[[File:TheKerbalX.png|thumbnail|center|Figure 6 : Kerbal X 方案]] | [[File:TheKerbalX.png|thumbnail|center|Figure 6 : Kerbal X 方案]] | ||
| − | + | 虽然这枚火箭看起来有点复杂,其实它很简单,解释起来也很容易。如图6,屏幕右侧有一排橙色的目录图标,上面标着 0 到 8。这些数字标识着不同的火箭发射段。发射段与火箭的各级不同,它是由各级火箭分别组成,按下空格键来触发各个发射段。每个发射段中都包括至少一个图标,这些标明了该发射段所要进行的所有动作。该火箭的发射段包括: | |
| − | # | + | # 火箭发射段 8 |
| − | #*# | + | #*# 这是你的第一个发射段。 |
| − | #*# | + | #*# 本发射段进行 7 个液体燃料推进器的点火动作。 |
| − | # | + | # 火箭发射段 7 |
| − | #*# | + | #*# 这是第二个发射段。 |
| − | #*# | + | #*# 本发射段释放火箭支撑臂,TT18-A 发射稳定增强机构,就是那些位于 Kerbal X 火箭底部的发射架支撑机构。 |
| − | #**# | + | #**# TT18-A LSE 就是带有红色头部的框架支撑机构。 |
| − | # | + | # 火箭发射段 6 |
| − | #*# | + | #*# 第三个发射段会完成主火箭与两枚助推器的分离动作。 |
| − | #**# | + | #**# 注意在第一组两枚助推器燃料用尽后再激活本发射段动作。 |
| − | #**# | + | #**# 会有声音以及图像提示你火箭引擎的燃料消耗完毕。 |
| − | # | + | # 火箭发射段 5 |
| − | #*# | + | #*# 很快,另一组两枚助推器会用尽燃料,按下空格键激活本发射段动作,完成其与主火箭的脱离。 |
| − | #**# | + | #**# 再次提示,在助推器燃料用尽后再激活本发射段动作。 |
| − | # | + | # 火箭发射段 4 |
| − | #*# | + | #*# 与上两个发射段相同。 |
| − | #**# | + | #**# 这里是剩下的最后两枚助推器与主火箭的分离动作。 |
| − | # | + | # 火箭发射段 3 |
| − | #*# | + | #*# 这里第一级火箭运作的最后阶段。 |
| − | #**# | + | #**# 按下空格键,跟帮助你飞向太空的主引擎告别吧,第一级火箭会与次级火箭分离。 |
| − | # | + | # 火箭发射段 2 |
| − | #*# | + | #*# 本发射段进行与乘员舱相连的次级火箭的小型引擎的点火。 |
| − | # | + | # 火箭发射段 1 |
| − | #*# | + | #*# 本发射段是降落伞开伞前的最后一个阶段。 |
| − | #**# | + | #**# 本发射段会关闭最后一具火箭引擎,因此在最终返回行星之前最好 *不要* 激活本发射段。 |
# Rocket Launch Stage 0 | # Rocket Launch Stage 0 | ||
| − | #*# | + | #*# 这是最后一个发射段,它会打开飞船乘员舱的降落伞。 |
That is the run down of the orange tabs on the right side of the screen. While there is nothing that really *needs* to be done to the Kerbal X Rocket, I strongly advise adding a couple of items that will make getting into orbit a bit easier. | That is the run down of the orange tabs on the right side of the screen. While there is nothing that really *needs* to be done to the Kerbal X Rocket, I strongly advise adding a couple of items that will make getting into orbit a bit easier. | ||
Revision as of 01:42, 21 May 2013
本指南希望能帮助你顺利进行坎巴拉太空计划(KSP)。尽管本文并不复杂,还是建议你能对太空飞行的基本概念有一定的了解。
Contents
购买
制作组为你提供了一个非常直观的网上购买KSP的界面。
- 访问 http://kerbalspaceprogram.com
- 点击 store,你会看到“Kerbal Space Program”,另外还有一个软件叫做“Kerbalizer”,现在先不去管它。
另外,你也可以通过 Steam 来购买。
下载
目前,KSP 是一次全部下载完成的,也会有定期的 Patcher,而 Steam 会自动进行版本的更新。
- 进入 store;
- 用你的用户名和密码登录;
- 点击 Profile 按钮;
- 下滑至底部,选择订购凭据旁的下载链接;
- 根据操作系统选择相应的文件下载:
- Mac 用户:
- 如果需要的话,安装 .dmg 文件中附带的 Mono;
- 解压文件至一个空目录;
- 在 Patcher.command 文件上设置执行属性;
- Windows 用户:
- 首先,如果需要的话,请安装 .NET Framework 4.0 或更高的版本。(Windows 7以上版本已经安装有此软件。)
- 把文件解压到一个 空目录,注意此目录不应是 Program Files。你或许可以用 7-zip 来进行解压。
- Linux 用户:
- Mac 用户:
- 身为 Linux 用户,你应该知道怎么做。:P
运行游戏
游戏安装完成之后,那就赶紧开始吧。打开游戏目录,运行 KSP.exe (OSX是 KSP.app,Linux 是 KSP.x86_64 (64bit)或 KSP.x86 (32bit)。在桌面建立快捷方式可以方便你打开游戏,不过假如你是把软件拷贝到U盘来运行,那就没必要了。
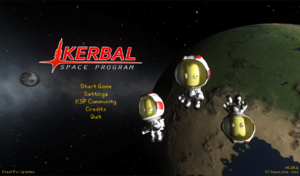
主界面包括以下选项:
- Start Game (开始游戏)
- Settings (设置)(你可以于此修改适合你的设置,比如降低图像的质量)
- KSP Community (KSP 社区)
- Credits (致谢)(参与制作 KSP 的人员名单)
- Quit (退出)(关闭游戏)
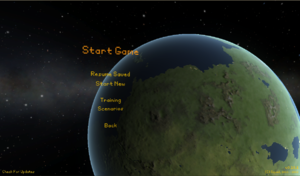
选择”开始游戏“后,出现的是开始、载入游戏的菜单。
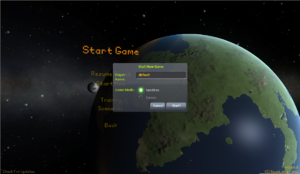
开始一个新游戏,这也是这篇 WIKI 所关注的内容,存储的游戏不需要保持’default‘这一名称。你可以按照自己的喜好命名。
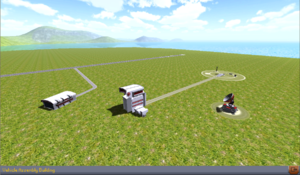
新游戏开始后,由两个安装车间、跟踪站和发射台组成的发射中心出现在界面上。
火箭!
只有拥有火箭才能进行发射操作,所以先选择中间的那栋建筑,它叫做”载具组装楼“。我们在这里根据已有的方案来建造第一枚火箭。
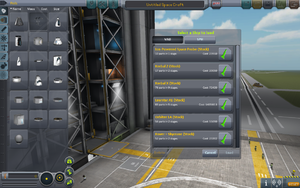
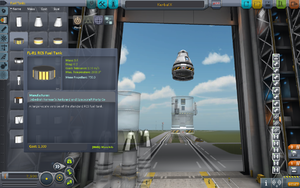
选择窗口右上角的橙色目录按钮,你会看到如 图5 的界面。找到并选择 Kerbal X (stock)。这样就可以直接装载已有的火箭设计方案,型号是 Kerbal X。这枚火箭相当简单,而且可以轻松的进入环绕行星的轨道。如果你用的是 demo 版本,你可以在这里 下载我制作的火箭方案,它拥有完成入轨及返回动作的足够燃料。
虽然这枚火箭看起来有点复杂,其实它很简单,解释起来也很容易。如图6,屏幕右侧有一排橙色的目录图标,上面标着 0 到 8。这些数字标识着不同的火箭发射段。发射段与火箭的各级不同,它是由各级火箭分别组成,按下空格键来触发各个发射段。每个发射段中都包括至少一个图标,这些标明了该发射段所要进行的所有动作。该火箭的发射段包括:
- 火箭发射段 8
- 这是你的第一个发射段。
- 本发射段进行 7 个液体燃料推进器的点火动作。
- 火箭发射段 7
- 这是第二个发射段。
- 本发射段释放火箭支撑臂,TT18-A 发射稳定增强机构,就是那些位于 Kerbal X 火箭底部的发射架支撑机构。
- TT18-A LSE 就是带有红色头部的框架支撑机构。
- 火箭发射段 6
- 第三个发射段会完成主火箭与两枚助推器的分离动作。
- 注意在第一组两枚助推器燃料用尽后再激活本发射段动作。
- 会有声音以及图像提示你火箭引擎的燃料消耗完毕。
- 火箭发射段 5
- 很快,另一组两枚助推器会用尽燃料,按下空格键激活本发射段动作,完成其与主火箭的脱离。
- 再次提示,在助推器燃料用尽后再激活本发射段动作。
- 火箭发射段 4
- 与上两个发射段相同。
- 这里是剩下的最后两枚助推器与主火箭的分离动作。
- 火箭发射段 3
- 这里第一级火箭运作的最后阶段。
- 按下空格键,跟帮助你飞向太空的主引擎告别吧,第一级火箭会与次级火箭分离。
- 火箭发射段 2
- 本发射段进行与乘员舱相连的次级火箭的小型引擎的点火。
- 火箭发射段 1
- 本发射段是降落伞开伞前的最后一个阶段。
- 本发射段会关闭最后一具火箭引擎,因此在最终返回行星之前最好 *不要* 激活本发射段。
- Rocket Launch Stage 0
- 这是最后一个发射段,它会打开飞船乘员舱的降落伞。
That is the run down of the orange tabs on the right side of the screen. While there is nothing that really *needs* to be done to the Kerbal X Rocket, I strongly advise adding a couple of items that will make getting into orbit a bit easier.
Figure 7 shows the main rocket stage removed in preparation of the black SAS module, from the Control Tab, that will be added. To "break" the rocket in the correct place, simply point your mouse at the section below the separator ring, the black and yellow ring with the red square on it, and do a left-mouse-click {LMC} once. This selects the fuel cell that is underneath of the separator ring and everything below that section of the rocket. Then simply move it out of the way, *but not into the grey component selections on the left* or else it will be trashed, and do another LMC to place the rocket components there.
The SAS module will help greatly in keeping your rockets on course without much fuss from you. With the SAS added, a simple keypress, "t", after the rocket is moved out to the launchpad, will allow the rocket to stay almost perfectly centered while it is in flight. There are other concerns for keeping the rocket stable but those will be covered later.
In order to add the SAS module, do an LMC on the black SAS module, then move your cursor over to the rocket sections. There should now be the SAS module following your cursor, and if not simply go back and do another LMC to select the module again. With the module following your cursor, drag it to the base of the separator ring and you will see the SAS turn green when it is properly placed. Do one last LMC and the module will be placed underneath the separator as shown in Figure 8. The last step is to combine the lower section back onto the SAS module. This is done the same way as it was taken off, just in reverse.
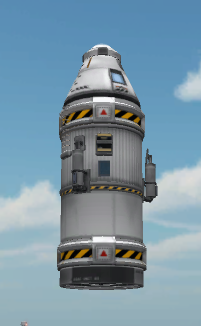
Another SAS module can be added to the section directly underneath the capsule. Simply repeat the same process to the separator that is underneath the capsule. While adding the SAS to the Capsule section, adding some RCS Fuel, Figure 9, will also assist in keeping the rocket stable in flight, by pressing "r" to turn on the rocket in flight. The last step is to add some RCS Thrusters, which I added to the capsule separation ring, see Figure 10. To add these thrusters in any sort of symmetry, use the symmetry icon in the bottom left of the screen, see Figure 11. Each LMC on this indicator will cycle through all of the cloning options, ie 1 - 8 duplicates of whatever item you are placing.
Once the rocket is all attached together again, it is time to move the rocket to the launch pad. Referring back to Figure 1, the Launch Pad is the green icon in the upper right corner of the screen. Clicking on this icon will move the rocket onto the launch pad.
Launching the rocket
Once you've made or selected a rocket, press the big green launch button in the top right.
Flight controls are not exactly straightforward. W, S, A, and D move the ship around, but they are relative to your rotation, controlled with Q and E. The easiest way to keep your rocket on target with WSAD is to look at the navball, in the bottom middle of the screen.
Before launching your rocket, take a second to look at your map, by pressing M. This will bring up Kerbin on the map. Scroll out to show kerbins moons, and even farther to see the rest of the solar system. It will be a while before you even learn how to make a rocket than can escape the sphere of influence of Kerbin, so experiment with different rocket designs, and see what works best for you.
Launching your rocket is the easy part. Just throttle up with left-shift and press space. But don't do that just yet, press T to turn SAS on. SAS is essentially autopilot, without SAS you just won't turn as well. Pure SAS allows you to control the movement of your rocket with the WSADQE keys faster, and with more power, however it is nothing compared to ASAS (Advanced SAS). Advanced SAS allows your rocket to use thrust vectoring (You'll learn about that later too) and it keeps you on course, instead of you having to turn manually.
Each time you run out of fuel in a stage, press space until the next stage of fuel and engines start burning.
If you don't want to read everything I said above all you need to know is before launching press T, hold left-shift until the throttle is at maximum, then press space to launch and if your rocket stops going, press space again.
Getting into orbit
It's time to make your own rocket. The parts editor in the VAB is simple enough to use, but if I were you I would stay away from spaceplanes for a little while longer.
You already know a little bit about staging, but I'm going to generalize it even more for you.
The launching stage
Here you have a whole bunch of high powered engines and large fuel tanks, Solid rocket boosters are most often used here. The motto here is pack as much of it on as you can because you're not taking it with you.
If you do not already know, you can mount things radially (on the side) of other things, and by the magic of the symmetry button (Bottom of the parts menu) you can have the radially mounted things not make your poor rocket tip over.
Staging is one of the most important aspects of building a rocket. I still use staging, even though a lot of people have quickly traded it out for action groups. On the right there is a tall bar with everything in it's respective stage, however if you were to put half your rockets in one stage and the other half in another, you would go almost 3 times as far, in twice the time!
The other stages
Generally split into a circularization stage (I totally didn't make that word up), and an interplanetary stage. For now all you really need to know is everything after the stages in the atmosphere should be light, with medium to low power. Once you're out, if you're going into orbit all you need is a LV-N, 909 or a Poodle, depending on your preference.
How to use these stages
Remember when I told you how to open the map? That's going to come in handy here. Your map also shows your orbital details, so what you need to do is burn just about directly up with your launcher stage. This may take a while, and I encourage you NOT to use the physics warp as with most rockets if you are burning as using the physics warp will almost always make you veer wildly off course or explode in midair. Once your apoapsis (displayed on the map) is above about 70km, press X or hold control to turn off your throttle. Turn off SAS and aim your rocket so it is facing sideways. On the navball the marker indicating your direction should be right on the border between blue and brown. Turn SAS back on and time warp (slowly) until your rocket is about 1km below your apoapsis, than start burning. On the map your orbit should get wider and wider (you can bring up your navball on the map and keep steering, and see your fuel on the map by pressing F2 twice), and once it gets wide enough your periapsis will pop out of the ground, see its shadow and go scampering off into space. Once your apoapsis and periapsis are both above 70km, you can rest and look at your work. Than you can start thinking, well great I have a piece of junk in orbit of my planet. To reenter kerbin, you need to burn retrograde. That sounds fancy, but if you have enough fuel just turn your rocket until you see the yellow circle with the small yellow lines in the middle. Point directly at it and burn. If you put a parachute on your rocket, it will deploy 500m above the ground, and if you made your top stage light enough it will almost completely stop you before you hit the ground. If your rocket is too heavy, the parachute will rip off and your kerbals will fall gently to the ground, exploding upon impact.
If you run out of fuel while burning retrograde, don't worry! As long as your periapsis is less than 70 km you can just timewarp and the atmosphere around Kerbin will slow your rocket down every time it gets below 70km. This technique is often referred as Aerobraking. For fancy points you can try to time your deorbit burn (retrogade burn) to when you are almost on top of kerbal space center, but you have to be aiming 90 degrees when you get your rocket into orbit for that to work well.
Still To Do
- Links for additional tips, tricks, and guidance
