Difference between revisions of "Getting Started/hu"
(further translation and update / további fordítás és a régi dolgok modernizálása) |
m |
||
| Line 64: | Line 64: | ||
* [[Runway|Kifutópálya]] [Runway] - Az űrrepülők indítása és érkezése céljából, | * [[Runway|Kifutópálya]] [Runway] - Az űrrepülők indítása és érkezése céljából, | ||
* [[Research and Development|Kutató-Fejlesztő Központ]] [Research and Development] - A rakéták fejlesztés (csak [[Career|karrier]] módban), | * [[Research and Development|Kutató-Fejlesztő Központ]] [Research and Development] - A rakéták fejlesztés (csak [[Career|karrier]] módban), | ||
| − | * [[ | + | * [[Flagpole|Zászlópózna]] [Flagpole], |
| − | Innen akármelyik létesítmény egy | + | Innen akármelyik létesítmény egy ráklikkeléssel elérhető. |
[[File:0.22 main.JPG|thumbnail|center|4. kép: Az űrközpont]] | [[File:0.22 main.JPG|thumbnail|center|4. kép: Az űrközpont]] | ||
| Line 87: | Line 87: | ||
#*# Ez a második fokozat | #*# Ez a második fokozat | ||
#*# Ez a fokozat elengedi a támasztóálványokat, TT18-A Kilövési Stabilitás Növelőket [TT18-A Launch Stability Enhancer], amelyek a Kerbal X rakéta alján láthatóak. | #*# Ez a fokozat elengedi a támasztóálványokat, TT18-A Kilövési Stabilitás Növelőket [TT18-A Launch Stability Enhancer], amelyek a Kerbal X rakéta alján láthatóak. | ||
| − | #**# A TT18-A LSE-k nyílt támaszfejjel | + | #**# A TT18-A LSE-k nyílt támaszfejjel ellátott pirosra mázolt konzolos megtámasztók |
# 6. Rakéta indítási fokozat | # 6. Rakéta indítási fokozat | ||
#*# Ez a harmadik indítási fokozat leválaszt két gyorsítórakétát a főrakétáról | #*# Ez a harmadik indítási fokozat leválaszt két gyorsítórakétát a főrakétáról | ||
| Line 94: | Line 94: | ||
# 5. Rakéta indítási fokozat | # 5. Rakéta indítási fokozat | ||
#*# Egy kicsivel később még két gyorsítórakéta fogy ki az üzemanyagból és a szóköz lenyomásával leválaszthatjuk a rakétáról. | #*# Egy kicsivel később még két gyorsítórakéta fogy ki az üzemanyagból és a szóköz lenyomásával leválaszthatjuk a rakétáról. | ||
| − | #**# Újra, közvetlen azután kapcsold | + | #**# Újra, közvetlen azután kapcsold ezt a fokozatot, amint a rakétahajtóművek kifogytak az üzemanyagból |
# 4. Rakéta indítási fokozat | # 4. Rakéta indítási fokozat | ||
#*# Ez ugyanaz mint az előző kettő | #*# Ez ugyanaz mint az előző kettő | ||
| Line 104: | Line 104: | ||
#*# Ez elindítja a közvetlenül a kapszula alatt található kisebb hajtóművet | #*# Ez elindítja a közvetlenül a kapszula alatt található kisebb hajtóművet | ||
# 1. Rakéta indítási fokozat | # 1. Rakéta indítási fokozat | ||
| − | #*# Ez az | + | #*# Ez az utolsó fokozat az ejtőernyő kinyitása előtt |
#**# Mivel ez fokozat leválasztja az utolsó hajtóművet is, nem ajánlatos aktiválni a visszatérési célpontra állás előtt | #**# Mivel ez fokozat leválasztja az utolsó hajtóművet is, nem ajánlatos aktiválni a visszatérési célpontra állás előtt | ||
# 0. Rakéta indítási fokozat | # 0. Rakéta indítási fokozat | ||
#*# Ez legutolsó fokozat amely az [[parachute/hu|ejtőernyő]]t indítja el. | #*# Ez legutolsó fokozat amely az [[parachute/hu|ejtőernyő]]t indítja el. | ||
| − | + | Ez szépen lefut a narancssárga aktában a képernyő jobb oldalán. Alapjában semmi egyébre sincsen szükség, hogy mindezt megcsináljuk a Kerbal X-szel, de azért van néhány erősen ajánlatos néhány dolgot hozzáadni, hogy némileg könnyebben juttathassuk keringési pályára.. | |
| − | [[File:SASLarge.png|thumbnail|center| | + | [[File:SASLarge.png|thumbnail|center|7. kép : A SAS modul beépítésének előkészülete]] |
Figure 7 shows the main rocket stage removed in preparation of the black SAS module, from the Control Tab, that will be added. To "break" the rocket in the correct place, simply point your mouse at the section below the separator ring, the black and yellow ring with the red square on it, and do a left-mouse-click {LMC} once. This selects the fuel cell that is underneath of the separator ring and everything below that section of the rocket. Then simply move it out of the way, *but not into the grey component selections on the left* or else it will be trashed, and do another LMC to place the rocket components there. | Figure 7 shows the main rocket stage removed in preparation of the black SAS module, from the Control Tab, that will be added. To "break" the rocket in the correct place, simply point your mouse at the section below the separator ring, the black and yellow ring with the red square on it, and do a left-mouse-click {LMC} once. This selects the fuel cell that is underneath of the separator ring and everything below that section of the rocket. Then simply move it out of the way, *but not into the grey component selections on the left* or else it will be trashed, and do another LMC to place the rocket components there. | ||
Revision as of 14:25, 10 April 2014
Ennek az útmutatónak a célja, hogy átsegítsen a rakétatervezés első néhány nehéz óráján. Az alábbi leírás csak a kezdőlökést adja meg, a játék csínját-bínját magadnak kell felfedezned.
Contents
Vásárlás
A Squad csapata létrehozott egy egyszerű webshopot, ahol megvásárolható a játék:
- Nyisd meg a weboldalt: http://kerbalspaceprogram.com
- Kattints a Store gombra, ahol megtalálod a Kerbal Space Programot, illetve itt tudod megvenni a Kerbalizer nevű programot is (erről később)
A játék már megvásárolható a Steam rendszerén keresztül is
Letöltés
Jelenleg a frissítésekkel a teljes programot újra le kell töltened. Vannak már tervek egy Patcher beépítésére, egyébként pedig a Steam verzió ezt már tudja kezelni.
- Menj a KSP Store-ba (lásd: fent).
- Lépj be a felhasználóneveddel és a jelszavaddal.
- Kattints a Profile gombra.
- Görgess le és válaszd ki a letöltési linket közvetlenül a vásárlási számla mellett.
- Töltsd le a friss verziót.
- Mac felhasználóknak:
- Szükség esetén telepítsd a Mono nevű programot a .dmg fájlból.
- Tömörítsd ki a fájlt egy üres mappába.
- Bizonyosodj meg róla, hogy a futtatás engedélyezve van a Patcher.command fájlnál.
- Windows felhasználók:
- Szükség esetén telepítsd a .NET Framework 4.0-át vagy újabbat. (Az újabb verziók ezt már tartalmazzák.)
- Tömörítsd ki a fájlokat egy üres mappába, ami nem a Program Files-ban van. A 7-zip vagy hasonló program jól jöhet ehhez.
- Linux felhasználók:
- Nektek semmit sem kell elmagyarázni, hiszen okos fából faragtak.
- Mac felhasználóknak:
A játék futtatása
Ha sikerült feltelepíteni a játékot, akkor ideje elindítani. Ehhez kattints a KSP.exe fájlra (OSX-en KSP.app, Linuxon KSP.x86 vagy KSP.x86_64, attól függően, hogy 32 vagy 64 bites verziót akarsz-e futtatni).
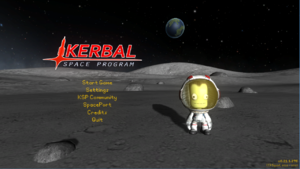
A főképernyőn a következő menük találhatók:
- Start Game (Játék kezdése, folytatása)
- Settings (Beállítások módosítása, mint például a grafika részletessége vagy a hangok)
- KSP Community (Link a játék weboldalára)
- SpacePort (Link a hivatalos mod-adatbázishoz)
- Credits (A Kerbal Space Program készítőinek névsora)
- Quit (Ez a gomb leformázza a merevlemezed!)
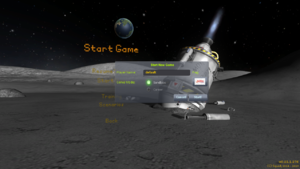
A Start Game gomb megnyomásával a játékindító menübe jutsz:
- Resume Saved (Mentett játék folytatása)
- Start New (Új játék kezdése)
- Training (Gyakorló küldetések)
- Scenarios (Előre megírt küldetések)
- Back (Vissza a főmenübe)
Új játék kezdésekor megadhatod a saját űrprogramod nevét, illetve kiválaszthatod dicső csapatod zászlaját. Az új játékot homokozó [Sandbox] (ez lényegében kötetlen szabad építkezést jelent) módban kezdheted, vagy a második lehetőség a karrier.
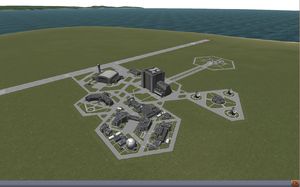
Amint elkezdted a játékot, a Kerbál Űrközpont az alábbi épületekkel jelenik meg:
- Jármű Összeszerelő Épület [Vehicle Assembly Building] (VAB) - A függőlegesen indított rakéták építése,
- Űrrepülőgép Hangár[Space Plane Hangar] (SPH) - A vízszintesen induló repülők [plane] építése,
- Követő Állomás [Tracking Station] - Az eszközök és roncsok pályájának követése,
- Űrhajós Kiképző Központ [Astronaut Complex] - Új jelöltek felvétele az űrprogram számára,
- Kilövőállás [Launch pad] - Függőleges indítású rakétáknak,
- Kifutópálya [Runway] - Az űrrepülők indítása és érkezése céljából,
- Kutató-Fejlesztő Központ [Research and Development] - A rakéták fejlesztés (csak karrier módban),
- Zászlópózna [Flagpole],
Innen akármelyik létesítmény egy ráklikkeléssel elérhető.
A rakéta
Mivel az űrbe jutáshoz szükséged van egy rakétára, kattints a középső épületre (VAB, Vehicle Assembly Building = Jármű Összeszerelő Épület). Alább egy kezdetleges rakéta megépítésén keresztül mutatjuk be a tervezés alapfunkcióit.
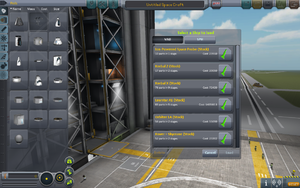
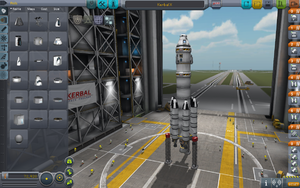
A képernyő jobb-felső részén található narancssárga dossziét kiválasztva az 5. képen látható menü jelenik meg. Keresd meg és válaszd a Kerbal X (stock)-et. Ez betölti a Kerbal X rakétát. Ez a rakéta igazán egyszerű és könnyen eléri a bolygó körüli pályát. Ha a demo verziót használod, Itt találsz egy egyszerű rakétát elég üzemanyaggal a pálya eléréséhez és a visszatéréshez.
Bár ez a rakéta kicsit összetettnek tűnik, valójában egyszerű és könnyű is elmagyarázni a működését. A képernyő jobb oldalán, ahogy a 6. kép mutatja a narancssárga dossziék vannak 0-tól 8-ig számozva. Ezek a rakétád indítási fokozatai [stage]. Az indítási fokozatok nem azonoska a rakéta fokozataival, de a rakétafokozatok is a minden egyes szóközzel továbblépő az indítási fokozatokkal kapcsolhatóak. Minden egyes fokozatban van legalább egy ikon. Ezek az eseményei annak a fokozatnak. Az indítófokozatok jelen esetben ezek lennének:
- 8. Rakéta indítási fokozat
- Ez a kezdő fokozat
- Összesen 7 folyékony üzemanyagú rakétahajtómű indítható be ebben a fokozatban.
- 7. Rakéta indítási fokozat
- Ez a második fokozat
- Ez a fokozat elengedi a támasztóálványokat, TT18-A Kilövési Stabilitás Növelőket [TT18-A Launch Stability Enhancer], amelyek a Kerbal X rakéta alján láthatóak.
- A TT18-A LSE-k nyílt támaszfejjel ellátott pirosra mázolt konzolos megtámasztók
- 6. Rakéta indítási fokozat
- Ez a harmadik indítási fokozat leválaszt két gyorsítórakétát a főrakétáról
- Ezt a fokozatot csak akkor ajánlatos kapcsolni ha az első két fokozat kifogyott az üzemanyagból
- Ez hallható, a lángnyelv elhalása látható akárcsak a rakéta ikonja melletti jelzősáv lecsökkenése.
- 5. Rakéta indítási fokozat
- Egy kicsivel később még két gyorsítórakéta fogy ki az üzemanyagból és a szóköz lenyomásával leválaszthatjuk a rakétáról.
- Újra, közvetlen azután kapcsold ezt a fokozatot, amint a rakétahajtóművek kifogytak az üzemanyagból
- 4. Rakéta indítási fokozat
- Ez ugyanaz mint az előző kettő
- A legfőbb különbség, hogy ez az utolsó gyorsítórakéta páros a főhajtóművön
- 3. Rakéta indítási fokozat
- Ez a vége a rakéta első fokozatának
- A szóköz lenyomásával a főhajtómű amelyet a gyorsítórakéták segítettek feljutni az űrbe elválik a rakéta második fokozatától
- 2. Rakéta indítási fokozat
- Ez elindítja a közvetlenül a kapszula alatt található kisebb hajtóművet
- 1. Rakéta indítási fokozat
- Ez az utolsó fokozat az ejtőernyő kinyitása előtt
- Mivel ez fokozat leválasztja az utolsó hajtóművet is, nem ajánlatos aktiválni a visszatérési célpontra állás előtt
- 0. Rakéta indítási fokozat
- Ez legutolsó fokozat amely az ejtőernyőt indítja el.
Ez szépen lefut a narancssárga aktában a képernyő jobb oldalán. Alapjában semmi egyébre sincsen szükség, hogy mindezt megcsináljuk a Kerbal X-szel, de azért van néhány erősen ajánlatos néhány dolgot hozzáadni, hogy némileg könnyebben juttathassuk keringési pályára..
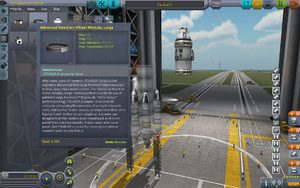
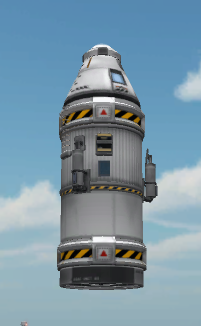
Figure 7 shows the main rocket stage removed in preparation of the black SAS module, from the Control Tab, that will be added. To "break" the rocket in the correct place, simply point your mouse at the section below the separator ring, the black and yellow ring with the red square on it, and do a left-mouse-click {LMC} once. This selects the fuel cell that is underneath of the separator ring and everything below that section of the rocket. Then simply move it out of the way, *but not into the grey component selections on the left* or else it will be trashed, and do another LMC to place the rocket components there.
The SAS module will help greatly in keeping your rockets on course without much fuss from you. With the SAS added, a simple keypress, "t", after the rocket is moved out to the launchpad, will allow the rocket to stay almost perfectly centered while it is in flight. There are other concerns for keeping the rocket stable but those will be covered later.
In order to add the SAS module, do an LMC on the black SAS module, then move your cursor over to the rocket sections. There should now be the SAS module following your cursor, and if not simply go back and do another LMC to select the module again. With the module following your cursor, drag it to the base of the separator ring and you will see the SAS turn green when it is properly placed. Do one last LMC and the module will be placed underneath the separator as shown in Figure 8. The last step is to combine the lower section back onto the SAS module. This is done the same way as it was taken off, just in reverse.
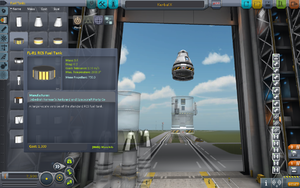
Another SAS module can be added to the section directly underneath the capsule. Simply repeat the same process to the separator that is underneath the capsule. While adding the SAS to the Capsule section, adding some RCS Fuel, Figure 9, will also assist in keeping the rocket stable in flight, by pressing "r" to turn on the rocket in flight. The last step is to add some RCS Thrusters, which I added to the capsule separation ring, see Figure 10. To add these thrusters in any sort of symmetry, use the symmetry icon in the bottom left of the screen, see Figure 11. Each LMC on this indicator will cycle through all of the cloning options, ie 1 - 8 duplicates of whatever item you are placing.
Once the rocket is all attached together again, it is time to move the rocket to the launch pad. Referring back to Figure 1, the Launch Pad is the green icon in the upper right corner of the screen. Clicking on this icon will move the rocket onto the launch pad.
Launching the rocket
Once you've made or selected a rocket, press the big green launch button in the top right.
Flight controls are not exactly straightforward. W, S, A, and D move the ship around, but they are relative to your rotation, controlled with Q and E. The easiest way to keep your rocket on target with WSAD is to look at the navball, in the bottom middle of the screen.
Before launching your rocket, take a second to look at your map, by pressing M. This will bring up Kerbin on the map. Scroll out to show kerbins moons, and even farther to see the rest of the solar system. It will be a while before you even learn how to make a rocket than can escape the sphere of influence of Kerbin, so experiment with different rocket designs, and see what works best for you.
Launching your rocket is the easy part. Just throttle up with left-shift and press space. But don't do that just yet, press T to turn SAS on. SAS is essentially autopilot, without SAS you just won't turn as well. Pure SAS allows you to control the movement of your rocket with the WSADQE keys faster, and with more power, however it is nothing compared to ASAS (Advanced SAS). Advanced SAS allows your rocket to use thrust vectoring (You'll learn about that later too) and it keeps you on course, instead of you having to turn manually.
Each time you run out of fuel in a stage, press space until the next stage of fuel and engines start burning.
If you don't want to read everything I said above all you need to know is before launching press T, hold left-shift until the throttle is at maximum, then press space to launch and if your rocket stops going, press space again.
Getting into orbit
It's time to make your own rocket. The parts editor in the VAB is simple enough to use, but if I were you I would stay away from spaceplanes for a little while longer.
You already know a little bit about staging, but I'm going to generalize it even more for you.
The launching stage
Here you have a whole bunch of high powered engines and large fuel tanks, Solid rocket boosters are most often used here. The motto here is pack as much of it on as you can because you're not taking it with you.
If you do not already know, you can mount things radially (on the side) of other things, and by the magic of the symmetry button (Bottom of the parts menu) you can have the radially mounted things not make your poor rocket tip over.
Staging is one of the most important aspects of building a rocket. I still use staging, even though a lot of people have quickly traded it out for action groups. On the right there is a tall bar with everything in it's respective stage, however if you were to put half your rockets in one stage and the other half in another, you would go almost 3 times as far, in twice the time!
The other stages
Generally split into a circularization stage (I totally didn't make that word up), and an interplanetary stage. For now all you really need to know is everything after the stages in the atmosphere should be light, with medium to low power. Once you're out, if you're going into orbit all you need is a LV-N, 909 or a Poodle, depending on your preference.
How to use these stages
Remember when I told you how to open the map? That's going to come in handy here. Your map also shows your orbital details, so what you need to do is burn just about directly up with your launcher stage. This may take a while, and I encourage you NOT to use the physics warp as with most rockets if you are burning as using the physics warp will almost always make you veer wildly off course or explode in midair. Once your apoapsis (displayed on the map) is above about 70km, press X or hold control to turn off your throttle. Turn off SAS and aim your rocket so it is facing sideways. On the navball the marker indicating your direction should be right on the border between blue and brown. Turn SAS back on and time warp (slowly) until your rocket is about 1km below your apoapsis, than start burning. On the map your orbit should get wider and wider (you can bring up your navball on the map and keep steering, and see your fuel on the map by pressing F2 twice), and once it gets wide enough your periapsis will pop out of the ground, see its shadow and go scampering off into space. Once your apoapsis and periapsis are both above 70km, you can rest and look at your work. Than you can start thinking, well great I have a piece of junk in orbit of my planet. To reenter kerbin, you need to burn retrograde. That sounds fancy, but if you have enough fuel just turn your rocket until you see the yellow circle with the small yellow lines in the middle. Point directly at it and burn. If you put a parachute on your rocket, it will deploy 500m above the ground, and if you made your top stage light enough it will almost completely stop you before you hit the ground. If your rocket is too heavy, the parachute will rip off and your kerbals will fall gently to the ground, exploding upon impact.
If you run out of fuel while burning retrograde, don't worry! As long as your periapsis is less than 70 km you can just timewarp and the atmosphere around Kerbin will slow your rocket down every time it gets below 70km. This technique is often referred as Aerobraking. For fancy points you can try to time your deorbit burn (retrogade burn) to when you are almost on top of kerbal space center, but you have to be aiming 90 degrees when you get your rocket into orbit for that to work well.
Still To Do
- Links for additional tips, tricks, and guidance
