Vehicle Assembly Building/es
| Edificio de Ensamblaje de Vehículos KSC building | ||||||
Nivel 3
| ||||||
| Localización | | |||||
| | ||||||
| Altitude | 67 m | |||||
| Desde la versión | 0.7.3 | |||||
- Editor de vehículos redirige aquí; ver también HAE.
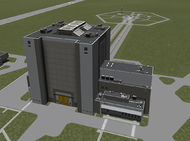
El Edificio de Ensamblaje de Vehículos, comúnmente llamado EEV (a veces erróneamente "Edificio de EnsamblajeVertical"), es una de las dos instalaciones de construcción de naves en el Centro Espacial Kerbal. Está obviamente inspirado en el Edificio de ensamblaje de vehículos en el mundo real de la NASA.
Es el edificio más alto y más grande del CEK, y situado en el corazón del complejo. En la historia del desarrollo del juego Programa Espacial Kerbal también puede considerarse el más antiguo.
Contents
Uso
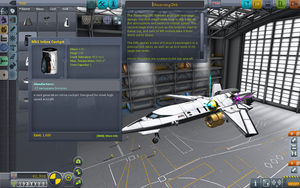
Como su contraparte, el Hangar del Avión Espacial (HAE), el Edificio de Ensamblaje de Vehículos es para la construcción de naves. La lista de piezas es la misma en ambas instalaciones. Además, mientras mantiene su propia lista de archivos de manualidades guardados y subconjuntos de partes, todos estos pueden ser cargados entre el EEV y el HAE.
Hay diferencias esenciales entre los dos. El espacio de trabajo EEV en general está orientado verticalmente, como un cohete, Como es el eje de simetría al colocar o mover partes. El HAE es horizontal en ambos aspectos, como un avión o rover. También, El modo de simetría por defecto en el EEV es simetría bilateral; el valor predeterminado del HAE es w:es:Simetría_especular/simetría especular. Desde la Versión 0.90.0 esto se puede cambiar. En el modo radial, las partes pueden colocarse individualmente o con simetría de dos, tres, cuatro, seis u ocho veces. Finalmente, el lanzamiento desde el EEV comenzará desde la plataforma de inicio mientras que el HAE se inicia desde la pista.
Como todas las instalaciones, el edificio de ensamblaje de vehículos se puede actualizar en el modo de carrera. El número máximo de piezas utilizadas para construir una embarcación y el rango de grupos de acción aumenta con el nivel de actualización del edificio. El primer nivel permite solo 30 partes, sin grupos de acción, el segundo nivel 255 partes, y solo los grupos de acción básicos (sin grupos personalizados), y el edificio completamente actualizado no tiene límites en ninguno de los dos. El estado de desarrollo de la Plataforma de lanzamiento también limita el tamaño de la nave construible.
Interfaz
Desde la Versión 0.90.0, La interfaz del editor para el Edificio de ensamblaje de vehículos y el hangar del avión espacial es la misma. Las únicas excepciones funcionales son la orientación del eje de simetría (vertical u horizontal, respectivamente) y el modo de simetría predeterminado (radial o espejado). El modo de simetría se puede cambiar presionando la tecla R.
La interfaz gráfica proporciona iconos seleccionables para casi todas las acciones. Hay algunas combinaciones de teclas sin iconos. La combinación de ^ Control+Z deshace la última acción, y ^ Control+Y la rehace. Además, manteniendo pulsada la tecla Mod, al hacer clic con el botón izquierdo en una parte, copia un segmento de la embarcación que consta de la parte y todos sus elementos secundarios, en lugar de agarrarla para moverla.
- en la esquina inferior izquierda:
- center-points:
- iconos de información en la esquina inferior derecha:
Controles de modo: A lo largo de la parte superior de la pantalla se encuentran algunos de los controles del taller. Los controles de la izquierda dependen del modo actual en el que se encuentra el taller.
El modo está controlado por los tres iconos azules justo a la izquierda del centro a lo largo de la parte superior. Estos son: Partes (el modo por defecto), Grupos de acción y Tripulación. Estos modos se describen en detalle en sus respectivas páginas.
Barras de modo: el 25% -30% izquierdo de la pantalla estará ocupado por los diversos controles relacionados con el modo.
- Partes - Aparece el cuadro de piezas. Hay una columna de pestañas con etiquetas de iconos para elegir el tipo de las partes. Hay una fila de botones para cambiar la clasificación de las partes visibles mediante: Nombre, Masa, Coste y Tamaño. Hay un interruptor de "Habilitar modo avanzado" en la parte superior, que alterna botones adicionales para ordenar por Módulo, Recurso, Fabricante, o Nivel de técnico. Usando Subconjuntos y la creación de categorías personalizadas también son posibles en este modo avanzado.
- Grupos de acción - menú para reorganizar los grupos de acción básicos y personalizados.
- Tripulación - menú para elegir kerbonautas para la misión.
Nombre de nave está en la parte superior central. Al hacer clic en el nombre, el usuario puede editar el nombre antes de guardar la tarea actual. También se despliega un área de texto para escribir cosas tales como una descripción del vehículo, guías de operaciones o cualquier otra cosa digna de mención. Al hacer clic en cualquier otro lugar de la pantalla se cierra.
Bandera de la misión está justo a la derecha del centro superior. Presenta la bandera utilizada en las etiquetas y, si se trata de un vehículo tripulado, en cualquier bandera colocada por la tripulación en los AEV.
Los controles de archivos y las órdenes de construcción se encuentran en la parte superior derecha de la pantalla.
- Nuevo - Borra el vehículo actualmente activo del EEV.
- Cargar - Abre una ventana emergente para cargar cualquier conjunto de vehículo guardado previamente.
- Guardar - Guarda el vehículo actualmente activo en el disco.
- Lanzar es el segundo desde la esquina superior derecha. Si no guardado recientemente, sobrescribe Nave Auto Guardada en el disco, a continuación, cambia desde el EEV a la Plataforma de lanzamiento.
- Salir es el botón de la derecha. Sale de la EEV de regreso al Centro Espacial.
Pocas cosas más son visibles y conmutables en la esquina inferior izquierda.
- The cost of the current vehicle is shown on right in the upper row, and the current fund in the lower one. There is financial system only in career mode - so the lower row doesn't appears in sandbox and science mode
- The Symmetry Mode is just right from the financial indicators. The number of symmetry level increasable and decreasable by clicking on the indicator (left or right), or using the X and ⇧ Shift+X keys. The switching between bilateral and radial symmetry is possible pressing R key.
- The Angle Snap's icon is the next. It is toggleable by clicking on it or pressing C.
- At the left side of this row there are the icons of the center-points in a column:
There are some popping up menu icons in the bottom right corner too, these from left:
- Craft Stats: The number of parts, the sizes and mass of the current craft shown clicking on the icon illustrated with an "i". If a value is beyond the capability of the building, the row turns to red in career game mode.
- Contracts: These list currently active contracts accepted in Mission Control. This icon appears only in career mode.
- Notifications: These report completed Contracts.
- Staging: On the right edge of the screen, rising from the bottom, is a dynamic and editable list of the current stages of the vehicle under construction. The game will attempt to build the stages as the user adds parts. However, the user may want to change the order that stages are activated, or edit what happens at each stage. The constantly visible RESET rearranges the staging system automatically.
Editor Gizmos: Icons for fine tune of the placing of the parts.
The editor gizmos appears on the top left as the first part is paced in the workshop (they are visible only if some part placed in the workshop) and makes fine tune of the parts situation and orientation possible. They Place, Offset, Rotate and Root. The modes can be activated by clicking on them, or pressing the equivalent (1234) key.
- Place is the default mode, for placing new and already placed parts.
- Offset makes the fine tune of the location of the placed parts possible. Pressing (left)-⇧ Shift makes this tuning work with even finer steps.
- Rotate for rotating - changing the orientation - of the already placed parts. The (left)-⇧ Shift works same way in this case too.
- Root for changing the root part with a single clicking on. The chosen part has to satisfy the conditions of being root part.
Appearance
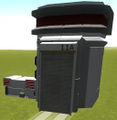
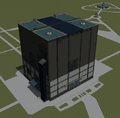
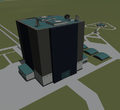
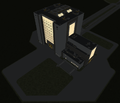
The Vehicle Assembly Building is structured around an approximately 100 m tall assembly bay tower (108 m including helipad) located at the center of KSC. A wing extends south from the assembly bay tower, itself taller than most buildings at KSC and structured in three tiers. A smaller, lower wing extends a short distance on the north side. On the roof, there are 2 helipads between the skylights. There are no helicopters in the game[outdated], but the helipads provide a suitable landing target for VTOL vehicles.
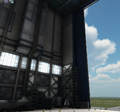
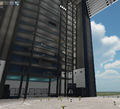
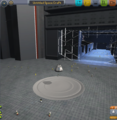
On the east face of the assembly bay tower is an 8-leaf vertical lift door[1] approximately 93 m tall. Closed at all other times, during craft assembly the east door is visibly open (giving 50 m clearance) as though ready for the craft to be rolled out. However, craft appear directly on the Launch Pad and the door is never seen in motion. The view outside is always lit as midday regardless of time in-game. Additionally, on the north, west, and south faces of the VAB are large, yellow, swinging doors which appear to be auxiliary entrances.
Kerbal scientists and workers roam the floor while a gauntlet of ground crew remain stationed at the main east door. Utility vehicles drive in and out and onto cargo lifts set in the north and south interior framework of the VAB. Occasionally, the utility vehicles will drive through one another, or through Kerbals on the floor, all without any effect on each other. None of this activity interacts with the build process, though scientists appear to examine the craft and workers hammer, drill, tighten, and wrench thin air.
Just to the northwest of the VAB is the retirement monument to the old Mk1 Pod used in the earliest versions of KSP.
Levels
- Level 1: Free
- Maximum number of parts: 30
- Level 2:
 337,500
- Maximum number of parts: 255
- Basic action groups available
- Level 3:
 1,267,500
- Unlimited number of parts
- Custom action groups available
Biomes
- Level 1: the VAB hex is available as an area biome, and the VAB Main Building is available as a structure biome.
- Level 2: the VAB South Complex is added as a structure biome.
- Level 3: the VAB South Complex is removed, and the VAB Tanks, Round Tank, and Pod Memorial are added as structure biomes.
Notes: structure biomes must be in contact with a craft to be accessed. The fact that the South Complex disappears when the VAB is fully upgraded may mean that you want to delay the upgrade until all your science instruments and/or the Mobile Processing Lab MPL-LG-2 are available. The total science that may be missed amounts to 55.5 points on 100% science rewards (Normal difficulty).
Gallery
Changes
- Added interior relative to building level.
- Added possibility to add and use subassemblies
- Redesigned exterior
- Redesigned exterior and interior with supply trucks, animated lifts, and more Kerbal Engineers.
- Tweaked lighting for VAB interior and Launch Pad
- Added ground crew
- Initial release
References
See also
- Vehicle Assembly Building on Wikipedia
