Difference between revisions of "Tutorial: ISS"
(what? 3 years?) |
|||
| Line 1: | Line 1: | ||
{{Stub}} | {{Stub}} | ||
{{Outdated| | {{Outdated| | ||
| − | * This article is based on a version of KSP which is over | + | * This article is based on a version of KSP which is over three years old and doesn't account for several gameplay changes and content additions.}} |
{{Quote|"It's fantastic. I can't say how much this means to all of us."|Robert Cabana|first person to enter the ISS }} | {{Quote|"It's fantastic. I can't say how much this means to all of us."|Robert Cabana|first person to enter the ISS }} | ||
Latest revision as of 21:32, 12 June 2023
This page or section is in need of being brought up to date. Please help Kerbal Space Program Wiki by fixing inaccurate or outdated information.
|
| “ | "It's fantastic. I can't say how much this means to all of us." — Robert Cabana, first person to enter the ISS |
” |
Welcome to my first tutorial! Here, we will try to re-enact one of the most important space programs: the International Space Station(ISS/MKC)
All of the designs are based on actual modules and rockets. Of course, I can't do it perfectly, but I am trying my best. Also, I am doing it without any mod parts, but I suggest using the part welder plugin to reduce lag.
This article is in need of images for visual representation and supplement of which would be greatly appreciated
Contents
Vocabulary list
Just so you know, some terms I am using here :
- Zenith - top side of the ship; usually oriented away from the orbited body.
- Nadir - bottom side of the ship; usually oriented towards the orbited body.
- Port - left side of the ship
- Starboard - right side of the ship
- Front - front side/end of the ship
- Aft - back side/end of the ship
- LPA - launch phase angle; angle between the vector of the launching rocket and the line drawn from the launchpad to another object in sky
Construction sequence
| Part | Launch Vehicle | Diameter (m) | Mass (Metric tonnes) |
|---|---|---|---|
| Zarya (FGB) | Proton-K | 4.1 | 19.3 |
| Unity (Node 1), PMA-1 & PMA-2 | US Shuttle | 4.57 | 11.6 |
| Zvezda (Service Module) | Proton-K | 4.15 | 19.1 |
| Z1 Truss and PMA-3 | US Shuttle | 4.2 | 8.8 |
| P6 Truss & SolarArrays | US Shuttle | 4.9 | 15.8 |
| Destiny (US Laboratory) | US Shuttle | 4.27 | 14.5 |
| External StowagePlatform-1 | US Shuttle | ||
| Canadarm2 (SSRMS) | US Shuttle | .35 | 4.9 |
| Quest (Joint Airlock) | US Shuttle | 4 | 6.1 |
| Pirs (Docking Compartment and Airlock) | Soyuz-U | 2.55 | 3.6 |
| S0 Truss | US Shuttle | 4.6 | 14 |
| Mobile Base System | US Shuttle | 2.9 | 1.5 |
| S1 Truss | US Shuttle | 4.6 | 14.1 |
| P1 Truss | US Shuttle | 4.6 | 14.0 |
| ESP-2 | US Shuttle | 4.9 | 2.7 |
| P3/P4 Truss & SolarArrays | US Shuttle | 4.9 | 15.9 |
| P5 Truss | US Shuttle | 4.6 | 1.8 |
| S3/S4 Truss and SolarArrays | US Shuttle | 4.9 | 15.9 |
| S5 Truss and ESP-3 | US Shuttle | 3.9 | 12.6 |
| Harmony (Node 2) Relocationof P6 Truss | US Shuttle | 4.48 | 14.3 |
| Columbus (European Laboratory) | US Shuttle | 4.5 | 12.8 |
| Dextre (SPDM) Japanese Logistics Module (ELM-PS) | US Shuttle | 4.4 | 4.2 |
| Japanese PressurizedModule (JEM-PM)JEM Robotic Arm (JEM-RMS) | US Shuttle | 4.4 | 15.9 |
| S6 Truss & SolarArrays | US Shuttle | 73.2 x 10.7 | 15.9 |
| Japanese ExposedFacility (JEM-EF) | US Shuttle | 4.1 | |
| Poisk (MRM-2) | Soyuz-U | 3.7 | |
| ExPRESS LogisticsCarriers 1 & 2 | US Shuttle | ||
| Cupola and Tranquility (Node 3) | US Shuttle | 4.25 (Node3) 2.95 (Cupola) | 12.2 |
| Rassvet (MRM-1) | US Shuttle | 5.1 | |
| Leonardo (PMM) and EXPRESS Logistics Carrier 4 | US Shuttle | 9.9 | |
| Alpha Magnetic Spectrometer, OBSS and EXPRESS Logistics Carrier 3 | US Shuttle | 6.7 | |
| Nauka (MLM) EuropeanRobotic Arm | Proton-M | 20.3 | |
| Nodal Module (UDM) | Soyuz 2.1b | 4.0 | |
| Science-PowerModule-1 | Proton-M | ||
| Science-PowerModule-2 | Proton-M | ||
| BigelowExpandable Activity Module | Falcon 9 |
Some of the parts of the station like the Nodal Module have not yet been launched.
Rockets
Proton Rocket family - Russian Launchers
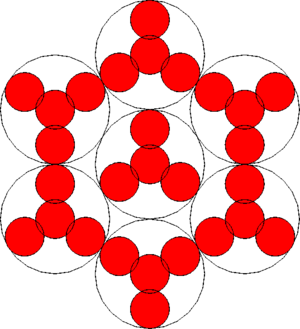
The proton rocket family had 7.4 meter diameter fuel tanks but we do not so I just used 4 large sized tanks to make the diameter 7.5 meters but however this causes problems as it has nothing surrounding the small tanks, so I used a few Modular Girder Segment XL to connect the boosters to the inner part. Since all the rockets in the Proton rocket family are so similar they will be used interchangeably in this tutorial.
Ship Design
- 1x Payload in fairings (Use pre-made fairings such as the AE-FF2 Airstream Protective Shell (2.5m))
- 3x TR-XL Stack Separator (Connect it to a few M-2x2 Structural Panel under/part of the fairings)
- 3x RC-L01 Remote Guidance Unit
- 3x Z-4K Rechargeable Battery Bank
- 3x Advanced S.A.S Module, Large
- 8x Rockomax Jumbo-64 Fuel Tank (three columns of tanks two tanks high surrounding two other tanks stacked on top each other)
- 3x FTX-2 External Fuel Duct (Going from the core tanks to the outward ones surrounding it)
- 3x FL-R1 RCS Fuel Tank
- 3x Rockomax "Skipper" Liquid Engine
- 3x TR-XL Stack Separator
- 12x Rockomax Jumbo-64 Fuel Tank (three columns of tanks three tanks high surrounding three other tanks stacked on top each other)
- 3x FTX-2 External Fuel Duct (Going from the core tanks to the outward ones surrounding it)
- 3x Rockomax "Mainsail" Liquid Engine
- 3x TR-XL Stack Separator
- 72x Rockomax Jumbo-64 Fuel Tank
- 12x Modular Girder Segment XL (two on each of the core tanks leading to the center core tank)
- 18x FTX-2 External Fuel Duct (going from each of the 6 outer core tanks to the outer tanks on the outer boosters)
- 18x Rockomax "Mainsail" Liquid Engine
- 72x Rockomax Jumbo-64 Fuel Tank
STS - Space Shuttle
This is the American launcher. I'm trying to make a replica that is flyable and dockable. Unfortunately, it used a mechanical arm to dock modules, a thing we don't have. Alternatively, you could use the stock Learstar A1, which closely resembles the Shuttle. The Learstar still needs some items (such as the parachute) which aren't on the craft. The Learstar, however, also includes cargo bays which make it easier when transporting cargo.
Ship Design
Orbiter
- 1x Mk1 Cockpit
- 3x Rockomax Mark 55 Radial Mount Liquid Engine (Put in the middle between tip and the slant beginning)
- 1x Mk3 Cockpit
- 1x Small Gear Bay (Middle)
- 2x Illuminator Mk2
- 1x Small Inline Reaction Wheel
- 16x M-2x2 Structural Panel (Put it so it is 1x4 of the 2x2 panels in a square shape)
- 16x Z-400 Rechargeable Battery (Four on the top side of each panel)
- 1x Clamp-O-Tron Shielded Docking Port (Second panel from the front)
- 2x Small Gear Bay (Two on the farthest Panel)
- 3x Delta Wing (One each side far back panel and one going vertically)
- 4x Standard Control Surface (Two for each wing)
- 1x Rockomax X200-16 Fuel Tank
- 4x Cubic Octagonal Strut (Make it so the first three were placed with 3x symetry on completely centered and the last one being placed as high as possible)
- 3x LV-T45 Liquid Fuel Engine
- 1x Oscar-B Fuel Tank (Just using it here so the parachute will have something better to be placed on)
- 4x Cubic Octagonal Strut (Make it so the first three were placed with 3x symetry on completely centered and the last one being placed as high as possible)
External tank and solid rocket booster
- 1x Rockomax Brand Adapter
- 1x Rockomax Jumbo-64 Fuel Tank
- 2x TT-70 Radial Decoupler
- 2x S1 SRB-KD25k
- 4x Cubic Octagonal Strut (put beside each other 2 on each booster on the inner side)
- 4x Sepratron I (Slant each one 5° in so they will be shaped like this /\ {angles exaggerated for clarity})
- 2x FL-A10 Adapter (One per booster)
- 2x Mk2-R Radial-Mount Parachute
- 4x Cubic Octagonal Strut (put beside each other 2 on each booster on the inner side)
- 2x S1 SRB-KD25k
- 1x FTX-2 External Fuel Duct (Connect to the orbiter's fuel tank)
- 4x Hydraulic Detachment Manifold (Use to shoot the Jumbo-64 tank off the shuttle do not use it to shoot the shuttle off from the Jumbo-64 tank)
- 2x TT-70 Radial Decoupler
Falcon 9 - SpaceX rocket
The Falcon 9 was developed by SpaceX and resupply the ISS with the Dragon capsule. The payload in real life is supplies but as kerbals need no supplies to live you can use it to send up fuel, solar arrays, science, or a tug. SpaceX is developing the Falcon Nine to be reusable. The first stage will fly back to the launch pad while the second stage is doing an orbit and then return to the launch pad. The Dragon capsule is along with the Soyuz the only vehicle to return back to Earth intact after the retirement of the Space Shuttle.
Ship Design
- 1x Payload in fairings
- 1x Probodobodyne OKTO2
- 1x Z-4K Rechargeable Battery Bank
- 1x Inline Advanced Stabilizer
- 1x Kerbodyne S3-7200 Tank
- 1x S3 KS-25 Engines
- 1x TR-XL Stack Separator
- 2x Kerbodyne S3-14400 Tank (One on top of the other)
Soyuz Rocket
A Soyuz rocket is another Russian rocket used to launch the manned Soyuz craft mainly but was also used to launch the Pirs docking compartment and airlock.
Ship Design
- 1x Payload in fairings
- 1x TR-38-D
- 1x Kerbodyne S3-14400 Tank
- 1x Kerbodyne KR-2L Advanced Engine
- 1x TR-38-D
- 2x Kerbodyne S3-14400 Tank
- 4x Hydraulic Detachment Manifold (attached radially with 4x symetry on)
- 4x Kerbodyne S3-7200 Tank
- 4x Cubic Octagonal Strut (attached on top on each tank off centered to be closer to the core)
- 4x Rockomax X200-32 Fuel Tank
- 4x Cubic Octagonal Strut (attached on top on each tank off centered to be closer to the core)
- 4x FL-T800 Fuel Tank
- 4x Tail Connector (attached on top of each tank upside down and slanted to be close to the core]]
- 4x FL-T800 Fuel Tank
- 4x Cubic Octagonal Strut (attached on top on each tank off centered to be closer to the core)
- 4x Rockomax X200-32 Fuel Tank
- 4x Kerbodyne KR-2L Advanced Engine (On the bottom this time)
- 8x FTX-2 External Fuel Duct (Two per tank)
- 4x Cubic Octagonal Strut (attached on top on each tank off centered to be closer to the core)
- 4x Kerbodyne S3-7200 Tank
- 1x Kerbodyne KR-2L Advanced Engine
- 4x Hydraulic Detachment Manifold (attached radially with 4x symetry on)
Spacecraft
Progress - resupply ship
Progress is an unmanned Russian resupply ship the routinely sends up supplies to the station as kerbalnauts need no food you can send up fuel and/or spare parts.
Ship design
- 1x Clamp-O-Tron Jr.
- 1x FL-A10 Adapter
- 1x FL-A10 Adapter (This time make it upside down)
- 1x NCS Adapter
- 1x RC-001S Remote Guidance Unit
- 1x Z-1k Rechargeable Battery Bank
- 1x FL-R25 RCS Fuel Tank
- 1x FL-T200 Fuel Tank
- 6x Place-Anywhere 7 Linear RCS Port (Use 2x symetry and place it three times each under the other spaced out evenly using all the room on the fuel tank)
- 2x Gigantor XL Solar Array
- 1x LV-909 Liquid Fuel Engine
- You can add an extra fuel tank(s) or solar arrays if you want to actually send up stuff and not just let it be there. The three adapters are meant to look like progress and are NOT meant to do anything.
Soyuz - Russian/International Crew Transfer Vehicle
A soyuz can carry three Cosmonauts to the station at a time.
Ship Design
- 1x Clamp-O-Tron Docking Port
- 1x Mk1-2 Command Pod
- 1x Rockomax Brand Adapter 02
- 1x Clamp-O-Tron Docking Port
- 1x Mk1-2 Command Pod
- 1x Clamp-O-Tron Sr. Docking Port
- 1x Rockomax X200-16 Fuel Tank
- 1x Rockomax "Poodle" Liquid Engine
Cygnus - Orbital Sciences Resupply Ship
Cygnus is a craft made by Orbital Sciences contracted by NASA. It is launched by the Antares rocket.
Ship Design
- 1x Clamp-O-Tron Docking Port
- 1x RC-001S Remote Guidance Unit
- 1x Inline Advanced Stabilizer
- 1x Z-1k Rechargeable Battery Bank
- 1x FL-T200 Fuel Tank
- 1x LV-909 Liquid Fuel Engine
Dragon - SpaceX Resupply Ship
Dragon is launched by SpaceX with their Falcon 9 rocket.
Ship Design
- 1x Clamp-O-Tron Docking Port
- 1x Rockomax X200-8 Fuel Tank
- 6x Rockomax Mark 55 Radial Mount Liquid Engine (Three pairs)
- 1x Kerbodyne ADTP-2-3
- 1x TD-37 Decoupler
- 1x Kerbodyne S3-3600 Tank (Remove all the oxidizer and liquid fuel)
Station Parts
Zarya - 1A/R
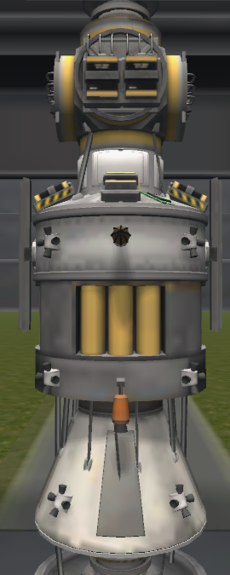
Zarya (Dawn in Russian) or FGB (Functional Cargo Block) was the first module of the ISS. FGB Zarya initially provided flight control as well as electricity and fuel supplies. Now, it is mostly used for storage. It is the connection between the Russian and American side of the station.
Ship Design
| Statistics | |
|---|---|
| Mass (full) | 13.02 t |
| Δv (vacuum) | 1 081 m/s |
Front to aft (1st-level bullets indicate the body; 2nd-level indicates radially-mounted parts):
- 1x Clamp-O-Tron Docking Port
- 1x Rockomax HubMax Multi-Point Connector
- 1x Clamp-O-Tron Docking Port (nadir on HubMax)
- 3x M-1x1 Structural Panel (zenith, port and starboard on HubMax)
- 2x RV-105 RCS Thruster Block (port and starboard on the 1x1 panels)
- 2x Z-400 Rechargable Battery (zenith on 1x1 panels)
- 1x MechJeb 1m Pod OR Small Inline Reaction Wheel (if you don't have MechJeb, put a manned pod on the launcher)
- 1x Rockomax Brand Adapter 02
- 1x Rockomax X200-8 Fuel Tank
- 2x Gigantor XL Solar Array (port and starboard)
- 4x RV-105 RCS Thruster Block (put diagonnaly so it doesn't touch the arrays)
- 1x Communotron 88-88 (zenith so it doesn't get in the way of docking)
- 1x Communotron 16 (nadir)
- 1x FL-R1 RCS Fuel Tank
- 1x Advanced S.A.S Module, Large
- 4x RV-105 RCS Thruster Block
- 2x Rockomax 24-77 (zenith and nadir)
- 1x Small Inline Reaction Wheel
- 1x Rockomax Brand Adapter
- 8x EAS-4 Strut Connector (connect to A.S.A.S.)
- 4x RV-105 RCS Thruster Block
- 1x Rockomax Brand Adapter 02
The Mission
The original Zarya launch happened on November 20, 1998. I can't find the original orbital information The module was placed on a Low Earth Orbit, which usually corresponds to 160 to 2000 km. The current ISS orbit is 402 km PE × 424 km AP with a 51.6° orbital inclination. So, if you want to make it good, launch as usual, with a gravity turn starting at 10 km. Turn towards 38.4 degrees (the 51.6 inclination). Continue until you reach 424 km apoapsis, then burn there to get 402 km periapsis. I'll have to test myself if it's possible with the current Proton-K design It is possible to achieve this orbit with precise flying or an autopilot. It leaves 60% of 3rd-stage fuel and a full on-station tank.
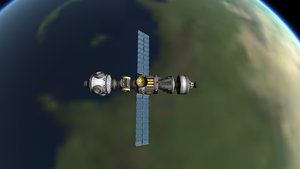
When you have the stable orbit, open the solar panels and the antennas. Move the station to orient it the good way (the one radial docking port facing the Earth; the HubMax towards your prograde vector). Transfer any fuel or electricity (if you are in the dark zone) then either undock the third stage or keep it until the Zvezda mission.
There you go, the ISS begins to exist!
Unity - 1A
| Statistics | |
|---|---|
| Mass (full) | 3.79 t |
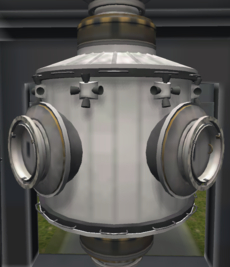
Unity, also known as Node 1, is the first American-only module on the ISS. It is basically a connector between many parts of the station. It was delivered with two PMA (Pressurized Mating Adapters), one that is permanently placed between Zarya and Unity, and the second has moved many times since its installation.
Ship Design
I can't really simulate the PMA's, because they aren't straight but a bit tilted. Here's what I did:
NOTE: : I made a little mistake, because the PMAs are supposed to be moveable. Check lower for info.
- 1x Clamp-O-Tron Docking Port
- 1x Small Inline Reaction Wheel
- 1x Rockomax Brand Adapter 02
- 2x Clamp-O-Tron Docking Port for moveable PMAs
- 1x PPD-10 Hitchhiker Storage Container
- 8x RV-105 RCS Thruster Block
- 4x BZ-52 Radial Attachment Point
- 4x Clamp-O-Tron Docking Port (on the BZ-52's;)
- 2x Clamp-O-Tron Docking Port for moveable PMAs
- 1x Rockomax Brand Adapter 02
- 1x Small Inline Reaction Wheel
- 1x Clamp-O-Tron Docking Port
Mission Phases
The original launch happened 2 weeks after deployment of Zarya, on December 4, 1998.
Launch
For my launch, I had to use the Proton-K launcher, because there isn't any solid fuel boosters as powerful as was used by the Space Shuttle. It had two boosters, each at 12.5 MN while the Rockomax booster has only 300 kN (2.4%).
Try your best to put it on the same orbit as Zarya. If you have an auto-pilot, use the "Launch to rendezvous" function. If not, try to send it with Zarya at a 45 degree LPA. Once again, the orbit is 424 km AP × 402 km PE.
Rendez-vous
Check the tutorials on rendezvous and docking if you don't know how to. The goal is to attach one of the PMA ends (front or aft, they're symmetrical) to the Hubmax (front end). You may need to switch between vessels to put them in the right diretions.
They connected!
On the actual mission, there were 3 EVA's to connect cables between the modules, and once to enter the ISS. As of 0.19.1, you can only do that last point. If you brought any Kerbonauts, put them in EVA and let them enter the Hitchhiker. After some time, get them back on what's left of your launcher.
Landing on Kerbin
I didn't use a manned pod, so I just dropped the launcher with as less fuel left as possible. Instead, try to return the Kerbonauts on the last stage of your Unity launcher. You can pump the fuel from the Zarya launcher if it's still docked; you'll also need the aft docking port of Zarya for the next mission.
What now
Possibly a lunar base? Let your imagination run wild!


