Difference between revisions of "Vehicle Assembly Building"
(Vehicle Editor redirect note) |
(→Biomes) |
||
| (48 intermediate revisions by 19 users not shown) | |||
| Line 1: | Line 1: | ||
| − | + | {{:Vehicle Assembly Building/Box}} | |
| − | + | :''Vehicle Editor redirects here; see also [[Spaceplane Hangar]].'' | |
| − | :''Vehicle Editor redirects here; see also [[ | ||
| − | The '''Vehicle Assembly Building''' | + | The '''Vehicle Assembly Building''', commonly called the '''VAB''' (sometimes wrongly "''Vertical'' Assembly Building"), is one of the two [[craft]] construction facilities at [[Kerbal Space Center]]. It is quite obviously inspired by NASA's real world [[w:Vehicle Assembly Building|Vehicle Assembly Building]]. |
| − | + | It is the [[KSC]]'s tallest and single largest building, and situated at the heart of the complex. In [[Kerbal Space Program]] game development history, it can also be considered the oldest. | |
| − | == | + | == Usage == |
| − | The | + | Like its counterpart the [[Spaceplane Hangar]] (SPH), the [[Vehicle Assembly Building]] is for craft construction. The [[parts]] list is the same in both facilities. Also, while it keeps its own list of saved craft files and [[Subassembly|subassemblies]] of parts, these can all be cross-loaded between the [[VAB]] and SPH. |
| + | |||
| + | There are essential differences between the two. The [[VAB]] workspace in general is vertically oriented, like a [[rocket]], as is it axis of symmetry when placing or moving parts. The SPH is horizontal in both regards, like a [[plane]] or [[rover]]. Also, the symmetry mode by default in the [[VAB]] is [[w:Radial_symmetry|radial]]; the SPH's default is [[w:Bilateral_symmetry|mirrored/bilateral symmetry]]. Since {{Version|0.90.0}} this can be toggled. In radial mode, parts can be placed singly or with two-, three-, four-, six- or eight-fold symmetry. Finally, craft launched from the [[VAB]] will start from the [[Launch Pad]] while the SPH launches from the [[Runway]]. | ||
| + | |||
| + | Like all installations, the Vehicle Assembly Building is upgradeable in [[Career|Career mode]]. The maximum number of [[part]]s used for building a craft and the available range of [[action group]]s increases with the upgrade level of the building. The first level allows only 30 [[part]]s, and no [[action group]]s, the second level 255 [[part]]s, and only the basic [[action group]]s (no custom groups), and the fully upgraded building has no limits on either. The state of development of the [[Launch Pad]] also limits the size of the buildable [[craft]]. | ||
== Interface == | == Interface == | ||
| + | [[File:Editor GUI_00.jpg|thumb|right|Editor view within the workshops]] | ||
| + | Since {{version|0.90.0}}, the editor interface for the [[Vehicle Assembly Building]] and the [[Spaceplane Hangar]] is the same. The only functional exceptions are the orientation of the axis of symmetry (vertical or horizontal, respectively) and the default symmetry mode (radial or mirrored). The symmetry mode can be toggled by pressing the {{key press|R}} button. | ||
| + | |||
| + | The graphical interface provides clickable icons for almost all actions. There are a few [[key bindings#VAB|key combinations]] without icons. The {{Key press|Control}}+{{Key press|Z}} key combination undoes the last action, and {{Key press|Control}}+{{Key press|Y}} redoes it. Also, holding down the {{Key press|[[key bindings#Modifier key|Mod]]}}, when left-clicking on a part, copies a segment of the craft consisting of the part and all its children, rather than grabbing it to be moved. | ||
| + | {{FlipBox|style=word-wrap: normal;margin: 0em 0em 0.5em; border-style: solid solid solid solid; padding: 0px; background-color: #EEEEEE; border-color:#aaaaaa; border-width:1px; width: 24em; | ||
| + | |title='''Contents''' | ||
| + | |content= | ||
| + | * [[#Mode|Modes of workshops]] | ||
| + | * [[#Name|Craft naming]] | ||
| + | * [[#Flag|Mission Flag]] | ||
| + | * [[#File|File and other operations]] | ||
| + | :''in bottom left corner:'' | ||
| + | :* [[#B-L|Costs]] | ||
| + | :* [[#B-L|Symmetry Mode]] | ||
| + | :* [[#B-L|Snap Angle]] | ||
| + | ::''center-points:'' | ||
| + | ::* [[#B-L|Center of Mass]] | ||
| + | ::* [[#B-L|Center of Thrust]] | ||
| + | ::* [[#B-L|Center of List]] | ||
| + | :''information icons in bottom right corner:'' | ||
| + | :* [[#Info|Craft Stats]] | ||
| + | :* [[#Info|Notifications]] | ||
| + | :* [[#Info|Contracts]] | ||
| + | :* [[#Info|Staging]] | ||
| + | * [[#Gizmo|Editor Gizmos]] | ||
| + | }} | ||
| + | <span id="Mode"></span> | ||
| + | '''Mode controls''': Along the top of the screen are some of the workshop controls. The leftmost controls are dependent on the current mode the workshop is in. | ||
| + | {|style="float: left;" | ||
| + | |[[File:part icon.png|link=]] [[File:action group icon.png|link=]] [[File:crew icon.png|link=]] | ||
| + | |} | ||
| + | The mode is controlled by the three blue icons just left-of-center along the top. These are: [[Parts]] (the default mode), [[Action group|Action Groups]] and [[Crew]]. ''These modes are described in detail on their respective pages.'' | ||
| + | {{clear|left}} | ||
| + | '''Mode bars''': the left 25%-30% of the screen will be occupied by the various controls related to the mode. | ||
| + | * '''[[Parts]]''' - the tableau of parts appears. There is a column of icon-labelled tabs for choosing the type of the parts. There is a row of buttons for changing the sorting of the visible parts by: '''Name''', '''Mass''', '''Cost''' and '''Size'''. There is an “Enable Advanced Mode” switch on the top, toggling extra buttons to sort by '''Module''', '''Resource''', '''Manufacturer''', or '''Tech Level'''. Using [[Subassembly|Subassemblies]] and creating custom categories are also possible in this advanced mode. | ||
| + | * '''[[Action group|Action Groups]]''' - menu for rearranging the basic and custom action groups. | ||
| + | * '''[[Crew]]''' - menu for choosing [[kerbonaut]]s for the mission. | ||
| + | |||
| + | <span id="Name"></span> | ||
| + | '''Craft Name''' is in the top center. Clicking on the name allows the user to edit the name before saving the current craft. It also drops down a textarea to write things such as a description of the vehicle, operations guides, or anything else noteworthy. Clicking anywhere else on the screen closes it. | ||
| + | |||
| + | <span id="Flag"></span> | ||
| + | '''Mission Flag''' is just to the right of top center. It presents the [[Flag (Image)|flag]] used on decals and, if this is a manned vehicle, on any [[Extend-o-matic Series A1 Deployable Flag|flag planted]] by crew on EVAs. | ||
| + | |||
| + | <span id="File"></span> | ||
| + | File controls and construction orders are located along the top right of the screen. | ||
| + | {|style="float: right;" | ||
| + | |[[File:New icon.png|link=]] [[File:Load icon.png|link=]] [[File:Save icon.png|link=]] [[File:Launch icon.png|37px|link=]] [[File:Exit icon.png|link=]] | ||
| + | |} | ||
| + | *''' New''' - Clears currently active vehicle from the [[VAB]]. | ||
| + | *''' Load''' - Opens a pop up window to load any previously saved vehicle assemblies. | ||
| + | *''' Save''' - Saves the currently active vehicle to disk. | ||
| + | *'''Launch''' is second in from the top right corner. If not recently saved, overwrites ''Auto Saved Ship'' on disk, then switches from the VAB to the [[Launch pad]]. | ||
| + | *'''Exit''' is the rightmost button. It exits the VAB back to the [[Kerbal Space Center|Space Center]]. | ||
| + | |||
| + | <span id="B-L"></span> | ||
| + | Few more things are visible and switchable in the bottom left corner. | ||
| + | [[File:SymmetryIndicator.png|right|link=]] | ||
| + | * The '''[[funds|cost]]''' of the current vehicle is shown on right in the upper row, and the current fund in the lower one. There is financial system only in career mode - so the lower row doesn't appears in [[sandbox]] and [[science mode]] | ||
| + | * The '''Symmetry Mode''' is just right from the financial indicators. The number of symmetry level increasable and decreasable by clicking on the indicator (left or right), or using the {{key press|X}} and {{key press|Shift}}+{{key press|X}} keys. The switching between bilateral and radial symmetry is possible pressing {{key press|R}} key. | ||
| + | * The '''Angle Snap''''s icon is the next. It is toggleable by clicking on it or pressing {{key press|C}}. | ||
| + | * At the left side of this row there are the icons of the center-points in a column: | ||
| + | ** '''[[center of mass|Center of Mass]]''' | ||
| + | ** '''[[center of thrust|Center of Thrust]]''' | ||
| + | ** '''[[center of lift|Center of Lift]]''' | ||
| + | |||
| + | <span id="Info"></span> | ||
| + | There are some popping up menu icons in the bottom right corner too, these from left: | ||
| + | * '''Craft Stats''': The number of parts, the sizes and mass of the current craft shown clicking on the icon illustrated with an "<big>'''i'''</big>". If a value is beyond the capability of the building, the row turns to red in career game mode. | ||
| + | * '''[[Contracts]]''': These list currently active contracts accepted in [[Mission Control]]. This icon appears only in career mode. | ||
| + | * '''Notifications''': These report completed Contracts. | ||
| + | * '''[[Stage|Staging]]''': On the right edge of the screen, rising from the bottom, is a dynamic and editable list of the current stages of the vehicle under construction. The game will attempt to build the stages as the user adds parts. However, the user may want to change the order that stages are activated, or edit what happens at each stage. The constantly visible '''''RESET''''' rearranges the staging system automatically. | ||
| − | ''' | + | <span id="Gizmo"></span> |
| − | [[ | + | '''Editor Gizmos''': Icons for fine tune of the placing of the parts. |
| + | [[File:Assemblymodes_icons.png|left|link=]] | ||
| + | The editor gizmos appears on the top left as the first part is paced in the workshop (they are visible only if some part placed in the workshop) and makes fine tune of the parts situation and orientation possible. They Place, Offset, Rotate and [[root part|Root]]. The modes can be activated by clicking on them, or pressing the equivalent ({{Key press|1|2|3|4|chain=}}) key. | ||
| + | {{clear|left}} | ||
| + | * '''Place''' is the default mode, for placing new and already placed parts. | ||
| + | * '''Offset''' makes the fine tune of the location of the placed parts possible. Pressing (left)-{{key press|Shift}} makes this tuning work with even finer steps. | ||
| + | * '''Rotate''' for rotating - changing the orientation - of the already placed parts. The (left)-{{key press|Shift}} works same way in this case too. | ||
| + | * '''Root''' for changing the [[root part]] with a single clicking on. The chosen part has to satisfy the conditions of being root part. | ||
| − | + | == Appearance == | |
| + | The Vehicle Assembly Building is structured around an approximately 100 m tall assembly bay tower (108 m including helipad) located at the center of [[KSC]]. A wing extends south from the assembly bay tower, itself taller than most buildings at [[KSC]] and structured in three tiers. A smaller, lower wing extends a short distance on the north side. On the roof, there are 2 helipads between the skylights. There are no helicopters in the game{{check version||0.90}}, but the helipads provide a suitable landing target for [[Craft#VTOL|VTOL]] vehicles. | ||
| − | + | On the east face of the assembly bay tower is an 8-leaf vertical lift door<ref>[http://www.international-door.com/vertical-lift-docked-doors.php Term "multi-leaf vertical lift door" used by real-world maker of similar door for NASA]</ref> approximately 93 m tall. Closed at all other times, during craft assembly the east door is visibly open (giving 50 m clearance) as though ready for the craft to be rolled out. However, craft appear directly on the Launch Pad and the door is never seen in motion. The view outside is always lit as midday regardless of time in-game. Additionally, on the north, west, and south faces of the [[VAB]] are large, yellow, swinging doors which appear to be auxiliary entrances. | |
| − | + | [[Kerbal]] scientists and workers roam the floor while a gauntlet of ground crew remain stationed at the main east door. Utility vehicles drive in and out and onto cargo lifts set in the north and south interior framework of the VAB. Occasionally, the utility vehicles will drive through one another, or through Kerbals on the floor, all without any effect on each other. None of this activity interacts with the build process, though scientists appear to examine the craft and workers hammer, drill, tighten, and wrench thin air. | |
| − | + | Just to the northwest of the [[VAB]] is the retirement monument to the old Mk1 Pod used in the earliest versions of [[KSP]]. | |
| − | + | {{SpoilerBox|description=Additional things to discover.|content=Beginning at the southeast corner of the assembly bay, a series of climbable stairs and ladders lead to the roof of the VAB. However, surmounting the ladders onto the helipad deck is very difficult.}} | |
| + | {{SpoilerBox|description=Glitch|content=If a Kerbal jumps off of the VAB roof, they may survive, but might temporarily glitch on landing, with the arms shooting outward and becoming the "thing" for a few seconds. It is similar to the effects experienced when falling into [[Jool]].}} | ||
| − | + | {{ID|KSP:building,interiors090|VAB|header='''Relative Level Interiors'''}} | |
| − | *''' | + | == Levels == |
| + | *'''Level 1''': Free | ||
| + | **Maximum number of [[Parts|parts]]: 30 | ||
| + | *'''Level 2''': {{mark|fund}}337,500 | ||
| + | **Maximum number of [[parts]]: 255 | ||
| + | **Basic [[action group]]s available | ||
| + | *'''Level 3''': {{mark|fund}}1,267,500 | ||
| + | **Unlimited number of [[parts]] | ||
| + | **Custom [[action groups]] available | ||
| − | *''' | + | == Biomes == |
| + | *'''Level 1''': the VAB hex is available as an area [[biome]], and the VAB Main Building is available as a structure biome. | ||
| + | *'''Level 2''': the VAB South Complex is added as a structure biome. | ||
| + | *'''Level 3''': the VAB South Complex is '''removed''', and the VAB Tanks, Round Tank, and Pod Memorial are added as structure biomes. | ||
| − | + | Notes: structure biomes must be in contact with a [[craft]] to be accessed. The fact that the South Complex disappears when the VAB is fully upgraded may mean that you want to delay the upgrade until all your science instruments and/or the [[Mobile Processing Lab MPL-LG-2]] are available. The total science that may be missed amounts to 55.5 points on 100% science rewards (Normal difficulty). | |
| − | The | ||
| − | |||
| − | |||
| − | |||
== Gallery == | == Gallery == | ||
<gallery> | <gallery> | ||
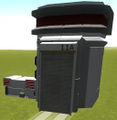
vabexterior.jpg|The exterior view of the VAB until 0.21 | vabexterior.jpg|The exterior view of the VAB until 0.21 | ||
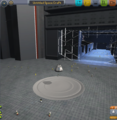
vabint.png|The interior view of the VAB until 0.21 | vabint.png|The interior view of the VAB until 0.21 | ||
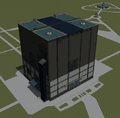
| + | VABTier1.png|The level 1 VAB | ||
| + | Inside_VABTier1.png|The interior view of the VAB (level 1) | ||
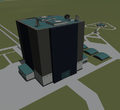
| + | VABTier2.png|The level 2 VAB | ||
| + | Inside_VABTier2.png|The interior view of the VAB (level 2) | ||
| + | VABwLP.jpg|The level 3 VAB | ||
| + | VABin.jpg|The crewed interior view of the VAB (level 3) | ||
| + | Rocket-power VTOL on VAB.jpg|On the helipad of the VAB | ||
| + | VAB night.png|The VAB at night | ||
</gallery> | </gallery> | ||
== Changes == | == Changes == | ||
| − | ; | + | ;[[0.90.0]] |
| − | * Added possibility to add and use subassemblies | + | * Added interior relative to building level. |
| − | * Redesigned exterior | + | ;[[0.22]] |
| − | ; | + | * Added possibility to add and use [[subassemblies]] |
| + | * Redesigned exterior | ||
| + | ;[[0.21]] | ||
* Redesigned exterior and interior with supply trucks, animated lifts, and more Kerbal Engineers. | * Redesigned exterior and interior with supply trucks, animated lifts, and more Kerbal Engineers. | ||
| − | * Tweaked lighting for VAB interior and | + | * Tweaked lighting for [[VAB]] interior and [[Launch Pad]] |
| − | ; | + | ;[[0.16]] |
| − | * Added ground crew | + | * Added ground crew |
| − | ; | + | ;[[0.7.3]] |
* Initial release | * Initial release | ||
| − | [[Category:Space Center | + | == References == |
| + | <references/> | ||
| + | |||
| + | == See also == | ||
| + | * {{Wikipedia|Vehicle Assembly Building}} | ||
| + | |||
| + | [[Category:Game interface]] | ||
| + | {{Kerbal Space Center}} | ||
Latest revision as of 07:28, 21 January 2018
| Vehicle Assembly Building KSC building | ||||||
Level 3
| ||||||
| Location | | |||||
| | ||||||
| Altitude | 67 m | |||||
| Since version | 0.7.3 | |||||
- Vehicle Editor redirects here; see also Spaceplane Hangar.
The Vehicle Assembly Building, commonly called the VAB (sometimes wrongly "Vertical Assembly Building"), is one of the two craft construction facilities at Kerbal Space Center. It is quite obviously inspired by NASA's real world Vehicle Assembly Building.
It is the KSC's tallest and single largest building, and situated at the heart of the complex. In Kerbal Space Program game development history, it can also be considered the oldest.
Contents
Usage
Like its counterpart the Spaceplane Hangar (SPH), the Vehicle Assembly Building is for craft construction. The parts list is the same in both facilities. Also, while it keeps its own list of saved craft files and subassemblies of parts, these can all be cross-loaded between the VAB and SPH.
There are essential differences between the two. The VAB workspace in general is vertically oriented, like a rocket, as is it axis of symmetry when placing or moving parts. The SPH is horizontal in both regards, like a plane or rover. Also, the symmetry mode by default in the VAB is radial; the SPH's default is mirrored/bilateral symmetry. Since version 0.90.0 this can be toggled. In radial mode, parts can be placed singly or with two-, three-, four-, six- or eight-fold symmetry. Finally, craft launched from the VAB will start from the Launch Pad while the SPH launches from the Runway.
Like all installations, the Vehicle Assembly Building is upgradeable in Career mode. The maximum number of parts used for building a craft and the available range of action groups increases with the upgrade level of the building. The first level allows only 30 parts, and no action groups, the second level 255 parts, and only the basic action groups (no custom groups), and the fully upgraded building has no limits on either. The state of development of the Launch Pad also limits the size of the buildable craft.
Interface
Since version 0.90.0, the editor interface for the Vehicle Assembly Building and the Spaceplane Hangar is the same. The only functional exceptions are the orientation of the axis of symmetry (vertical or horizontal, respectively) and the default symmetry mode (radial or mirrored). The symmetry mode can be toggled by pressing the R button.
The graphical interface provides clickable icons for almost all actions. There are a few key combinations without icons. The ^ Control+Z key combination undoes the last action, and ^ Control+Y redoes it. Also, holding down the Mod, when left-clicking on a part, copies a segment of the craft consisting of the part and all its children, rather than grabbing it to be moved.
- in bottom left corner:
- center-points:
- information icons in bottom right corner:
Mode controls: Along the top of the screen are some of the workshop controls. The leftmost controls are dependent on the current mode the workshop is in.
The mode is controlled by the three blue icons just left-of-center along the top. These are: Parts (the default mode), Action Groups and Crew. These modes are described in detail on their respective pages.
Mode bars: the left 25%-30% of the screen will be occupied by the various controls related to the mode.
- Parts - the tableau of parts appears. There is a column of icon-labelled tabs for choosing the type of the parts. There is a row of buttons for changing the sorting of the visible parts by: Name, Mass, Cost and Size. There is an “Enable Advanced Mode” switch on the top, toggling extra buttons to sort by Module, Resource, Manufacturer, or Tech Level. Using Subassemblies and creating custom categories are also possible in this advanced mode.
- Action Groups - menu for rearranging the basic and custom action groups.
- Crew - menu for choosing kerbonauts for the mission.
Craft Name is in the top center. Clicking on the name allows the user to edit the name before saving the current craft. It also drops down a textarea to write things such as a description of the vehicle, operations guides, or anything else noteworthy. Clicking anywhere else on the screen closes it.
Mission Flag is just to the right of top center. It presents the flag used on decals and, if this is a manned vehicle, on any flag planted by crew on EVAs.
File controls and construction orders are located along the top right of the screen.
- New - Clears currently active vehicle from the VAB.
- Load - Opens a pop up window to load any previously saved vehicle assemblies.
- Save - Saves the currently active vehicle to disk.
- Launch is second in from the top right corner. If not recently saved, overwrites Auto Saved Ship on disk, then switches from the VAB to the Launch pad.
- Exit is the rightmost button. It exits the VAB back to the Space Center.
Few more things are visible and switchable in the bottom left corner.
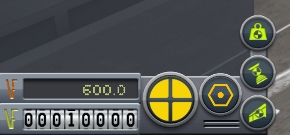
- The cost of the current vehicle is shown on right in the upper row, and the current fund in the lower one. There is financial system only in career mode - so the lower row doesn't appears in sandbox and science mode
- The Symmetry Mode is just right from the financial indicators. The number of symmetry level increasable and decreasable by clicking on the indicator (left or right), or using the X and ⇧ Shift+X keys. The switching between bilateral and radial symmetry is possible pressing R key.
- The Angle Snap's icon is the next. It is toggleable by clicking on it or pressing C.
- At the left side of this row there are the icons of the center-points in a column:
There are some popping up menu icons in the bottom right corner too, these from left:
- Craft Stats: The number of parts, the sizes and mass of the current craft shown clicking on the icon illustrated with an "i". If a value is beyond the capability of the building, the row turns to red in career game mode.
- Contracts: These list currently active contracts accepted in Mission Control. This icon appears only in career mode.
- Notifications: These report completed Contracts.
- Staging: On the right edge of the screen, rising from the bottom, is a dynamic and editable list of the current stages of the vehicle under construction. The game will attempt to build the stages as the user adds parts. However, the user may want to change the order that stages are activated, or edit what happens at each stage. The constantly visible RESET rearranges the staging system automatically.
Editor Gizmos: Icons for fine tune of the placing of the parts.
The editor gizmos appears on the top left as the first part is paced in the workshop (they are visible only if some part placed in the workshop) and makes fine tune of the parts situation and orientation possible. They Place, Offset, Rotate and Root. The modes can be activated by clicking on them, or pressing the equivalent (1234) key.
- Place is the default mode, for placing new and already placed parts.
- Offset makes the fine tune of the location of the placed parts possible. Pressing (left)-⇧ Shift makes this tuning work with even finer steps.
- Rotate for rotating - changing the orientation - of the already placed parts. The (left)-⇧ Shift works same way in this case too.
- Root for changing the root part with a single clicking on. The chosen part has to satisfy the conditions of being root part.
Appearance
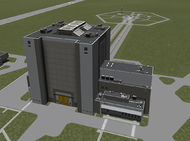
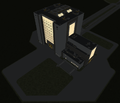
The Vehicle Assembly Building is structured around an approximately 100 m tall assembly bay tower (108 m including helipad) located at the center of KSC. A wing extends south from the assembly bay tower, itself taller than most buildings at KSC and structured in three tiers. A smaller, lower wing extends a short distance on the north side. On the roof, there are 2 helipads between the skylights. There are no helicopters in the game[outdated], but the helipads provide a suitable landing target for VTOL vehicles.
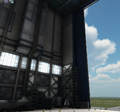
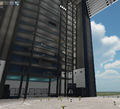
On the east face of the assembly bay tower is an 8-leaf vertical lift door[1] approximately 93 m tall. Closed at all other times, during craft assembly the east door is visibly open (giving 50 m clearance) as though ready for the craft to be rolled out. However, craft appear directly on the Launch Pad and the door is never seen in motion. The view outside is always lit as midday regardless of time in-game. Additionally, on the north, west, and south faces of the VAB are large, yellow, swinging doors which appear to be auxiliary entrances.
Kerbal scientists and workers roam the floor while a gauntlet of ground crew remain stationed at the main east door. Utility vehicles drive in and out and onto cargo lifts set in the north and south interior framework of the VAB. Occasionally, the utility vehicles will drive through one another, or through Kerbals on the floor, all without any effect on each other. None of this activity interacts with the build process, though scientists appear to examine the craft and workers hammer, drill, tighten, and wrench thin air.
Just to the northwest of the VAB is the retirement monument to the old Mk1 Pod used in the earliest versions of KSP.
Levels
- Level 1: Free
- Maximum number of parts: 30
- Level 2:
 337,500
- Maximum number of parts: 255
- Basic action groups available
- Level 3:
 1,267,500
- Unlimited number of parts
- Custom action groups available
Biomes
- Level 1: the VAB hex is available as an area biome, and the VAB Main Building is available as a structure biome.
- Level 2: the VAB South Complex is added as a structure biome.
- Level 3: the VAB South Complex is removed, and the VAB Tanks, Round Tank, and Pod Memorial are added as structure biomes.
Notes: structure biomes must be in contact with a craft to be accessed. The fact that the South Complex disappears when the VAB is fully upgraded may mean that you want to delay the upgrade until all your science instruments and/or the Mobile Processing Lab MPL-LG-2 are available. The total science that may be missed amounts to 55.5 points on 100% science rewards (Normal difficulty).
Gallery
Changes
- Added interior relative to building level.
- Added possibility to add and use subassemblies
- Redesigned exterior
- Redesigned exterior and interior with supply trucks, animated lifts, and more Kerbal Engineers.
- Tweaked lighting for VAB interior and Launch Pad
- Added ground crew
- Initial release
References
See also
- Vehicle Assembly Building on Wikipedia
