Difference between revisions of "Getting Started/ja"
Kspjptrans (talk | contribs) |
Kamonanban (talk | contribs) m (カテゴリ他修正) |
||
| (30 intermediate revisions by 5 users not shown) | |||
| Line 1: | Line 1: | ||
{{outdated}} | {{outdated}} | ||
| − | + | このガイドは、Kerbal Space Programの最初の数時間をプレイする助けになることを目的にした解説です。すべてを網羅してはいませんが、ロケットの組み立てと打ち上げの基礎を理解できるはずです。より詳しい内容は、他の解説ページを参照してください。 | |
| + | ---- | ||
| − | + | :''その他の解説は、 [[Tutorial: Walkthrough for Ye Compleat Beginner|Tutorial: Walkthrough for Ye Compleat Beginner]]を参照してください。'' | |
| + | :''ゲームの概要・仕組みについては[[Tutorial:Game Manual|Tutorial:Game Manual]]を参照してください。'' | ||
| − | + | == 購入先 == | |
| + | 開発元のSquadはKSPを簡単に購入できる販路をいくつか用意しています。 | ||
| − | + | #公式ページ http://kerbalspaceprogram.com へアクセス。 | |
| − | + | #"store"をクリックしたら、商品一覧の中にある“Kerbal Space Program”がソフト本体になります。“Kerbalizer”というのも隣にありますが、今は必要ありません。 | |
| − | |||
| − | # | ||
| − | # | ||
<!-- I forgot ;_; --> | <!-- I forgot ;_; --> | ||
| − | + | また、ダウンロード販売主体のプラットホーム、[https://store.steampowered.com/app/220200/Kerbal_Space_Program/ Steam]を利用している方は、そちらからでも購入できます。その他いくつかの小規模販売サービスや[https://www.humblebundle.com/store/p/kerbalspaceprogram_storefront The Humble Store]でも取り扱いがあります。 | |
| − | == | + | == ダウンロード == |
| − | + | 現在は、Kerbal Space Programの最新バージョンが一度にダウンロードされます。 また[[Patcher|パッチツール]]があり、Steam版は自動的にアップデートされます。 | |
| − | # | + | # ストアページに行く。 |
| − | # | + | # ユーザー名とパスワードを入力してLoginする。 |
| − | # | + | # Profileボタンをクリック。 |
| − | # | + | # ページ下までスクロールし、purchase invoiceの隣にあるダウンロードリンクをクリック。 |
| − | # | + | # OSプラットフォームに合わせて専用バージョンをダウンロードしてください。 |
| − | #* | + | #* Macユーザー: |
#*#Install Mono from the bundled .dmg file, if needed. | #*#Install Mono from the bundled .dmg file, if needed. | ||
#*#Unzip the file into an empty folder. | #*#Unzip the file into an empty folder. | ||
#*#Ensure the execute permission is set on the Patcher.command file. | #*#Ensure the execute permission is set on the Patcher.command file. | ||
| − | #* | + | #* Windowsユーザー: |
| − | #*# | + | #*# 必要に応じて.NET Framework 4.0以降をインストールします。(Windows最新バージョンには標準で入っています。) |
| − | #*# | + | #*# システムフォルダ'''以外'''の新規作成したフォルダ内に解凍して下さい。解凍には[http://sevenzip.sourceforge.jp/ 7-zip]などを使ってください。 |
| − | #* | + | #* Linuxユーザー: |
| − | #* | + | #** [[Linux|Linux-users help you]].<ref>http:////forum.kerbalspaceprogram.com/threads/24529-The-Linux-compatibility-thread!?highlight=linux+compatibility/ The-Linux-compatibility-thread</ref> |
| − | == | + | == ゲームの起動 == |
| − | + | 解凍したフォルダの中にあるKSP.exe(Mac OSXならKSP.app、LinuxならKSP.x86_64かKSP.x86)を開くことでゲームを起動することができます。64bit版WindowsではKSP_64.exeを開くこともできます(Modを多く入れている場合は64bit版推奨)。KSP.exeのショートカットをデスクトップに作成することで簡単にゲームを起動できるようになります。またフォルダをUSBメモリーに入れることで他のPCでプレイすることも可能です。 | |
| − | [[File: | + | {{Clear}} |
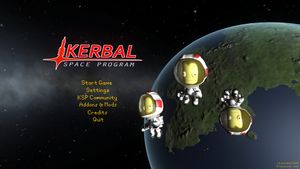
| + | [[File:Mainscreen.jpg|thumbnail|図 1 : KSP メインメニュー]] | ||
| + | タイトル画面には以下の項目があります: | ||
| + | # ゲームを開始 | ||
| + | # [[Settings/ja|セッティング]] (ゲーム設定、操作設定、グラフィック設定など) | ||
| + | # KSP コミュニティー (webブラウザでコミュニティサイトを開く) | ||
| + | # アドオン & Mod | ||
| + | # クレジット (スタッフロール) | ||
| + | # 終了 | ||
| − | + | "ゲームを開始"を選択すると、"ゲームを開始"メニュー画面に移ります。 | |
| − | |||
| − | |||
| − | |||
| − | |||
| − | |||
| − | |||
| − | [[File: | + | {{Clear}} |
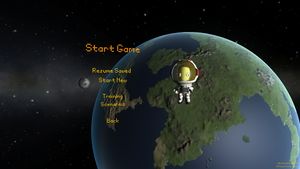
| + | [[File:Start Game.jpg|thumbnail|図 2 : ゲームを開始メニュー]] | ||
| − | + | "ゲームを開始"メニューには以下の項目があります: | |
| + | # セーブデータの読み込み | ||
| + | # 新しくゲームを始める | ||
| + | # トレーニング (チュートリアル) | ||
| + | # シナリオ (与えられた目標を達成するショートゲーム) | ||
| + | # 戻る | ||
| − | + | ここでは"新しくゲームを始める"を選択してください。 | |
| − | |||
| − | |||
| − | |||
| − | |||
| − | |||
| − | |||
| − | |||
| − | |||
| − | |||
| − | |||
| − | |||
| − | + | {{Clear}} | |
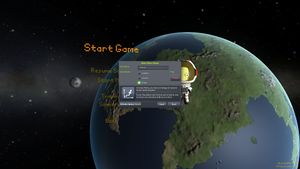
| + | [[File:Start New Game.jpg|thumbnail|図 3 : 新しくゲームを始める]] | ||
| − | [[ | + | 当ページでは[[Sandbox/ja|サンドボックス]]モードを基に説明を進めていきます。[[Science mode/ja|サイエンス]]モード、[[Career/ja|キャリア]]モードについては各ページを確認してください。プレイヤー名は'デフォルト'のままでも構いませんが、お好きなものを付けてください。さあゲームを始めましょう! |
| − | |||
| − | [[File: | + | {{Clear}} |
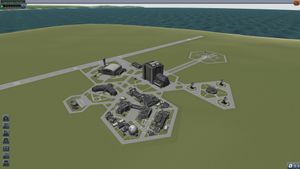
| + | [[File:KSC main.jpg|thumbnail|図 4 : 宇宙センター]] | ||
| + | ゲームが始まると、[[Kerbal_Space_Center/ja|宇宙センター]](KSC)が画面に表示され、以下の施設にアクセスできます。 | ||
| + | * [[Vehicle Assembly Building/ja|ロケット組立棟]](VAB) - 垂直打ち上げ式[[rocket|ロケット]]を組み立て、保存します。 | ||
| + | * [[Spaceplane Hangar/ja|スペースプレーンハンガー]](SPH) - 滑走して離着陸する[[plane|航空機]](スペースプレーン)を組み立て、保存します。 | ||
| + | * [[Tracking Station/ja|トラッキングステーション]] - アクティブな操作対象や[[Debris|デブリ]]を管理し、天体や小惑星を観測します。 | ||
| + | * [[Astronaut Complex/ja|宇宙飛行士センター]] - 乗組員を雇用し、状態を確認します。 | ||
| + | * [[Flagpole/ja|フラッグポール]] - フラッグを選択・変更します。 | ||
| + | * [[Launch Pad/ja|発射場]] - 垂直打ち上げ式ロケットを発射します。 | ||
| + | * [[Runway/ja|滑走路]] - 航空機(スペースプレーン)を離着陸させます。 | ||
| + | * [[Research and Development/ja|研究開発センター]] - 技術ツリーをアンロックします。([[Science mode/ja|サイエンス]]・[[Career/ja|キャリア]]専用) | ||
| + | * [[Mission Control/ja|ミッションコントロールセンター]] - [[contract/ja|契約]]を受注、管理します。([[Career/ja|キャリア]]専用) | ||
| + | * [[Administration Building/ja|運営本部]] - [[strategies/ja|事業戦略]]を実施します。([[Career/ja|キャリア]]専用) | ||
| + | 各施設には、施設のエリアまたは画面左側のアイコンをクリックして入ります。 | ||
| − | + | ジーン・カーマン フライト・ディレクターのガイドを読み、よければ"'''''ありがとう、わかったよ!'''''"と書かれたボタンを押してください。こうしたガイドは、宇宙センターの各施設に初めて入ったときにも表示されます。 | |
| − | [[File: | + | {{Clear}} |
| + | == ロケットをつくろう! == | ||
| + | [[File:KerbalXstock.0.21.1.png|thumbnail|図 5 : 機体一覧]] | ||
| + | [[File:VAB icon.png|left|link=]] それではこのゲームの基本、ロケット組み立てから説明していきます。[[KSC]]中央の高い正方形の建物[[Vehicle Assembly Building/ja|ロケット組立棟(VAB)]]をクリックしてください。(または画面左側のアイコンから選択します)この項では見本機体を使って説明していきます。 | ||
| + | <br> | ||
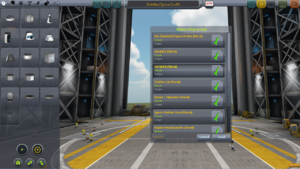
| + | [[File:Load icon.png|left|link=]] 画面右上にあるオレンジ色のフォルダが描かれた「機体をロード」ボタンを押すと、図5のようなウィンドウが開きます。"[[Kerbal X|カーバル-X]] (見本)"を探して[[Load|ロード]]してください。この[[rocket|ロケット]]はとてもシンプルな構造で、簡単に周回軌道に到達することができます。デモ版を使用している場合は、[http://dl.dropbox.com/u/27588455/Jam001.craft ここ]に地上に戻るために十分な燃料を持ち、周回軌道到達できるシンプルなロケットがあります。 | ||
| + | <br> | ||
| + | [[File:Assemblymodes_icons.png|left|link=]] | ||
| + | 機体が読み込まれると、ツールが表示されます(これは一つ目のパーツを配置した際に表示されます)。それらは、'''''配置'''''、'''''オフセット'''''、'''''回転'''''と'''''[[root part|ルートパーツ]]'''''です。それぞれ、組み立てツールの動作を変更します。ツールを変更するには、アイコンを左クリックするか、{{Key press|1|2|3|4|chain=}}のキーを押します。このガイドでは配置ツールのみを使用します。その他のツールは別のページで詳しく説明します。 | ||
| + | {{Clear}} | ||
| + | <br> | ||
| + | [[File:TheKerbalX.png|thumbnail|図 6 : カーバル X]] | ||
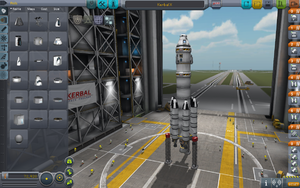
| + | この機体の構成を説明します。図6の画面右側に、0~8までの番号が書かれたオレンジ色の枠(フォルダ)があります。これらは[[stage|ステージ]]と言います。現実のロケットで指す「ステージ・段」とは異なり、ゲーム内のステージは同時に作動させるパーツのグループのことを指します。{{Key press|space}}キーを押すたびに数字の大きいステージから順に作動します。各ステージには一つ以上のパーツが属しており、それぞれのパーツを示すアイコンが表示されています。 | ||
| − | + | カーバル-Xのステージ設定と操作タイミングは以下のようになっています。 | |
| − | # | + | # 第8ステージ |
| − | #* | + | #* 7基(大型1基、補助6基)の液体燃料エンジンを始動。 |
| − | #* | + | #** 発射台補強装置と繋がっているのでまだ離陸はしません。 |
| − | # | + | # 第7ステージ |
| − | #* | + | #* 打ち上げ |
| − | #* | + | #* カーバル Xの下部を支える[[TT18-A Launch Stability Enhancer/ja|TT18-A 発射台補強装置]]と呼ばれる補助アームを解放します。 |
| − | # | + | #** ロケット発射。エンジン点火後、推力が上がったら速やかに作動させます。 |
| − | #* | + | # 第6ステージ |
| − | #** | + | #* 最初に燃焼終了した補助ロケット2基の切り離し。 |
| − | #** | + | #** 補助ロケット6基のうち2基の燃料が先に無くなります。2基が停止したら作動させます。 |
| − | # | + | #** 燃料切れのタイミングはエンジンの燃焼音や、噴射炎、残量表示で確認できます。 |
| − | #* | + | # 第5ステージ |
| − | #** | + | #* 次に燃焼終了した補助ロケット2基の切り離し。 |
| − | # | + | #** 最初の2基に遅れて次の2基が燃料切れになります。第6ステージと同じ要領で作動させます。 |
| − | #* | + | # 第4ステージ |
| − | #** | + | #* 最後に燃焼終了した補助ロケット2基の切り離し。 |
| − | # | + | #** 残り2基の燃料もやがて尽きます。同じ要領で作動させます。 |
| − | #* | + | # 第3ステージ |
| − | #** | + | #* 主力エンジンの切り離し。 |
| − | # | + | #** 主力エンジンの燃料が尽きたら作動させます。現実のロケットではここで分離する所を「第1ステージ」と言います。 |
| − | #* | + | # 第2ステージ |
| − | # | + | #* より小型の第2段エンジンの始動。 |
| − | #* | + | # 第1ステージ |
| − | #** | + | #* 第2段エンジン切り離し。 |
| − | # | + | #** 落下し始めたら作動させます。 |
| − | #* | + | # 第0ステージ |
| + | #* [[parachute|パラシュート]]展開。 | ||
| − | + | このように画面右のパーツアイコンは下から順に見ていくことになります。カーバル-Xロケットはこのままでも十分飛ぶことが出来ますが、初心者でも思いどおりに飛ばせるように少しだけパーツを足しましょう。 | |
| − | [[File:SASLarge | + | {{Clear}} |
| + | [[File:SASLarge.png|thumbnail|図 7 : リアクションホイールの取り外し]] | ||
| + | まずパーツを間に差し込むため、右の図を参考にロケットを分解しましょう。まずは[[Rockomax Brand Decoupler|ロコマックス デカプラー]](警戒色模様と赤三角のついたリング)のすぐ下の燃料タンクをクリックします。これで選択した燃料タンクに繋がったすべてのパーツをまとめて移動できるので、少しずらした所で再度クリックしてください。これがパーツ移動の基本となります。もし取り外したパーツが不要な場合はパーツを選択した後、画面左側のパーツウィンドウ内で再度クリックすることで削除することが出来ます。 | ||
| − | + | 準備が出来たのでパーツを追加していきましょう。1つ目は[[Reaction wheel|リアクションホイール]]です。このパーツはトルクを発生させて、[[SAS/ja|SAS]]によるロケットの回転抑制や手動方向転換が非常に楽になります。ロケット発射台に移動してから{{Key press|T}}キーを押すとSASが作動します。それではパーツを取り付けましょう。 | |
| − | |||
| − | [[File:SASaddedFirstStage | + | {{Clear}} |
| + | [[File:SASaddedFirstStage.png|thumbnail|図 8 : メインロケットステージに取り付けられたリアクションホイール]] | ||
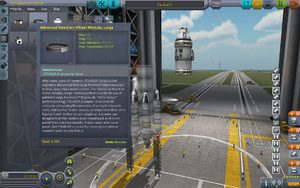
| − | + | 画面左上のパーツタブを"姿勢制御装置"に切り替え、[[Advanced Reaction Wheel Module, Large/ja|先進的大型リアクションホイール]]をクリックしてください。選択したパーツがマウスカーソルに付いてくるので右の図を参考にデカプラーの下まで移動してください。パーツが緑色に光ったらその位置でクリックすると取り付けが完了します。これがパーツ取り付けの基本です。繰り返すことによってパーツを付け足していくことが出来ます。 | |
| − | [[File:RCSFuelLarge | + | {{Clear}} |
| + | [[File:RCSFuelLarge.png|thumbnail|図 9 : RCS燃料タンクの選択]] | ||
| − | + | 次にもう一つの姿勢制御パーツ、[[RCS]]を追加しましょう。リアクションホイールが電力を消費するのに対して、RCSは燃料を消費して姿勢制御を行う装置です。RCSはロケット発射台に移動してから{{Key press|R}}キーを押すと作動します。それではリアクションホイールと同じ要領で、RCS燃料タンクを追加しましょう。パーツタブを"燃料タンク"に切り替え、[[FL-R1 RCS Fuel Tank|FL-R1 RCS燃料タンク]]を選択し取り付けます。 | |
| − | [[File:RCSAdded | + | {{Clear}} |
| + | [[File:RCSAdded.png|thumbnail|図 10 : RCSスラスターをデカプラーに取り付け]] | ||
| − | [[File:SymmetryIndicator.png|thumbnail| | + | RCSを機能させるためにはスラスター(噴射口)も必要です。パーツタブを"姿勢制御装置"に切り替え、[[RV-105 RCS Thruster Block|RV-105 RCSスラスターブロック]]を取り付けます。このスラスターの場合、船体側面の4箇所に設置する必要がありますが、対称的に同一パーツを取り付ける場合は画面左下の"対称配置モード"に切り替えます。<br> |
| + | {{Clear}} | ||
| + | [[File:SymmetryIndicator.png|thumbnail|図 11 : 対称配置モード]] | ||
| + | 右の図を参考に×4対称配置になるまでアイコンをクリック(または{{Key press|X}}キー)を押してください。 | ||
| − | + | 最初に外しておいたパーツをつなげ直して改修完了です。早速打ち上げましょう。画面右上にある緑色の"[[Launch|打ち上げ]]"ボタン[[File:Launch_icon.png]]を押してください。発射台に移動します。 | |
| − | == | + | {{Clear}} |
| − | + | ==ロケット発射== | |
| + | ====コントロール==== | ||
| + | 打ち上げる前に{{Key press|M}}キーを押して[[map view/ja|マップビュー]]を確認しておきましょう。画面には惑星[[Kerbin/ja|カービン]]が映し出されています。スクロールするとカービンの衛星が、さらにスクロールすると惑星系まで見えてきます。カービンの[[sphere of influence|作用圏]]を離れ、これらの天体に向かうには、ロケット設計や打ち上げの経験を積みながら方法を模索する時間が必要でしょう。 | ||
| − | + | [[File:Resource icon.png|left|link=]] 機体の各[[resource|リソース]]量を見たい場合は、右上のオイル缶が描かれたアイコンをクリックすると各リソース量が見れます。この機体の[[reaction engine/hu|ロケットエンジン]]は、'''''[[oxidizer|酸化剤]]'''''と'''''[[liquid fuel|液体燃料]]'''''を消費します。どちらかが枯渇すると、エンジンが停止します。 | |
| + | {{clear}} | ||
| − | + | それでは打ち上げ手順に入ります。最初に{{Key press|Z}}キーを押して[[throttle/ja|スロットル]]を全開にします。次に{{Key press|T}}キーを忘れずに押してSASを作動させてください。SAS作動を忘れると自動姿勢制御が行われず、ロケットがどんどんあらぬ方向に飛んでいってしまいます。SASの効果でロケットの操舵({{Key press|W|S|A|D|Q|E|chain=}})がすばやく行えるはずです。また[[thrust vectoring|推力偏向]](これもいずれ説明します)の効果で狙った角度を微調整なしに維持できるはずです。{{Key press|space}}でエンジン点火、今回の機体には支柱が付いているので、すばやくもう一度{{Key press|space}}で支柱を切り離して離陸します。 | |
| − | + | ロケットの操縦は「簡単に」とは行きません。{{Key press|W|S|A|D|chain=}}で機体の傾き操作、{{Key press|Q|E|chain=}}で回転操作ですが、機体が回転すると傾き操作の向きもあわせて変わるので注意が必要です。一番簡単な方法は画面下中央の[[navball/ja|姿勢指示器]]を見て傾き操作することです。 | |
| − | + | 燃料が切れたパーツが発生するたびに{{Key press|Space}}キーを押して次のステージを作動させてください。 | |
| − | + | もし、何か失敗したり、やり直したい時や、単に中断したい場合は、{{Key press|Esc}}を押します。または、画面右上の扉が描かれたアイコンをクリックします。一時停止してポーズ中ウィンドウが表示され、以下のことができます。 | |
| + | * '''''飛行の再開''''' - そのままゲームを再開します。 | ||
| + | * '''''宇宙センター''''' - 宇宙センター施設選択画面に戻ります。(大気圏内飛行中には戻れません) | ||
| + | * '''''飛行のやり直し''''' - 飛行を中止して、以下のいずれかの状態に戻ります。 | ||
| + | ** '''''打ち上げに戻る''''' - 打ち上げ直前に戻ります。 | ||
| + | ** '''''ロケット組立棟に戻る''''' - ロケット組立棟の[[editor|エディター]]に戻ります。 | ||
| + | ** '''''キャンセル''''' - 前のメニューに戻ります。 | ||
| + | * '''''トラッキングステーション''''' - トラッキングステーションに移動します。(大気圏内飛行中には移動できません) | ||
| + | * '''''ロードする''''' - セーブデータをロードするウィンドウを開きます。 | ||
| + | * '''''セッティング''''' - [[settings|設定]]メニューを開きます。 | ||
| + | * '''''セーブする''''' - セーブするウィンドウを開きます。 | ||
| + | * '''''メインメニューに戻る''''' - ゲーム起動直後の画面に戻ります。 | ||
| + | <br> | ||
| + | ==== 打ち上げ実行 ==== | ||
| + | '''おさらいすると、発射台に移動したら{{Key press|T}}を押す、{{Key press|Z}}でスロットル全開、{{Key press|space}}でエンジン点火、もう一度{{Key press|space}}で離陸です。''' | ||
| − | + | 打ち上げ直後は垂直に上昇します。強い[[drag|空気抵抗]]を受ける低高度大気層を燃料効率の良い[[Atmosphere#Terminal velocity|終端速度]]以下に抑えて通過する必要があります。速度が50~60 m/sに達したら、垂直から東(90°)へ10度傾け(これをピッチオーバーといいます)、[[gravity turn|重力ターン]]を開始します。徐々に傾く[[prograde|順行]]マーカー{{mark|prog-l}}からあまり機首(姿勢表示線の中心点)を遠ざけずに、5 km(5,000 m)で30°まで傾斜させますが、10 km(10,000 m)に到達するまでに45°以上には傾けないでください。高度20 km(20,000 m)で水平から25~30°、高度30 km(30,000 m)で15°を目安に、緩やかに傾け続けてください。Mキーを押してマップビューに切り替え、[[apoapsis|遠点高度]]が70 km(70,000 m)以上になるまで、速度が120 m/sを過ぎたらスロットルを50%ほどに絞って加速し続けてください。遠点高度が70 km以上になったらXを押してスロットルを閉じます。Apに近づいたら全力噴射して、速度が2,290 m/s前後に到達すると円軌道化し、周回軌道に乗ることが出来ます。 | |
| − | + | 注意:あまりにも浅い角度の軌道は空気抵抗のために燃料を無駄に消費します。 | |
| − | + | 機体は常に順行マーカーの方向へ進みます。大気圏内では機首を順行マーカーから遠ざけるほど強い空気抵抗を受けます。重力ターンは機首を順行方向に向けながら、少ない空気抵抗で大気層を突破できる効率的な方法です。 | |
| − | + | <gallery class="center" heights=100px widths=150px> | |
| + | File:KerbalXLaunch00.jpg|発射台上 | ||
| + | File:KerbalXLaunch01.jpg|発射準備 | ||
| + | File:KerbalXLaunch02.jpg|発射 | ||
| + | File:KerbalXLaunch03.jpg|最初の切り離し | ||
| + | File:KerbalXLaunch04.jpg|ピッチオーバー | ||
| + | File:KerbalXLaunch05.jpg|高度10 km | ||
| + | File:KerbalXLaunch06.jpg|高度20 km | ||
| + | File:KerbalXLaunch07.jpg|高度30 km | ||
| + | File:KerbalXLaunch08.jpg|軌道到達 | ||
| + | File:KerbalXLaunch09.jpg|燃焼準備 | ||
| + | File:KerbalXLaunch10.jpg|円軌道化 | ||
| + | </gallery> | ||
| − | + | ==周回軌道投入と帰還== | |
| − | ==== | + | ====周回軌道投入==== |
| − | + | マップビューが周回軌道投入に役立ちます。軌道の詳細が表示され、燃焼噴射の時間を判断できます。[[Physics warp|物理時間加速]]は大きくコースを外れたり、爆散する危険性があるため使用しないことをお勧めします。<br> | |
| + | Apが70 kmを越えるまで加速した後、Apに到達する前から円軌道化の噴射を始めますが、最も効率的な方法は、Apから2~5秒程度の位置を維持しながら噴射を行なうことです。機首を水平から上方向に傾けるとApは遠ざかり、水平にすると近づきます。燃焼再開のタイミングは速度と加速力に依存します。浅い軌道は余分な加速を要しません。軌道はより広がっているほど良い軌道です。十分に広がると、Pe(近点高度)が地面から現れ、宇宙へ到達します。Ap、Peともに70 kmを越えると操作を終えて休息することができます。 | ||
| − | + | {{Key press|F2}}を押すとすべてのUIを非表示にできます。 | |
| − | + | ====軌道周回と再突入==== | |
| + | [[File:Kerbal X fire ret.png|thumb|カービンへ帰還 (この画像は古く耐熱シールドをつけた方がよいです)]] | ||
| + | カービン地上に帰還するには、[[retrograde|逆行]]方向に噴射します。逆行マーカー{{mark|retg-l}}に機首を合わせてください。空気抵抗が軌道を変えるため、着地点を狙う必要はありません。Pe(近点高度)を35~45 kmにすることで十分です。この高度は機体の焼尽を回避する効果的な[[aerobraking|エアロブレーキ]]を保証します。70 kmの軌道は35~40 km付近が着地点になります。従ってKSCなどに着地したい場合は、軌道の反対側で逆行噴射を開始する必要があります。まだ噴射できる燃料が残っていれば、より望ましい着地点に修正できます。最後のステージを切り離してパラシュートを展開します。エンジンは重く降下速度を早くし過ぎるため、パラシュートが開けなくなる恐れがあります。 | ||
| − | === | + | ===再突入時の熱=== |
| + | KSP 1.0以降は再突入時の熱を考慮する必要があります。機体(ここではポッドとパラシュートのみ)が大気圏に再突入するときには、非常に高速に空気の分子を圧縮するため、熱が発生します。さらに高度低下に伴う大気圧の増加が熱の発生を促します。あなたが小さな緑のクルーを焼こうとしていない限り、機体に十分な耐熱性能があることを確認する必要があります。耐熱シールドは、"熱制御装置"タブから機体の大きさにあったものを選択してください。 | ||
| − | + | |[[File:Parachute_icon-ud unsafe.png|36px|link=]][[File:Parachute_icon-safe.png|36px|link=]] | |
| − | + | | パラシュートは22 kmの高度で半展開でき、デフォルトで1,000 mで全展開します。最上段部分を十分に減速できれば展開でき、安全に地表に降りることができます。パラシュートを半展開させると効果的に減速できます。機体が速すぎたり重すぎると、パラシュートが破損して[[kerbal|カーバル]]は地面に激突してしまいます。従ってパラシュートを起動する前に300 m/s以下に減速させてください。これはアイコンの色の変化で見分けられます(左上の図参照)。パラシュートがすでに開き、ポッドが降下している場合は地表に到達するのを待ってください。地表に到達したら、画面上部中央の高度計にカーソルを合わせ、緑色の'''''機体を回収する'''''を押してポッドを[[Recovery|回収]]してください。おめでとうございます。あなたは最初のミッションを成功裏に終えることができました! | |
| − | |||
| − | |||
| − | |||
| − | |||
| − | [[File: | ||
| − | |||
<br><br> | <br><br> | ||
| − | : | + | : ''見本機体カーバル-X(または自作ロケット)を使って十分にミッション(発射と軌道投入)を行なえるようになったら、[[tutorials/ja|チュートリアル]]や、[[Tutorial:Learning basics of rocket building|Tutorial:Learning basics of rocket building]]に移動して、ロケット組み立てや飛行の仕組みを知ることが出来ます。'' |
== Notes == | == Notes == | ||
<references /> | <references /> | ||
| − | + | [[Category: Tutorials/ja]] | |
| − | |||
Latest revision as of 09:06, 6 September 2018
| This page or section is in need of being brought up to date. Please help Kerbal Space Program Wiki by fixing inaccurate or outdated information. |
このガイドは、Kerbal Space Programの最初の数時間をプレイする助けになることを目的にした解説です。すべてを網羅してはいませんが、ロケットの組み立てと打ち上げの基礎を理解できるはずです。より詳しい内容は、他の解説ページを参照してください。
- その他の解説は、 Tutorial: Walkthrough for Ye Compleat Beginnerを参照してください。
- ゲームの概要・仕組みについてはTutorial:Game Manualを参照してください。
Contents
購入先
開発元のSquadはKSPを簡単に購入できる販路をいくつか用意しています。
- 公式ページ http://kerbalspaceprogram.com へアクセス。
- "store"をクリックしたら、商品一覧の中にある“Kerbal Space Program”がソフト本体になります。“Kerbalizer”というのも隣にありますが、今は必要ありません。
また、ダウンロード販売主体のプラットホーム、Steamを利用している方は、そちらからでも購入できます。その他いくつかの小規模販売サービスやThe Humble Storeでも取り扱いがあります。
ダウンロード
現在は、Kerbal Space Programの最新バージョンが一度にダウンロードされます。 またパッチツールがあり、Steam版は自動的にアップデートされます。
- ストアページに行く。
- ユーザー名とパスワードを入力してLoginする。
- Profileボタンをクリック。
- ページ下までスクロールし、purchase invoiceの隣にあるダウンロードリンクをクリック。
- OSプラットフォームに合わせて専用バージョンをダウンロードしてください。
- Macユーザー:
- Install Mono from the bundled .dmg file, if needed.
- Unzip the file into an empty folder.
- Ensure the execute permission is set on the Patcher.command file.
- Windowsユーザー:
- 必要に応じて.NET Framework 4.0以降をインストールします。(Windows最新バージョンには標準で入っています。)
- システムフォルダ以外の新規作成したフォルダ内に解凍して下さい。解凍には7-zipなどを使ってください。
- Linuxユーザー:
- Macユーザー:
ゲームの起動
解凍したフォルダの中にあるKSP.exe(Mac OSXならKSP.app、LinuxならKSP.x86_64かKSP.x86)を開くことでゲームを起動することができます。64bit版WindowsではKSP_64.exeを開くこともできます(Modを多く入れている場合は64bit版推奨)。KSP.exeのショートカットをデスクトップに作成することで簡単にゲームを起動できるようになります。またフォルダをUSBメモリーに入れることで他のPCでプレイすることも可能です。
タイトル画面には以下の項目があります:
- ゲームを開始
- セッティング (ゲーム設定、操作設定、グラフィック設定など)
- KSP コミュニティー (webブラウザでコミュニティサイトを開く)
- アドオン & Mod
- クレジット (スタッフロール)
- 終了
"ゲームを開始"を選択すると、"ゲームを開始"メニュー画面に移ります。
"ゲームを開始"メニューには以下の項目があります:
- セーブデータの読み込み
- 新しくゲームを始める
- トレーニング (チュートリアル)
- シナリオ (与えられた目標を達成するショートゲーム)
- 戻る
ここでは"新しくゲームを始める"を選択してください。
当ページではサンドボックスモードを基に説明を進めていきます。サイエンスモード、キャリアモードについては各ページを確認してください。プレイヤー名は'デフォルト'のままでも構いませんが、お好きなものを付けてください。さあゲームを始めましょう!
ゲームが始まると、宇宙センター(KSC)が画面に表示され、以下の施設にアクセスできます。
- ロケット組立棟(VAB) - 垂直打ち上げ式ロケットを組み立て、保存します。
- スペースプレーンハンガー(SPH) - 滑走して離着陸する航空機(スペースプレーン)を組み立て、保存します。
- トラッキングステーション - アクティブな操作対象やデブリを管理し、天体や小惑星を観測します。
- 宇宙飛行士センター - 乗組員を雇用し、状態を確認します。
- フラッグポール - フラッグを選択・変更します。
- 発射場 - 垂直打ち上げ式ロケットを発射します。
- 滑走路 - 航空機(スペースプレーン)を離着陸させます。
- 研究開発センター - 技術ツリーをアンロックします。(サイエンス・キャリア専用)
- ミッションコントロールセンター - 契約を受注、管理します。(キャリア専用)
- 運営本部 - 事業戦略を実施します。(キャリア専用)
各施設には、施設のエリアまたは画面左側のアイコンをクリックして入ります。
ジーン・カーマン フライト・ディレクターのガイドを読み、よければ"ありがとう、わかったよ!"と書かれたボタンを押してください。こうしたガイドは、宇宙センターの各施設に初めて入ったときにも表示されます。
ロケットをつくろう!
機体が読み込まれると、ツールが表示されます(これは一つ目のパーツを配置した際に表示されます)。それらは、配置、オフセット、回転とルートパーツです。それぞれ、組み立てツールの動作を変更します。ツールを変更するには、アイコンを左クリックするか、1234のキーを押します。このガイドでは配置ツールのみを使用します。その他のツールは別のページで詳しく説明します。
この機体の構成を説明します。図6の画面右側に、0~8までの番号が書かれたオレンジ色の枠(フォルダ)があります。これらはステージと言います。現実のロケットで指す「ステージ・段」とは異なり、ゲーム内のステージは同時に作動させるパーツのグループのことを指します。spaceキーを押すたびに数字の大きいステージから順に作動します。各ステージには一つ以上のパーツが属しており、それぞれのパーツを示すアイコンが表示されています。
カーバル-Xのステージ設定と操作タイミングは以下のようになっています。
- 第8ステージ
- 7基(大型1基、補助6基)の液体燃料エンジンを始動。
- 発射台補強装置と繋がっているのでまだ離陸はしません。
- 7基(大型1基、補助6基)の液体燃料エンジンを始動。
- 第7ステージ
- 打ち上げ
- カーバル Xの下部を支えるTT18-A 発射台補強装置と呼ばれる補助アームを解放します。
- ロケット発射。エンジン点火後、推力が上がったら速やかに作動させます。
- 第6ステージ
- 最初に燃焼終了した補助ロケット2基の切り離し。
- 補助ロケット6基のうち2基の燃料が先に無くなります。2基が停止したら作動させます。
- 燃料切れのタイミングはエンジンの燃焼音や、噴射炎、残量表示で確認できます。
- 最初に燃焼終了した補助ロケット2基の切り離し。
- 第5ステージ
- 次に燃焼終了した補助ロケット2基の切り離し。
- 最初の2基に遅れて次の2基が燃料切れになります。第6ステージと同じ要領で作動させます。
- 次に燃焼終了した補助ロケット2基の切り離し。
- 第4ステージ
- 最後に燃焼終了した補助ロケット2基の切り離し。
- 残り2基の燃料もやがて尽きます。同じ要領で作動させます。
- 最後に燃焼終了した補助ロケット2基の切り離し。
- 第3ステージ
- 主力エンジンの切り離し。
- 主力エンジンの燃料が尽きたら作動させます。現実のロケットではここで分離する所を「第1ステージ」と言います。
- 主力エンジンの切り離し。
- 第2ステージ
- より小型の第2段エンジンの始動。
- 第1ステージ
- 第2段エンジン切り離し。
- 落下し始めたら作動させます。
- 第2段エンジン切り離し。
- 第0ステージ
- パラシュート展開。
このように画面右のパーツアイコンは下から順に見ていくことになります。カーバル-Xロケットはこのままでも十分飛ぶことが出来ますが、初心者でも思いどおりに飛ばせるように少しだけパーツを足しましょう。
まずパーツを間に差し込むため、右の図を参考にロケットを分解しましょう。まずはロコマックス デカプラー(警戒色模様と赤三角のついたリング)のすぐ下の燃料タンクをクリックします。これで選択した燃料タンクに繋がったすべてのパーツをまとめて移動できるので、少しずらした所で再度クリックしてください。これがパーツ移動の基本となります。もし取り外したパーツが不要な場合はパーツを選択した後、画面左側のパーツウィンドウ内で再度クリックすることで削除することが出来ます。
準備が出来たのでパーツを追加していきましょう。1つ目はリアクションホイールです。このパーツはトルクを発生させて、SASによるロケットの回転抑制や手動方向転換が非常に楽になります。ロケット発射台に移動してからTキーを押すとSASが作動します。それではパーツを取り付けましょう。
画面左上のパーツタブを"姿勢制御装置"に切り替え、先進的大型リアクションホイールをクリックしてください。選択したパーツがマウスカーソルに付いてくるので右の図を参考にデカプラーの下まで移動してください。パーツが緑色に光ったらその位置でクリックすると取り付けが完了します。これがパーツ取り付けの基本です。繰り返すことによってパーツを付け足していくことが出来ます。
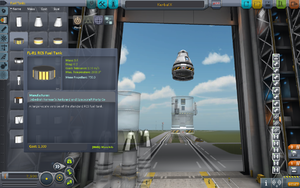
次にもう一つの姿勢制御パーツ、RCSを追加しましょう。リアクションホイールが電力を消費するのに対して、RCSは燃料を消費して姿勢制御を行う装置です。RCSはロケット発射台に移動してからRキーを押すと作動します。それではリアクションホイールと同じ要領で、RCS燃料タンクを追加しましょう。パーツタブを"燃料タンク"に切り替え、FL-R1 RCS燃料タンクを選択し取り付けます。
RCSを機能させるためにはスラスター(噴射口)も必要です。パーツタブを"姿勢制御装置"に切り替え、RV-105 RCSスラスターブロックを取り付けます。このスラスターの場合、船体側面の4箇所に設置する必要がありますが、対称的に同一パーツを取り付ける場合は画面左下の"対称配置モード"に切り替えます。
右の図を参考に×4対称配置になるまでアイコンをクリック(またはXキー)を押してください。
最初に外しておいたパーツをつなげ直して改修完了です。早速打ち上げましょう。画面右上にある緑色の"打ち上げ"ボタン![]() を押してください。発射台に移動します。
を押してください。発射台に移動します。
ロケット発射
コントロール
打ち上げる前にMキーを押してマップビューを確認しておきましょう。画面には惑星カービンが映し出されています。スクロールするとカービンの衛星が、さらにスクロールすると惑星系まで見えてきます。カービンの作用圏を離れ、これらの天体に向かうには、ロケット設計や打ち上げの経験を積みながら方法を模索する時間が必要でしょう。
それでは打ち上げ手順に入ります。最初にZキーを押してスロットルを全開にします。次にTキーを忘れずに押してSASを作動させてください。SAS作動を忘れると自動姿勢制御が行われず、ロケットがどんどんあらぬ方向に飛んでいってしまいます。SASの効果でロケットの操舵(WSADQE)がすばやく行えるはずです。また推力偏向(これもいずれ説明します)の効果で狙った角度を微調整なしに維持できるはずです。spaceでエンジン点火、今回の機体には支柱が付いているので、すばやくもう一度spaceで支柱を切り離して離陸します。
ロケットの操縦は「簡単に」とは行きません。WSADで機体の傾き操作、QEで回転操作ですが、機体が回転すると傾き操作の向きもあわせて変わるので注意が必要です。一番簡単な方法は画面下中央の姿勢指示器を見て傾き操作することです。
燃料が切れたパーツが発生するたびにSpaceキーを押して次のステージを作動させてください。
もし、何か失敗したり、やり直したい時や、単に中断したい場合は、⎋ Escを押します。または、画面右上の扉が描かれたアイコンをクリックします。一時停止してポーズ中ウィンドウが表示され、以下のことができます。
- 飛行の再開 - そのままゲームを再開します。
- 宇宙センター - 宇宙センター施設選択画面に戻ります。(大気圏内飛行中には戻れません)
- 飛行のやり直し - 飛行を中止して、以下のいずれかの状態に戻ります。
- 打ち上げに戻る - 打ち上げ直前に戻ります。
- ロケット組立棟に戻る - ロケット組立棟のエディターに戻ります。
- キャンセル - 前のメニューに戻ります。
- トラッキングステーション - トラッキングステーションに移動します。(大気圏内飛行中には移動できません)
- ロードする - セーブデータをロードするウィンドウを開きます。
- セッティング - 設定メニューを開きます。
- セーブする - セーブするウィンドウを開きます。
- メインメニューに戻る - ゲーム起動直後の画面に戻ります。
打ち上げ実行
おさらいすると、発射台に移動したらTを押す、Zでスロットル全開、spaceでエンジン点火、もう一度spaceで離陸です。
打ち上げ直後は垂直に上昇します。強い空気抵抗を受ける低高度大気層を燃料効率の良い終端速度以下に抑えて通過する必要があります。速度が50~60 m/sに達したら、垂直から東(90°)へ10度傾け(これをピッチオーバーといいます)、重力ターンを開始します。徐々に傾く順行マーカー![]() からあまり機首(姿勢表示線の中心点)を遠ざけずに、5 km(5,000 m)で30°まで傾斜させますが、10 km(10,000 m)に到達するまでに45°以上には傾けないでください。高度20 km(20,000 m)で水平から25~30°、高度30 km(30,000 m)で15°を目安に、緩やかに傾け続けてください。Mキーを押してマップビューに切り替え、遠点高度が70 km(70,000 m)以上になるまで、速度が120 m/sを過ぎたらスロットルを50%ほどに絞って加速し続けてください。遠点高度が70 km以上になったらXを押してスロットルを閉じます。Apに近づいたら全力噴射して、速度が2,290 m/s前後に到達すると円軌道化し、周回軌道に乗ることが出来ます。
からあまり機首(姿勢表示線の中心点)を遠ざけずに、5 km(5,000 m)で30°まで傾斜させますが、10 km(10,000 m)に到達するまでに45°以上には傾けないでください。高度20 km(20,000 m)で水平から25~30°、高度30 km(30,000 m)で15°を目安に、緩やかに傾け続けてください。Mキーを押してマップビューに切り替え、遠点高度が70 km(70,000 m)以上になるまで、速度が120 m/sを過ぎたらスロットルを50%ほどに絞って加速し続けてください。遠点高度が70 km以上になったらXを押してスロットルを閉じます。Apに近づいたら全力噴射して、速度が2,290 m/s前後に到達すると円軌道化し、周回軌道に乗ることが出来ます。
注意:あまりにも浅い角度の軌道は空気抵抗のために燃料を無駄に消費します。
機体は常に順行マーカーの方向へ進みます。大気圏内では機首を順行マーカーから遠ざけるほど強い空気抵抗を受けます。重力ターンは機首を順行方向に向けながら、少ない空気抵抗で大気層を突破できる効率的な方法です。
周回軌道投入と帰還
周回軌道投入
マップビューが周回軌道投入に役立ちます。軌道の詳細が表示され、燃焼噴射の時間を判断できます。物理時間加速は大きくコースを外れたり、爆散する危険性があるため使用しないことをお勧めします。
Apが70 kmを越えるまで加速した後、Apに到達する前から円軌道化の噴射を始めますが、最も効率的な方法は、Apから2~5秒程度の位置を維持しながら噴射を行なうことです。機首を水平から上方向に傾けるとApは遠ざかり、水平にすると近づきます。燃焼再開のタイミングは速度と加速力に依存します。浅い軌道は余分な加速を要しません。軌道はより広がっているほど良い軌道です。十分に広がると、Pe(近点高度)が地面から現れ、宇宙へ到達します。Ap、Peともに70 kmを越えると操作を終えて休息することができます。
F2を押すとすべてのUIを非表示にできます。
軌道周回と再突入
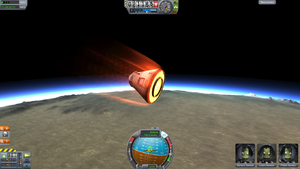
カービン地上に帰還するには、逆行方向に噴射します。逆行マーカー![]() に機首を合わせてください。空気抵抗が軌道を変えるため、着地点を狙う必要はありません。Pe(近点高度)を35~45 kmにすることで十分です。この高度は機体の焼尽を回避する効果的なエアロブレーキを保証します。70 kmの軌道は35~40 km付近が着地点になります。従ってKSCなどに着地したい場合は、軌道の反対側で逆行噴射を開始する必要があります。まだ噴射できる燃料が残っていれば、より望ましい着地点に修正できます。最後のステージを切り離してパラシュートを展開します。エンジンは重く降下速度を早くし過ぎるため、パラシュートが開けなくなる恐れがあります。
に機首を合わせてください。空気抵抗が軌道を変えるため、着地点を狙う必要はありません。Pe(近点高度)を35~45 kmにすることで十分です。この高度は機体の焼尽を回避する効果的なエアロブレーキを保証します。70 kmの軌道は35~40 km付近が着地点になります。従ってKSCなどに着地したい場合は、軌道の反対側で逆行噴射を開始する必要があります。まだ噴射できる燃料が残っていれば、より望ましい着地点に修正できます。最後のステージを切り離してパラシュートを展開します。エンジンは重く降下速度を早くし過ぎるため、パラシュートが開けなくなる恐れがあります。
再突入時の熱
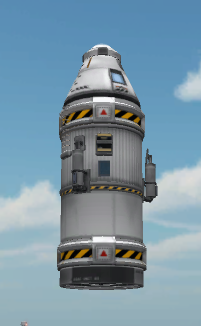
KSP 1.0以降は再突入時の熱を考慮する必要があります。機体(ここではポッドとパラシュートのみ)が大気圏に再突入するときには、非常に高速に空気の分子を圧縮するため、熱が発生します。さらに高度低下に伴う大気圧の増加が熱の発生を促します。あなたが小さな緑のクルーを焼こうとしていない限り、機体に十分な耐熱性能があることを確認する必要があります。耐熱シールドは、"熱制御装置"タブから機体の大きさにあったものを選択してください。
|![]()
![]() | パラシュートは22 kmの高度で半展開でき、デフォルトで1,000 mで全展開します。最上段部分を十分に減速できれば展開でき、安全に地表に降りることができます。パラシュートを半展開させると効果的に減速できます。機体が速すぎたり重すぎると、パラシュートが破損してカーバルは地面に激突してしまいます。従ってパラシュートを起動する前に300 m/s以下に減速させてください。これはアイコンの色の変化で見分けられます(左上の図参照)。パラシュートがすでに開き、ポッドが降下している場合は地表に到達するのを待ってください。地表に到達したら、画面上部中央の高度計にカーソルを合わせ、緑色の機体を回収するを押してポッドを回収してください。おめでとうございます。あなたは最初のミッションを成功裏に終えることができました!
| パラシュートは22 kmの高度で半展開でき、デフォルトで1,000 mで全展開します。最上段部分を十分に減速できれば展開でき、安全に地表に降りることができます。パラシュートを半展開させると効果的に減速できます。機体が速すぎたり重すぎると、パラシュートが破損してカーバルは地面に激突してしまいます。従ってパラシュートを起動する前に300 m/s以下に減速させてください。これはアイコンの色の変化で見分けられます(左上の図参照)。パラシュートがすでに開き、ポッドが降下している場合は地表に到達するのを待ってください。地表に到達したら、画面上部中央の高度計にカーソルを合わせ、緑色の機体を回収するを押してポッドを回収してください。おめでとうございます。あなたは最初のミッションを成功裏に終えることができました!
- 見本機体カーバル-X(または自作ロケット)を使って十分にミッション(発射と軌道投入)を行なえるようになったら、チュートリアルや、Tutorial:Learning basics of rocket buildingに移動して、ロケット組み立てや飛行の仕組みを知ることが出来ます。
Notes
- ↑ http:////forum.kerbalspaceprogram.com/threads/24529-The-Linux-compatibility-thread!?highlight=linux+compatibility/ The-Linux-compatibility-thread
